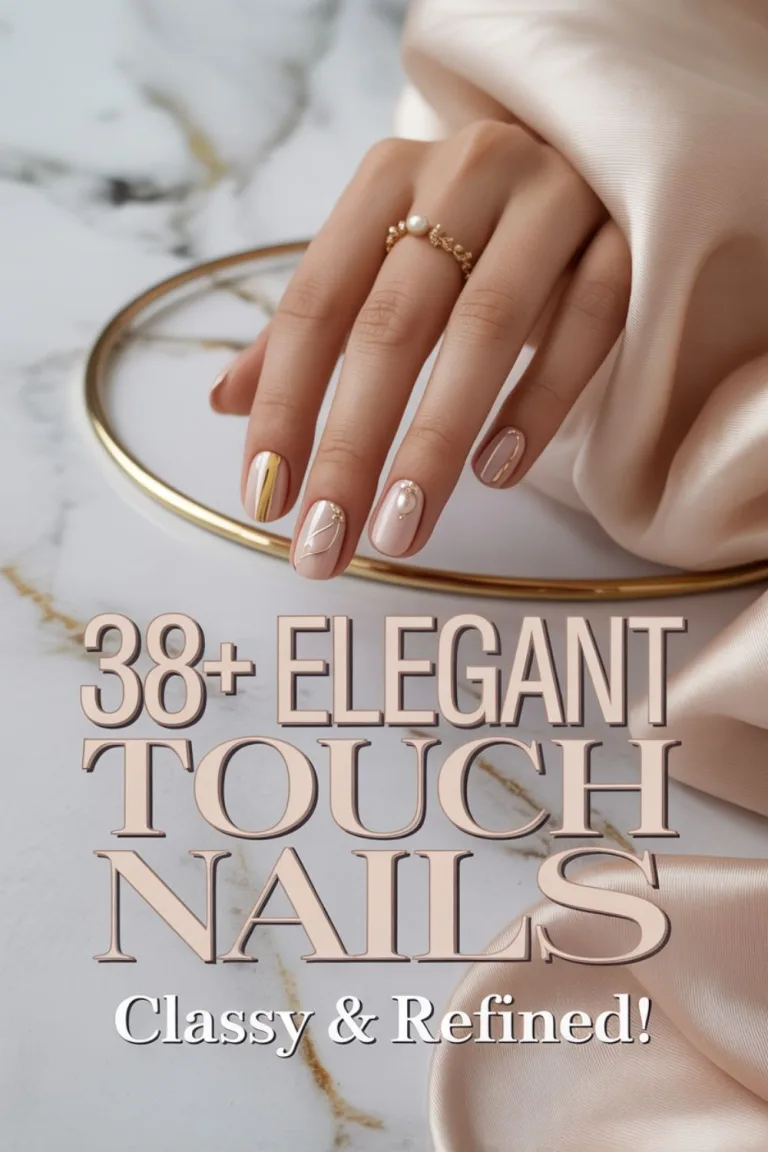
Elegant touch nails deliver that classy, refined finish that feels impossibly luxurious and wearable at once. The sophisticated approach strips away noise and focuses on intentional, beautiful design elements. Your hands become a quiet statement of impeccable taste and timeless grace.
The beauty of elegant touch nails is their remarkable versatility across every aspect of your life. Professional environments, formal occasions, casual moments—they work everywhere with effortless elegance. The refined touches add personality without compromising that coveted polished aesthetic you’re after.
We’ve curated 38 gorgeous elegant touch nail designs that prove refinement and beauty go hand in hand. From subtle geometric details to sophisticated colour combinations, these looks inspire. Find your perfect match and elevate your entire aesthetic with genuine grace.
Table of Contents
- Modern French Manicure Twist
- Nude Square Nails With Thin French Tips
- Minimalist White Tips On Natural Nails
- Classic Beige With Silver Foil Placement
- Matte Warm White With Refined Gold Tips
- Soft Pink Ombre For Timeless Elegance
- Blush Pink With Hand-Painted Floral Details
- Soft Nude With Barely-There Shimmer Finish
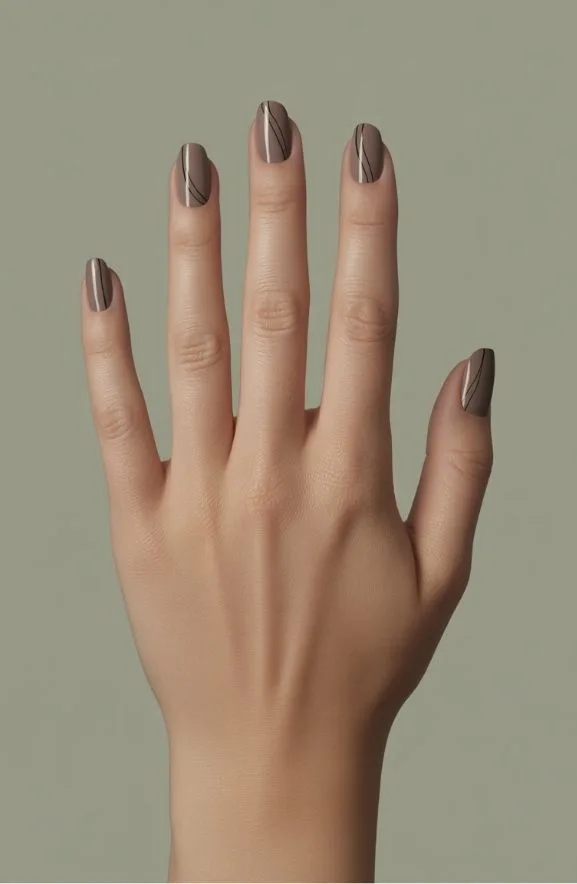
- Cream Base With Minimalist Black Lines
- Matte Nude With Subtle Glitter Gradient
- Soft Nude Square Nails With Thin Borders
- Soft Ivory With Embossed Texture Details
- Pale Peach With Textured Matte-and-Gloss Layering
- Nude Base With Gold Geometric Accents
- Tan Base With Refined Copper Swirls
- Warm Beige And Soft Gray Striping
- Neutral Gradient From Beige To Taupe
- Cream And Caramel Striped Elegance
- Taupe With Intricate Line Work Details
- Matte Mauve With Rose Gold Accent Lines
- Champagne Metallic Finish For Evening Glamour
- Champagne Gradient From Nude To Gold
- Glossy Nude With Thin Gold Stripes
- Champagne With Thin Metallic Line Work
- Champagne Matte With Polished Gold Accents
- Glossy Nude With Hand-Painted Gold Leaf
- Matte Blush With Rose Gold Accents
- Classic Beige With Refined Gold Swirls
- Pearl Inlay Designs For Sophisticated Shine
- Sheer Pink With Embedded Sparkle Details
- Soft Gray And White Color-Block Style
- Pale Gray And White Geometric Pattern
- Blush And Cream Negative Space Design
- Nude And White Marble Effect
- Ivory And Pale Blue Ombre Blend
- Sage Green With Refined Matte Finish
- Dusty Rose With Subtle Botanical Lines
- Pale Pink Base With Silver Constellation Art
- Frequently Asked Questions
- How Long Do Elegant Touch Nails Typically Last Before Needing a Refill?
- What Is the Best Nail Shape for Beginners Interested in Elegant Nail Designs?
- Can Elegant Touch Nails Be Applied at Home or Require Professional Application?
- How Much Does an Elegant Touch Manicure Cost at a Typical Salon?
- What Products Are Recommended for Maintaining the Shine and Longevity of Nails?
- Conclusion
Modern French Manicure Twist
While the classic French manicure has dominated nail aesthetics for decades, today’s version pushes boundaries with unexpected colors and dimensional finishes. You’re no longer limited to white tips and nude bases. Instead, try soft blush with champagne accents or even nude with metallic gold edging for sophisticated depth.
The key is layering. Apply a base gel polish, then add shimmer or chrome details to your tips using precision brushes. According to nail artist Maria Chen, “Modern French designs celebrate personal style while maintaining elegance through strategic accent placement.”
You can experiment with ombre shifts instead of stark lines. Soft gradients between your natural nail and enhanced tips create visual interest without sacrificing refinement.
Dimensional finishes—matte, glossy, and textured combinations—elevate your look instantly. This approach lets you express creativity while keeping that polished, professional appearance you’re after.
Also read: Brown Nails | Simple Almond Design Ideas
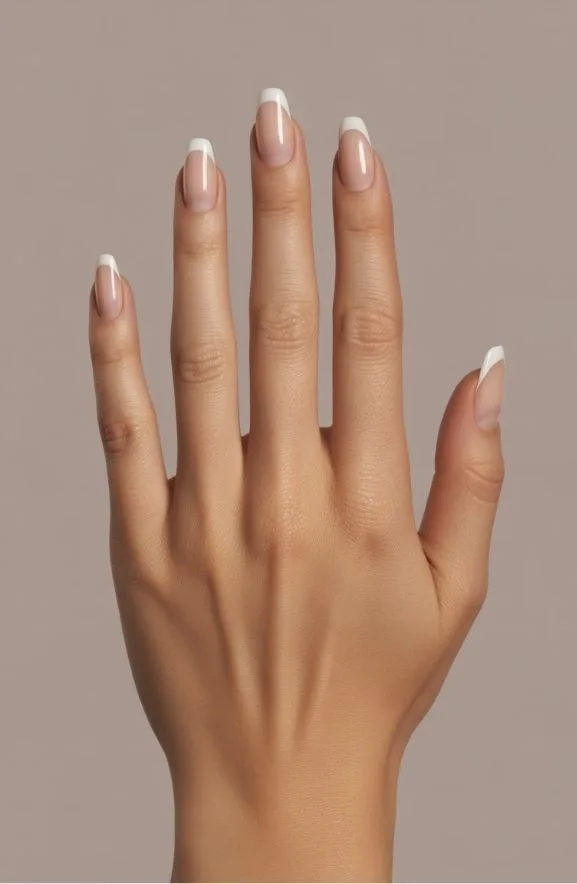
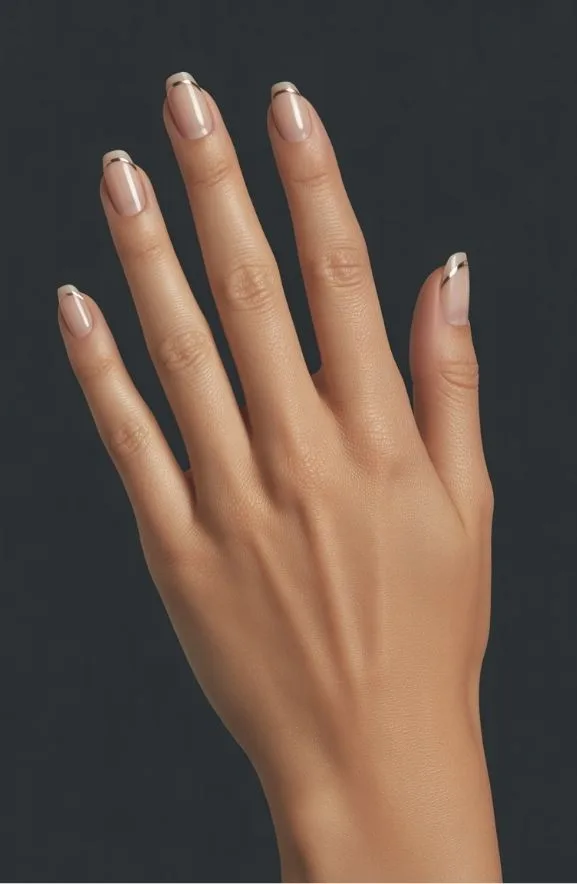
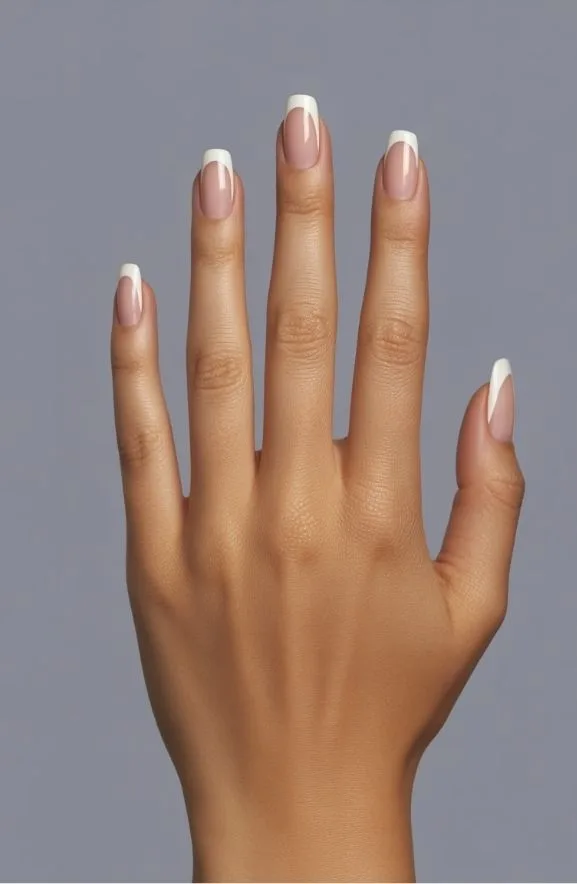
Nude Square Nails With Thin French Tips
If you’re craving something sleeker than the layered finishes we just covered, nude square nails with thin French tips deliver understated sophistication. This style works beautifully because it elongates your fingers while keeping things minimal. The nude base creates a clean canvas. Thin white tips—roughly 1-2mm—provide just enough contrast without overwhelming your hands.
You’ll want a quality nude polish that matches your skin tone precisely. Essie’s “Ballet Slippers” or OPI’s “Bubble Bath” are industry favorites. Apply two coats for opacity, then use a fine liner brush for those crisp white tips.
The beauty here lies in precision. Sharp, clean edges matter tremendously. Consider a gel formula for longevity—it’ll last two to three weeks without chipping. This manicure works everywhere: boardrooms, weddings, daily wear. It’s timeless elegance you can actually live in.
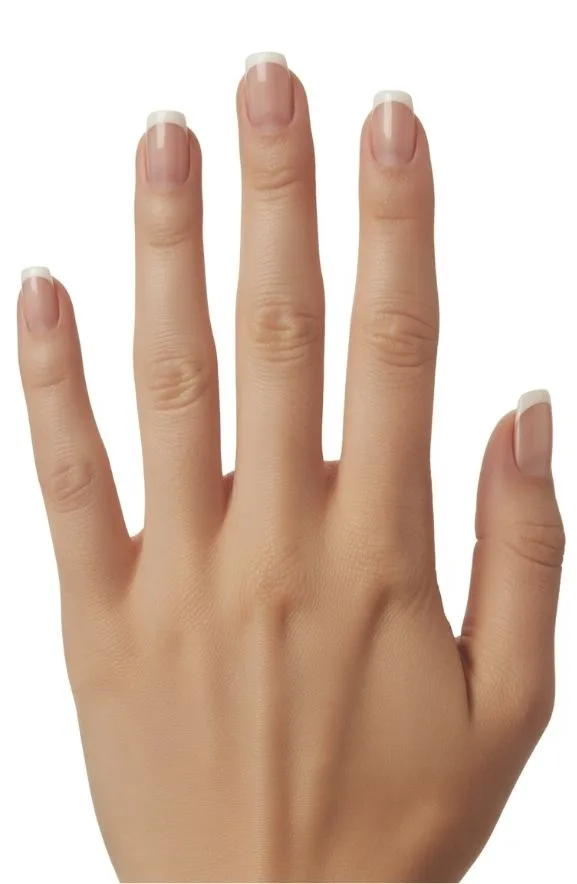
Minimalist White Tips On Natural Nails
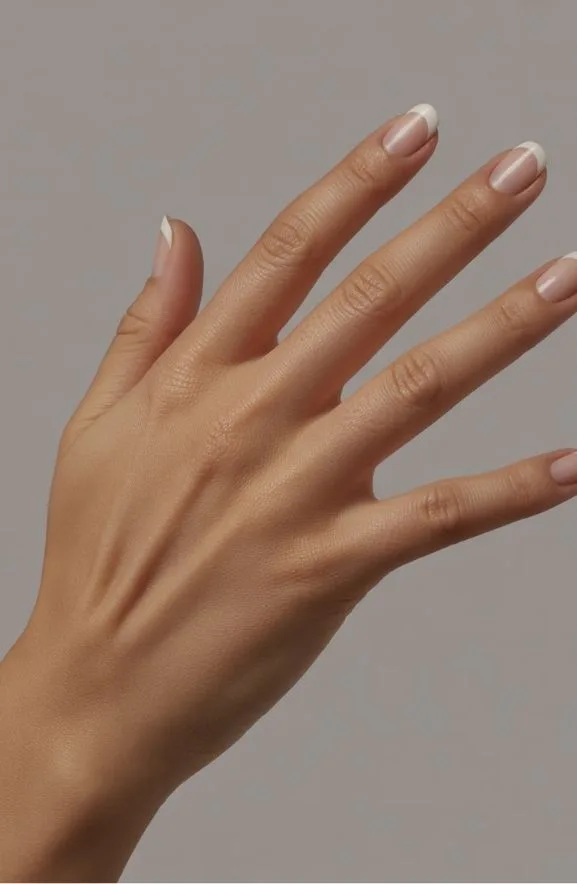
The beauty of keeping your natural nails shines through when you add just a whisper of white to the tips. This approach celebrates what you’ve already got. You’re working with your nail’s natural strength and length, which means less damage and maintenance overall.
Apply a crisp white polish like Essie “Ballet Slippers” to just the tip edge. Keep the line razor-sharp using a thin brush or nail art pen for precision. The minimalist design flatters shorter nails beautifully. You’ll notice how this style elongates your fingers without looking overdone.
“Clean lines and understated elegance never go out of style,” says celebrity manicurist Michelle Saunders. This timeless look works for professional settings and casual days alike. Seal everything with a glossy topcoat for protection and shine. You’ve created a sophisticated, effortless aesthetic.
Classic Beige With Silver Foil Placement

For a look that bridges elegance and sparkle, you’ll want to try beige polish paired with strategic silver foil accents. This combination creates understated sophistication without overwhelming your natural nails.
- Apply a creamy beige base coat as your foundation
- Position silver foil pieces along the nail tips or cuticle area for dimensional interest
- Seal everything with a glossy top coat for longevity
Start with two coats of your chosen beige shade. Let it dry completely before applying foil placement. You can use tweezers for precise positioning, or try adhesive foil strips for easier application.
The result? Nails that whisper elegance rather than shout for attention. This design works beautifully for professional settings and special occasions alike. We can’t get enough of how effortlessly refined this style feels.
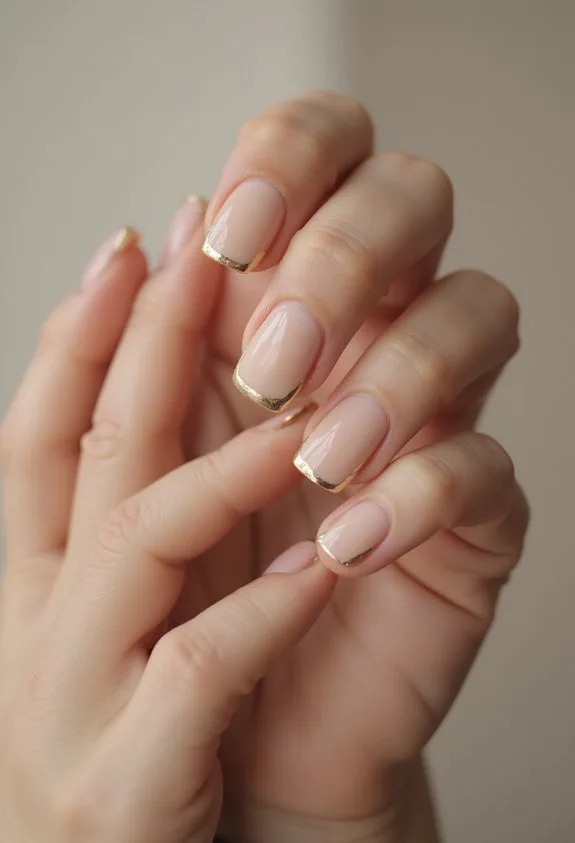
Matte Warm White With Refined Gold Tips
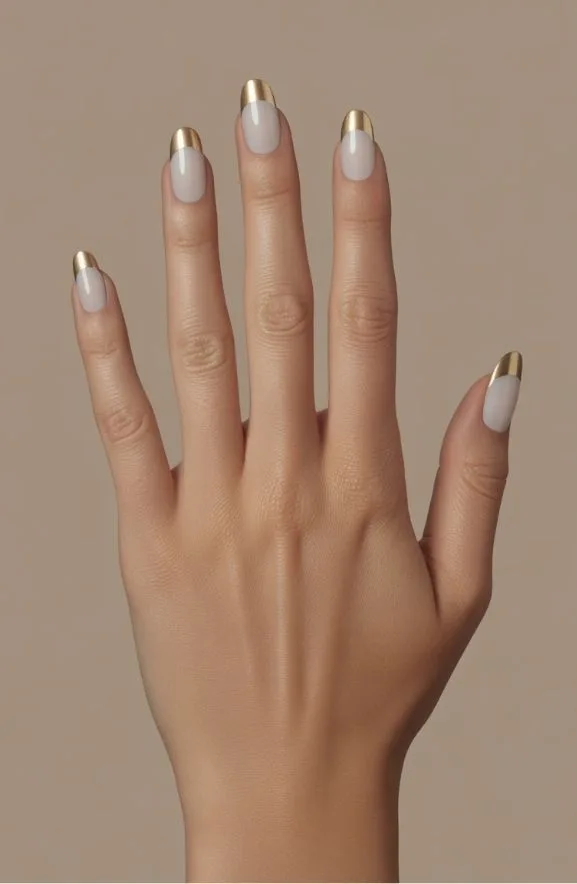
When you’re ready to elevate your nail game with understated luxury, matte warm white paired with refined gold tips delivers exactly that. This combination whispers sophistication rather than shouting it.
Start with a creamy matte base coat across your entire nail. The warm undertones prevent that stark, clinical appearance some whites can create. Apply two thin layers for even coverage without streaking.
Next, create your gold tips using a thin brush or nail art pen. Angle the gold at forty-five degrees for dimension. A beauty industry expert notes, “The refined approach uses restraint—narrow gold lines outperform thick borders.”
Layer a matte top coat to maintain that velvety texture. The contrast between matte and metallic creates visual interest without overwhelming your hands. This design works beautifully for professional settings and special occasions alike.
Soft Pink Ombre For Timeless Elegance

Soft pink ombre nails deliver a gradient effect that shifts from pale rose at your cuticles to deeper mauve at your tips, creating an illusion of length and elegrance. This timeless design works for any occasion, whether professional settings or special events.
You’ll achieve the best results by following these steps:
- Apply a base coat to protect your nails and guarantee longevity
- Blend two complementary pink shades using a makeup sponge for seamless color migration
- Seal everything with a glossy topcoat for dimension and shine
The gradient technique requires patience and precision. Use a light hand when sponging to avoid harsh lines between colors. Brands like Sally Hansen and OPI offer quality polishes that blend smoothly. This design flatters all skin tones while maintaining sophisticated simplicity. We can’t get enough of this versatile look.
Blush Pink With Hand-Painted Floral Details
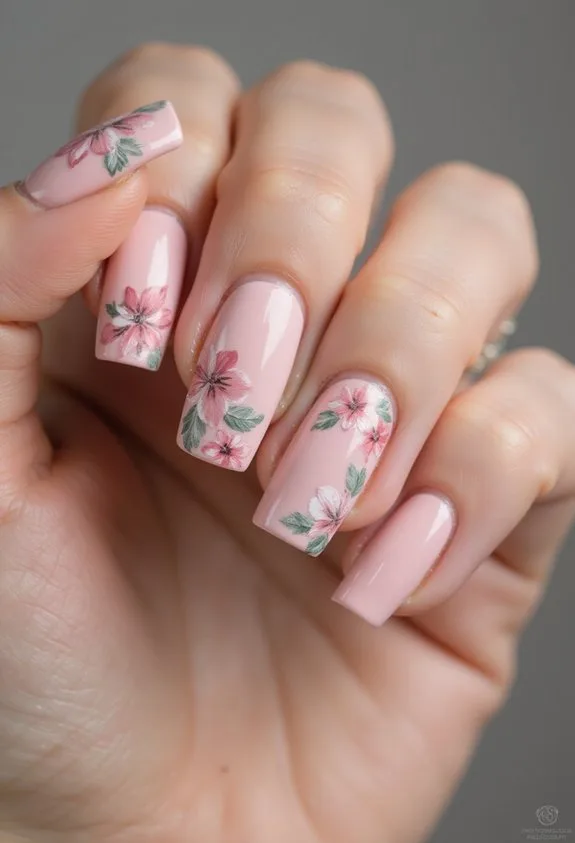
Why settle for solid color when you can elevate your manicure with delicate hand-painted botanicals? Blush pink serves as the perfect canvas for intricate floral artwork. You’ll start with a creamy base coat in soft rose tones, creating dimension through strategic shading.
Hand-painted florals demand precision. Tiny wildflowers, peonies, or cherry blossoms transform your nails into wearable art. Professional nail artists use ultra-fine brushes and acrylics for detailed designs. As one technician notes, “The key is layering translucent pigments to achieve depth.”
You can customize designs to match your aesthetic. Consider adding delicate stems, leaves, or subtle gold leaf accents. Seal everything with glossy top coat for protection and longevity. This technique balances sophistication with artistic expression beautifully.
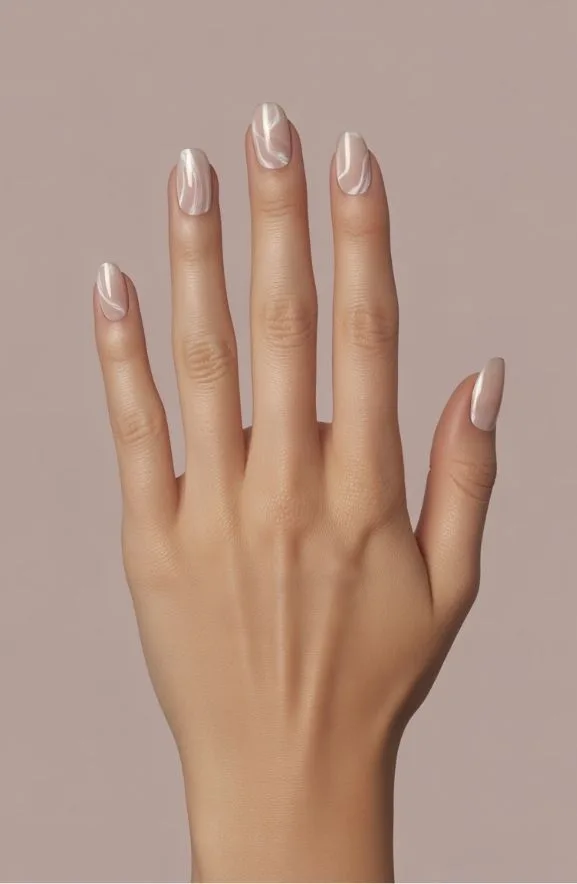
Soft Nude With Barely-There Shimmer Finish

If hand-painted artistry feels too intricate for your routine, a soft nude with barely-there shimmer offers understated elegance that’s just as alluring. This nail style delivers sophisticated refinement without demanding precision brushwork.
The shimmer creates dimension across your nail bed. It catches light subtly, never overwhelming your overall appearance. You’re choosing quiet confidence over bold statements.
Consider these essential elements:
- Base polish selection – Choose warm or cool-toned nudes matching your skin undertone for seamless integration
- Shimmer intensity – Opt for fine microglitter formulas that provide luminosity without chunkiness or visible sparkle particles
- Topcoat application – Use a glossy seal to amplify the shimmer’s reflective quality and extend wear time
Brands like OPI’s “Bubble Bath” or Essie’s “Ballet Slippers” deliver this effect effortlessly. The result? Nails that look intentional, polished, and undeniably elegant for any professional or social setting.
Cream Base With Minimalist Black Lines
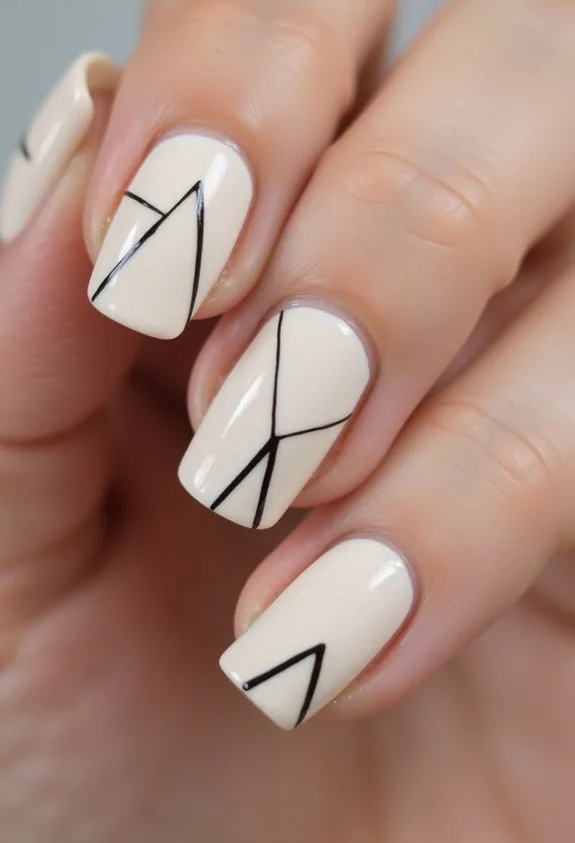
Minimalist black lines on a cream base create striking contrast without demanding artistic skill. You’ll appreciate how this design offers sophistication through simplicity, making it achievable for home manicures or salon appointments.
Start with a smooth cream foundation like OPI’s “Bubble Bath” or Sally Hansen’s “Nude” shade. Once dry, use a thin black liner brush or nail art pen to draw geometric patterns—vertical stripes, horizontal accents, or angular shapes work beautifully.
According to nail technician Maria Chen, “Clean lines communicate elegance better than busy designs.” You can experiment with asymmetrical placement on accent nails for added interest. The contrast between warm cream and stark black creates visual impact that photographs remarkably well.
This style shifts seamlessly from professional settings to casual outings, offering you versatile refinement.
Matte Nude With Subtle Glitter Gradient
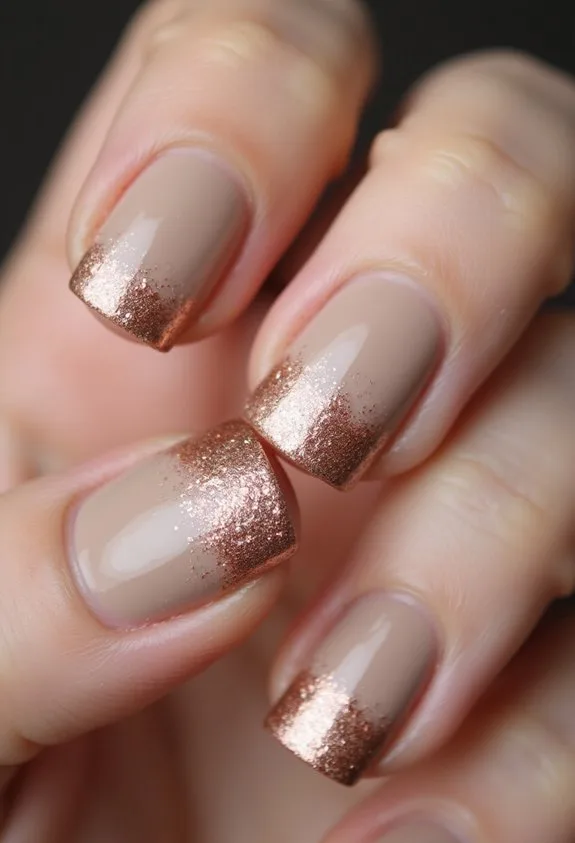
A matte nude base paired with glitter that fades gradually creates understated glamour you’ll love wearing everywhere. This design combines sophistication with modern appeal effortlessly.
The matte finish provides a polished, professional foundation. You’ll apply two coats of a warm beige or soft taupe polish for ideal coverage. The glitter gradient then shifts from concentrated sparkle near the tips to barely-there shimmer at the cuticles.
Use a high-quality matte topcoat to seal the base without shine. Layer fine glitter particles gradually, decreasing density toward the nail bed. Finish with a glossy topcoat only on the gradient section for dimension.
Beauty technician Maria Chen notes, “This technique works beautifully for both professional and casual settings.” The contrast between matte and shimmer creates visual interest without appearing overdone. You’re investing in versatile elegance.
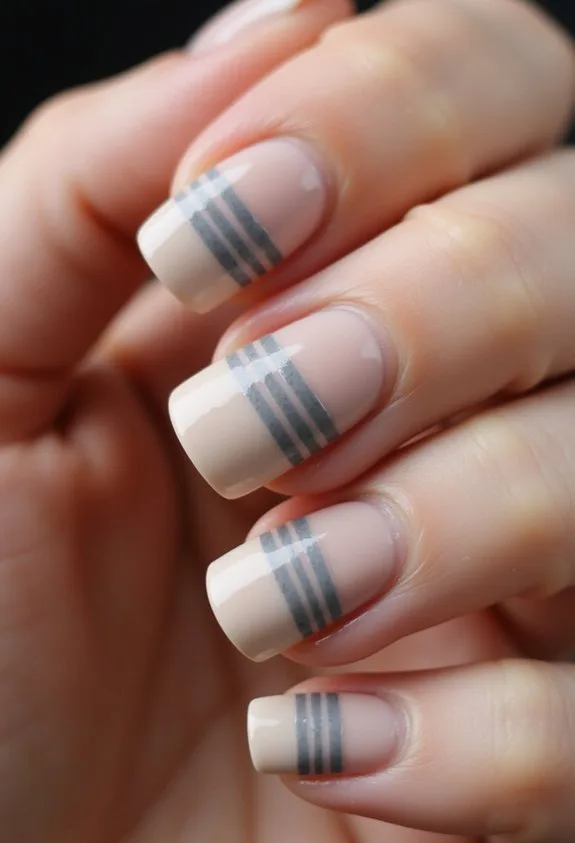
Soft Nude Square Nails With Thin Borders
Square nails offer a crisp canvas that builds beautifully on the understated elegance we’ve just explored. You’ll appreciate how this shape creates clean lines that elongate your fingers while maintaining sophistication. The thin borders—typically 1-2mm in width—frame your nail beds with precision and restraint. Choose a soft nude base that matches your undertone. Apply two coats of a quality formula like OPI’s “Bubble Bath” for flawless coverage. The borders work best in deeper taupe or charcoal, creating subtle contrast without drama. Use a thin liner brush for exact application. This design offers versatility for professional and casual settings. The geometry speaks confidence. As nail artist Sarah Thompson notes, “Thin borders elevate simple manicures into refined statements.” You’ll find this look incredibly wearable year-round, requiring minimal maintenance while delivering maximum polish.
Soft Ivory With Embossed Texture Details
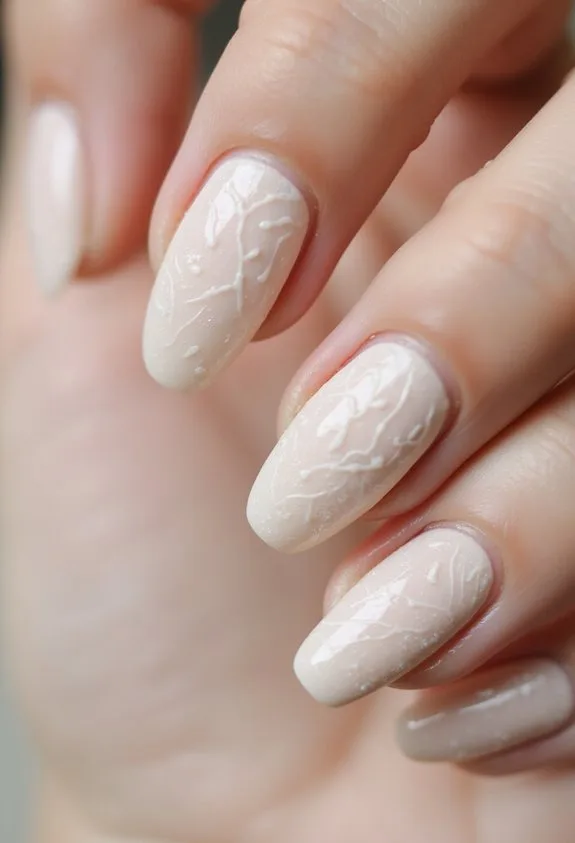
Three-dimensional texture transforms soft ivory into a tactile masterpiece that catches light beautifully. You’ll create depth by layering embossed techniques that elevate your manicure beyond flat polish applications.
Consider these sophisticated approaches:
- Base application: Apply two coats of creamy ivory polish, ensuring smooth, even coverage for your textured foundation.
- Embossing method: Use gel or stamping plates to create raised patterns—geometric designs, florals, or abstract lines work exceptionally well.
- Finishing touch: Seal with matte or glossy top coat, depending on your preferred aesthetic.
A nail technician notes, “Embossed details require patience and precision.” You’ll appreciate how subtle dimensionality adds refinement without overwhelming your nails. The soft ivory palette keeps everything elegant and wearable, perfect for professional or special occasions.
Pale Peach With Textured Matte-and-Gloss Layering

When you layer matte and glossy finishes over pale peach, you’re creating a nail design that shifts between soft and luminous depending on how light hits it. Start with a creamy pale peach base—think OPI’s “Worth a Pretty Penny” or similar warm neutrals. Apply matte topcoat to your entire nail first. Then, using a thin brush, strategically paint glossy topcoat only on certain zones: perhaps the center strip or diagonal sections. This contrast creates visual depth and movement. The matte areas absorb light while glossy sections reflect it, producing dimensional interest without extra embellishment. Your nails’ll look sophisticated yet modern. As nail artist Sarah Chen notes, “Texture variation is the secret to elevated minimalism.” This technique works beautifully for professional settings where you want refined polish without overwhelming drama.
Nude Base With Gold Geometric Accents
Gold geometric accents over a nude base create understated luxury that works for any occasion. You’re combining timeless sophistication with modern design elements that elevate your entire look.
Start with a creamy nude polish as your foundation. This neutral canvas lets geometric patterns truly shine. Layer thin gold lines using a fine-detail brush or gold striping tape for precision.
- Triangular patterns along the nail tips create visual interest without overwhelming your fingertips
- Linear designs down the center deliver a sleek, architectural quality to each nail
- Accent nails with full geometric coverage while keeping others minimal for balanced elegance
Seal everything with a glossy top coat to enhance the gold’s luminosity. You’ll achieve that refined, put-together aesthetic that whispers confidence rather than screams for attention.
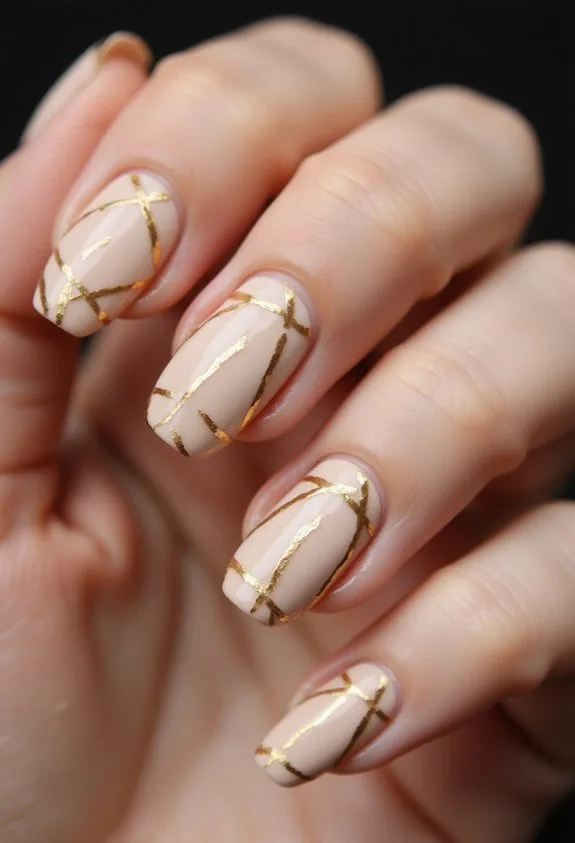
Tan Base With Refined Copper Swirls

If you’re seeking warmth without boldness, a tan base paired with copper swirls delivers exactly that balance. This combination creates sophisticated elegance that works for any occasion.
Start with two coats of warm tan polish as your foundation. Choose shades with subtle undertones—think caramel or honey rather than stark beige. The tan provides the perfect canvas for your copper artistry.
Use a thin brush or copper nail art pen to create flowing swirls across each nail. Let the curves move naturally from cuticle to tip. Layer your copper details strategically—not every nail needs identical patterns.
Seal everything with a glossy top coat. This technique emphasizes dimension while maintaining refinement. A manicurist notes that “copper’s warmth against tan creates visual depth without overwhelming the nail.” You’ll achieve understated luxury that commands attention through sophistication, not drama.
Warm Beige And Soft Gray Striping
Warm beige and soft gray striping offers a more structured approach to neutral elegance than the organic swirls we’ve explored. This technique creates clean, geometric lines that demand precision and intentionality. You’ll appreciate how stripes transform simple polish into sophisticated nail art.
- Apply a warm beige base using two thin coats for even coverage and durability
- Use a thin striping brush with soft gray polish to create parallel lines at consistent intervals
- Seal everything with a glossy top coat that enhances dimension and protects your design
The contrast between warm and cool tones creates visual interest without overwhelming your overall aesthetic. Essie’s “Chinchilly” pairs beautifully with “Taupeware” for this effect. This design works perfectly for professional settings or elevated casual occasions. Your nails’ll look polished and intentional.
Neutral Gradient From Beige To Taupe

As you move from structured striping to flowing color shifts, gradient designs offer a softer, more dimensional approach to neutral nail art. You’ll blend warm beige with cool taupe using a makeup sponge or gradient brush. Start by applying a beige base coat. Then layer taupe polish onto your sponge’s edge, dabbing it across the nail’s upper portion. The colors naturally merge in the middle, creating seamless progressions that feel sophisticated and modern.
This technique requires patience but rewards you with elegance. Use OPI’s “Worth a Pretty Penny” beige and “Taupe-less Beach” for authentic results. A glossy top coat enhances the gradient’s depth and dimension. You’re not just painting nails; you’re creating subtle luxury. The gradient approach flatters all skin tones while maintaining that refined, understated aesthetic we can’t get enough of in contemporary nail design.
Cream And Caramel Striped Elegance

Stripes bring structure and visual interest to your neutral nail palette in ways that softer gradients simply can’t match. You’ll create dimension through alternating cream and caramel tones that feel both modern and timeless.
Start with these essential steps:
- Apply a creamy base coat to all nails for smooth adhesion and longevity
- Use thin striping brushes or nail tape to create clean, parallel lines across each nail
- Seal everything with a glossy top coat for professional shine and protection
The contrast between warm caramel and cool cream draws the eye without overwhelming. A nail technician notes, “Striped designs offer precision that appeals to clients seeking refined aesthetics.” Layer your caramel stripes strategically—wider stripes on larger nails maintain proportional elegance. You’re building sophistication through intentional color placement and technical execution.
Taupe With Intricate Line Work Details
Taupe’s understated elegance becomes your canvas for precision artistry when you layer intricate line work across each nail. Thin, geometric lines create sophisticated visual depth without overwhelming the neutral base. You’ll apply a quality taupe polish first, allowing it to cure completely under UV light.
Next, use a fine-tipped liner brush with contrasting colors—charcoal, gold, or ivory work beautifully. Sketch delicate patterns: parallel lines, angular designs, or abstract swirls across the nail surface. Each stroke demands steady hands and patience.
“Line work transforms simple polish into wearable art,” explains nail technician Maria Chen. The result? Professional-grade elegance you can achieve at home. Layer a glossy topcoat to seal your masterpiece and enhance dimensional detail. This refined technique proves that sometimes, simplicity speaks loudest.
Matte Mauve With Rose Gold Accent Lines
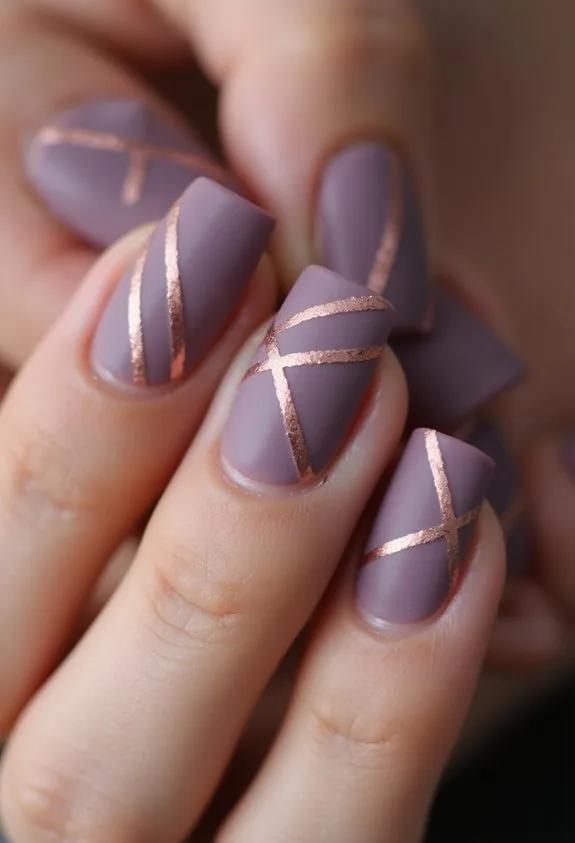
While geometric precision demands steady technique, matte finishes offer a softer sophistication that lets you explore dimension through color contrast rather than shine. Matte mauve creates an understated elegance that works year-round. You’ll layer rose gold accent lines with intentional placement for visual interest.
- Apply two coats of matte mauve base using thin, even strokes
- Use a rose gold gel pen or thin liner brush for delicate line work
- Seal with matte top coat to preserve the velvety finish
The contrast between cool mauve and warm rose gold creates sophisticated depth. Your lines needn’t be perfectly symmetrical—subtle irregularities add character. Consider placing accents along the nail’s edge or creating geometric patterns. This combination appeals to clients seeking refinement without high shine. The matte texture absorbs light beautifully, emphasizing color nuance over reflectivity.
Champagne Metallic Finish For Evening Glamour
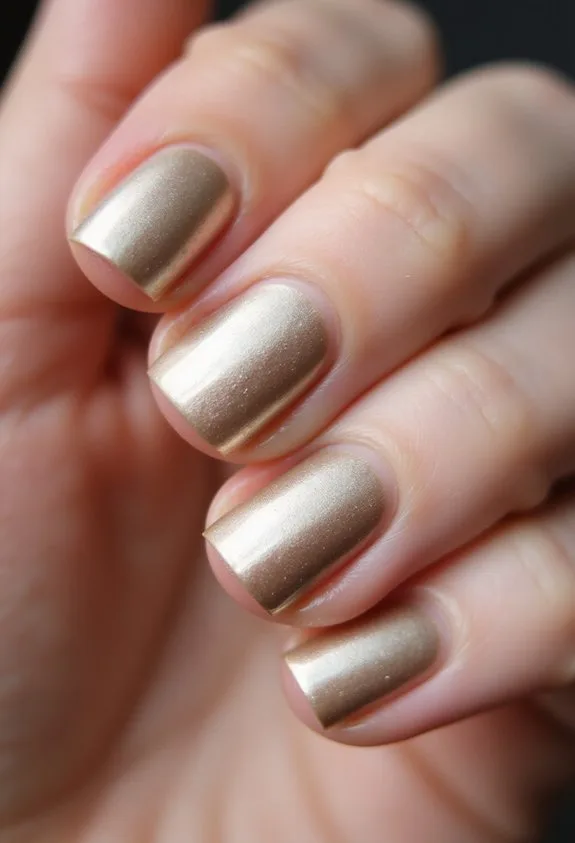
How do you capture pure luminosity on the nail? You’ll apply a champagne metallic base that catches light beautifully. This luxurious finish creates dimension and elegance for evening events.
Start with a smooth, even base coat. Then apply two coats of champagne metallic polish, allowing proper drying time between layers. The shimmering particles‘ll give your nails that sophisticated glow you’re after.
Layer a glossy top coat to amplify the reflective quality. You can add delicate gold leaf accents or thin metallic lines for extra glamour. These dimensional details elevate the design from simple to striking.
Consider brands like Essie’s “Good as Gold” or OPI’s “Champagne for My Real Friends.” These polishes deliver that coveted mirror-like finish without streaking. Your nails’ll radiate elegance all evening long.
Champagne Gradient From Nude To Gold

Building on the luminous appeal of a solid champagne finish, a gradient that flows from soft nude to rich gold offers something even more alluring. You’ll create depth and dimension that catches light from every angle, transforming your nails into wearable art.
To master this technique, you’ll need:
- A creamy nude base polish as your foundation shade
- Champagne and gold transitional/intermediary/gradational polishes for seamless blending
- A soft sponge applicator for precise gradient application
Start by applying your nude base to all nails. Dab champagne onto your sponge’s center, then gold at the tip. Sponge this combination onto each nail in gentle dabbing motions, layering until colors merge beautifully. Seal everything with glossy topcoat for that refined, jewelry-like finish you’re after.
Glossy Nude With Thin Gold Stripes
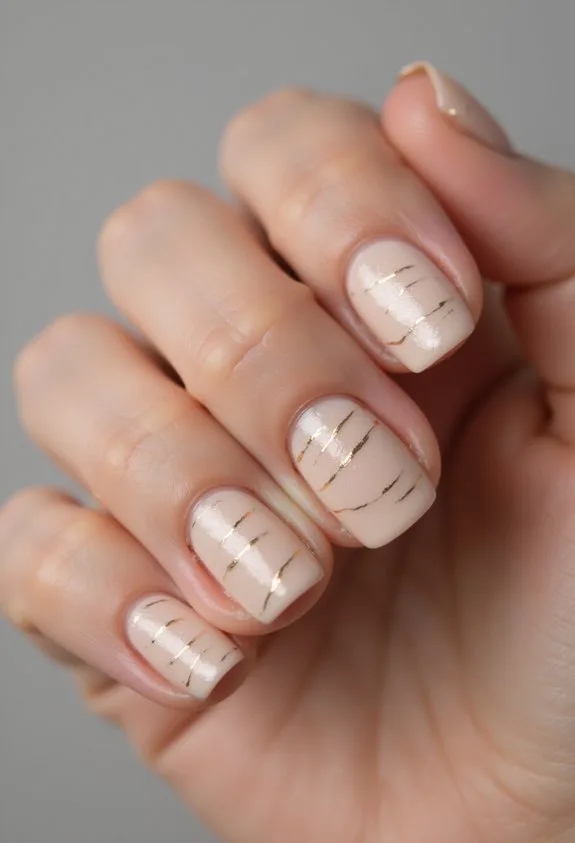
Simplicity meets sophistication when you pair a creamy nude base with delicate gold striping. You’ll create an understated elegance that works for any occasion. Apply two coats of your favorite nude polish—think warm beiges or soft taupes. Once dry, use a thin striping brush or nail art pen to draw precise gold lines across each nail. Vary the placement: diagonal, vertical, or geometric patterns all work beautifully. A glossy topcoat amplifies the refined look while protecting your design. Consider brands like Essie or OPI for quality base colors. As nail artist Sarah Chen notes, “Thin stripes elongate the nail and add visual interest without overwhelming the design.” This manicure projects polished confidence and timeless class.
Champagne With Thin Metallic Line Work
Three elements elevate this design into pure luxury: a shimmering champagne base, precise metallic details, and masterful restraint. You’re creating sophistication through careful composition rather than overwhelming embellishment.
Start with a creamy champagne polish as your foundation. Apply two coats for ideal coverage and depth. Next, you’ll add thin metallic line work using gold or silver gel polish with a fine liner brush.
The key details you’ll master:
- Thin diagonal lines across three nails, leaving the accent nail solid champagne
- Metallic accents concentrated on the nail tips for elongated visual effect
- Matte topcoat application over metallic lines for refined contrast
Your restraint here matters most. Avoid cluttering the design. One nail artist notes, “Less truly is more when working with luxury finishes.” This approach delivers timeless elegance.
Champagne Matte With Polished Gold Accents

The contrast between matte and shine creates visual drama that elevates your manicure instantly. You’ll apply a champagne matte base across all nails, establishing a soft, sophisticated foundation. Once dry, strategically place polished gold accents on select areas—try geometric patterns on accent nails or delicate lines along cuticles.
A nail technician explains, “Matte finishes diffuse light while glossy elements catch it, creating dimensional depth.” You can achieve this layering by applying matte top coat first, then using gold gel or metallic polish for detailed work. The result? A refined design that shifts beautifully in natural and artificial lighting.
This combination works especially well for professional settings and evening occasions. You’re balancing understated elegance with just enough sparkle to command attention without overwhelming your overall aesthetic.
Glossy Nude With Hand-Painted Gold Leaf
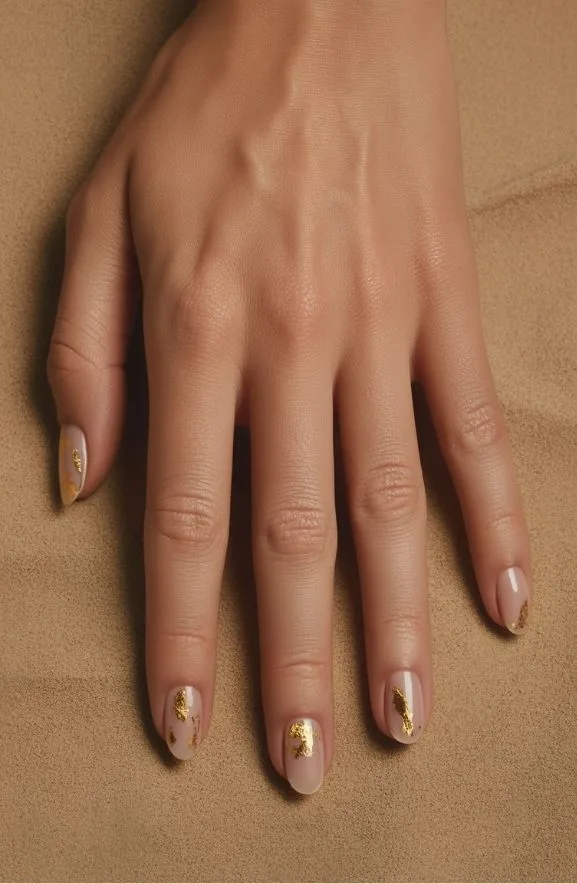
You’ll build this design by layering soft nude tones with delicate metallic accents that catch the light beautifully. Start with a creamy base coat in warm beige, then apply two coats of glossy nude polish for seamless coverage.
The hand-painted gold leaf elevates the entire look:
- Use a thin art brush with 24-karat gold leaf to create organic veining across 2-3 nails
- Apply a high-shine top coat that magnifies the metallic shimmer and protects your artwork
- Seal edges with precision for a polished, gallery-worthy finish
This technique demands steady hands and quality products like IrisLe or Essie for reliable color payoff. The contrast between matte nude and gleaming gold creates dimensional sophistication. We can’t get enough of how effortlessly refined this combination feels—it’s understated luxury at its finest.
Matte Blush With Rose Gold Accents

If you’re craving something softer than gleaming gold, matte blush with rose gold accents delivers that same luxe feel with a more wearable, everyday vibe. This combination strikes the perfect balance between sophistication and practicality.
Start with a creamy matte blush base across your nail bed. Rose gold metallic accents work beautifully as geometric lines or delicate corner details. Consider brands like Essie or OPI for quality matte formulas that won’t chip easily.
Layer rose gold foil or thin striping tape strategically. A nail artist explains, “The matte-to-metallic contrast creates dimensional depth without overwhelming the design.” This approach flatters most skin tones beautifully.
The understated elegance suits professional settings and casual outings alike. You’ll appreciate how this refined palette shifts seamlessly from office to evening plans.
Classic Beige With Refined Gold Swirls
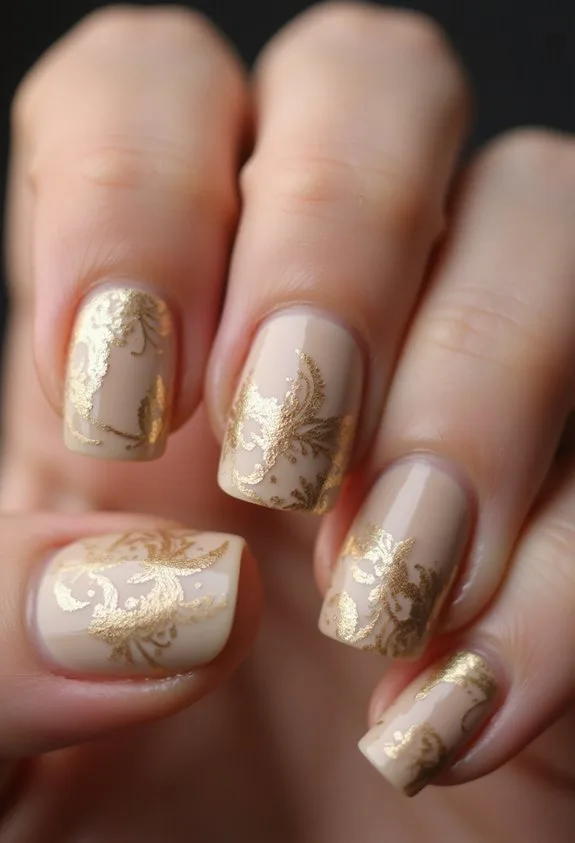
Pairing up a warm beige base with delicate gold swirls creates a timeless manicure that doesn’t demand constant upkeep. You’ll achieve sophistication through strategic layering and intentional design placement.
Here’s how to master this elegant look:
- Apply two coats of a nude-beige polish like OPI’s “Worth a Pretty Penne” for a smooth, creamy foundation
- Use a thin gold liner brush to create sweeping swirls across each nail with precision and confidence
- Seal everything with a glossy top coat for dimension and longevity
The gold swirls shouldn’t overwhelm your nails. Instead, they should flow naturally across the beige canvas, creating movement without chaos. This combination works beautifully for both professional settings and special occasions. You’re investing in understated elegance that’ll keep your hands looking polished for weeks.
Pearl Inlay Designs For Sophisticated Shine

There’s something undeniably luxe about embedding tiny pearls directly into your nail surface—it transforms an ordinary manicure into a statement of refined taste. You’ll find that pearl inlays catch light beautifully, creating dimensional depth that photographed nails can’t fully capture.
The technique involves carefully placing freshwater or akoya pearls into wet gel polish before curing. You can arrange them in geometric patterns, scattered clusters, or elegant focal-point designs. Consider nude or blush bases to let pearls become the star.
Nail technician Maria Chen notes, “Pearl inlays elevate any nail shape, from classic rounds to trendy coffins.” Seal everything with a glossy top coat for protection and enhanced luminescence. This investment-worthy design lasts two to three weeks, making it perfect for special occasions or everyday luxury.
Sheer Pink With Embedded Sparkle Details
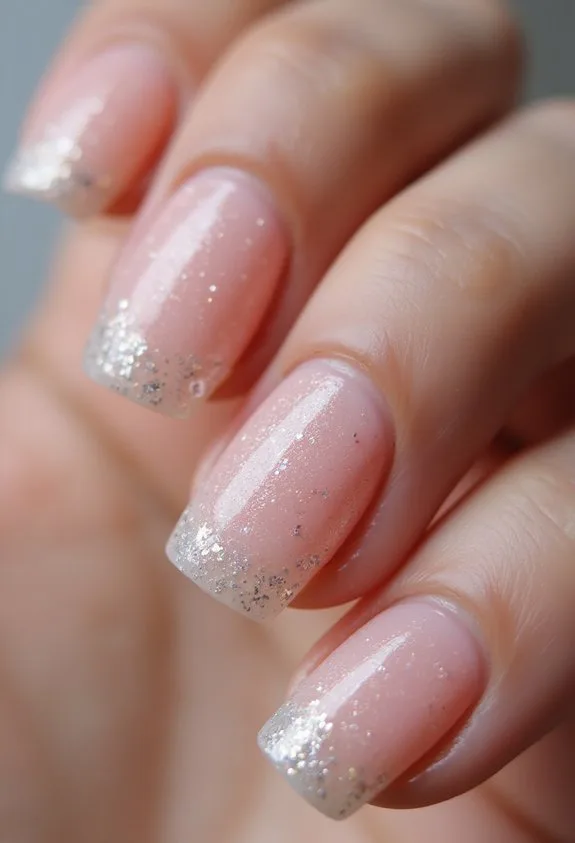
Sheer pink polish creates the perfect canvas for sparkle details that truly shine. You’ll love how this combination delivers elegance without overwhelming your fingertips.
Here’s how to master this sophisticated look:
- Apply two coats of quality sheer pink base, like Essie’s Ballet Slippers, for seamless coverage
- Strategically place micro-glitter or diamond dust along the nail bed’s center using a thin brush
- Seal everything with a glossy top coat for dimensional depth and protection
The beauty of this design lies in its restraint. Strategic sparkle placement catches light beautifully without appearing costume-like. You’re creating an understated luxury effect that works everywhere—boardroom meetings, elegant dinners, everyday sophistication.
Mix fine glitter sizes for visual interest. Larger crystals on accent nails create focal points. Smaller particles fill spaces subtly. This layering technique prevents a flat appearance while maintaining refinement throughout your manicure design.
Soft Gray And White Color-Block Style
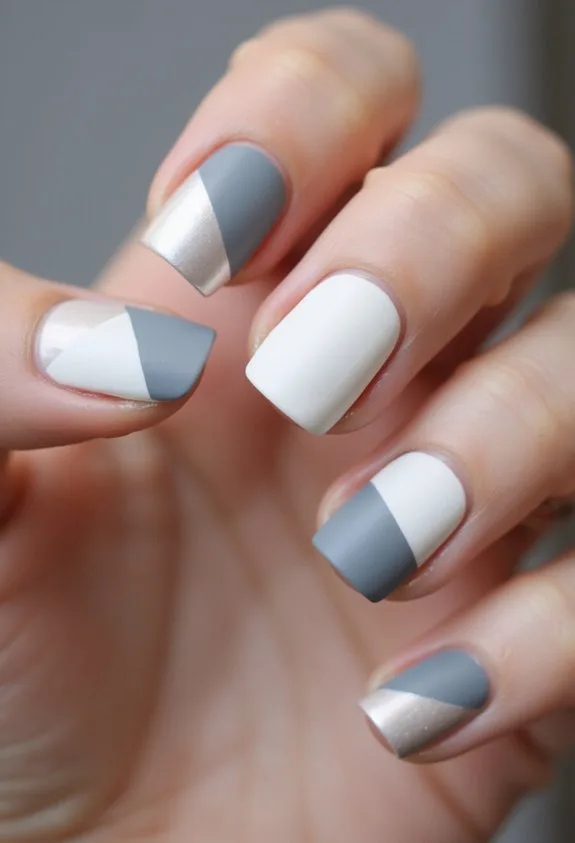
While sparkle designs celebrate light and shimmer, color-blocking offers a bolder statement through geometric contrast and clean lines. You’ll create visual impact by dividing your nail into distinct gray and white sections. Apply a base coat, then use precise nail tape to establish clean boundaries between shades. This technique demands steady hands and quality brushes for crisp edges.
The soft gray acts as a sophisticated anchor while white provides brightness and dimension. You can experiment with diagonal splits, vertical halves, or asymmetrical placements. According to nail artist Maria Chen, “Color-blocking emphasizes nail shape and creates optical lengthening effects.” Two coats of each shade guarantee opacity and durability.
Seal everything with a glossy top coat for professional finish. You’ve now mastered a timeless technique that works year-round for any occasion.
Pale Gray And White Geometric Pattern

Building on your color-blocking foundation, geometric patterns take the technique further by introducing repeating shapes and lines that transform your nails into miniature canvases. You’ll create visual interest through strategic design placement.
Consider these approaches:
- Triangular arrangements – Layer pale gray triangles across a white base using thin brushes or striping tape for crisp edges and professional precision
- Linear designs – Apply clean horizontal or diagonal lines with gel polish for dimensional depth and modern sophistication
- Hexagonal accents – Feature geometric honeycomb patterns on accent nails, combining matte and glossy finishes for textural contrast
Apply a quality base coat before executing patterns. Use gel formulas like Gelish or Shellac for durability. Seal everything with a glossy top coat to enhance dimension. Your geometric nails project refined elegance with contemporary flair, elevating any professional or social setting effortlessly.
Blush And Cream Negative Space Design
Negative space design shifts your focus from pattern coverage to strategic emptiness, letting your natural nail peek through carefully planned gaps. You’ll create an elegant effect by applying blush pink polish to your nail bed, then leaving the tips bare or cream-colored. This minimalist approach feels refined without demanding intricate detail work.
Start with a creamy base coat like OPI’s “Bubble Bath” shade. Paint your desired blush tone across most of the nail. Use a thin brush to define where negative space begins. Leave roughly one-third of your nail unpainted or filled with soft cream. This contrast highlights your nail’s natural shape beautifully.
As nail artist Sarah Jensen notes, “Negative space designs appear more sophisticated because they embrace simplicity.” You’re working smarter, not harder, while achieving polished results that photograph exceptionally well.
Nude And White Marble Effect
Marble effects transform your nails into miniature works of art. You’ll achieve sophisticated elegance by layering nude and white polish for dimensional depth. This technique requires patience but delivers stunning results that elevate your entire look.
- A quality base coat to protect your nail beds and guarantee longevity
- Nude and white gel polishes that blend seamlessly without muddying colors
- A thin detail brush for precise veining that mimics natural marble patterns
Start with your nude foundation. Then carefully apply white streaks using your detail brush, creating organic swirls across the surface. Don’t aim for perfection; natural marble contains beautiful imperfections.
A top coat seals everything. The result? Nails that whisper refined sophistication rather than shout trendy design choices.
Ivory And Pale Blue Ombre Blend
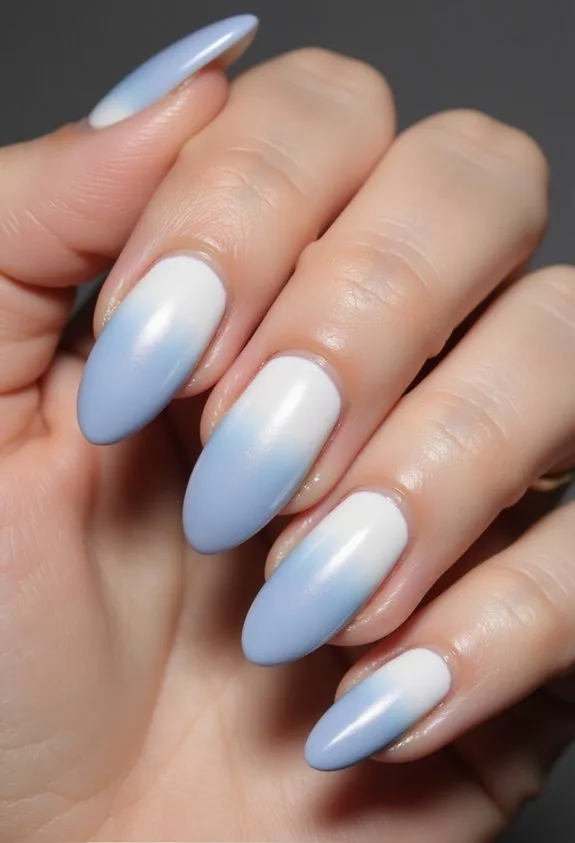
While ombre techniques often feel intimidating, the ivory-to-pale-blue gradient is surprisingly forgiving for beginners. You’ll blend two soft, complementary shades that naturally complement most skin tones and wardrobes.
Start with an ivory base coat on all nails. Apply pale blue to the tip area using a damp sponge, dabbing gently to create soft shifts. The sponge method diffuses color boundaries beautifully without harsh lines.
Use OPI’s “Do You Have This Color in Stock-holm?” as your ivory foundation. Layer it with Essie’s “Bikini So Teeny” for that dreamy pale blue. These pigments work harmoniously together.
Seal everything with a quality top coat. The ombre effect creates dimension and elegance without overwhelming your nails. You’ve achieved sophisticated, wearable artistry that feels both modern and timeless.
Sage Green With Refined Matte Finish
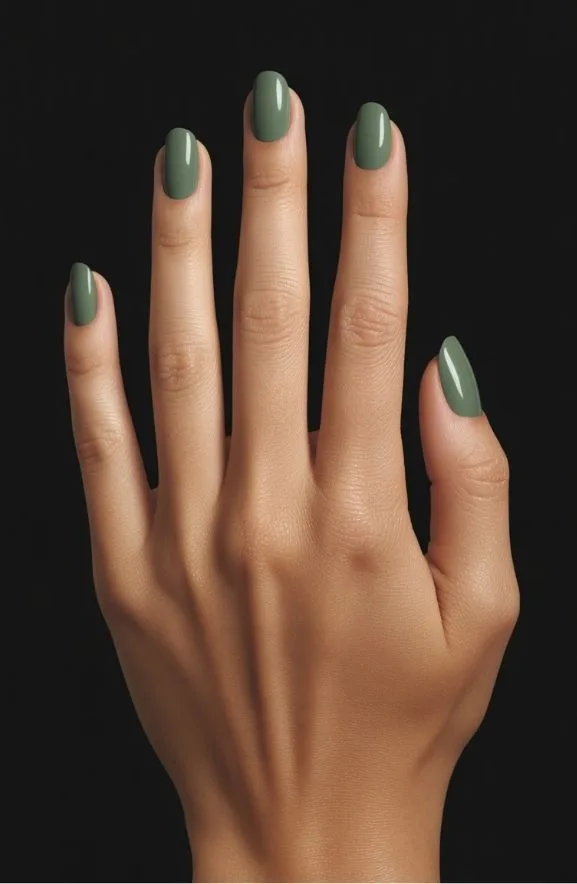
Sage green’s sophisticated appeal lies in its versatility and modern aesthetic. You’ll discover this shade works beautifully across various skin tones and occasions. The matte finish creates an understated elegance that feels particularly refined.
Here’s what makes this look exceptional:
- Base Application: Apply two thin coats of a quality sage green polish like Essie’s “Peaceful Lily” for even coverage without streaking.
- Matte Top Coat: Seal with a dedicated matte topcoat to eliminate shine and enhance the velvety texture.
- Length Consideration: Medium to long nails showcase the color’s depth more effectively than shorter lengths.
Professional manicurist Sarah Chen notes, “Matte finishes demand impeccable application—any bubbles become immediately visible.” You’ll appreciate how this minimalist approach elevates your overall style with understated sophistication and contemporary polish.
Dusty Rose With Subtle Botanical Lines
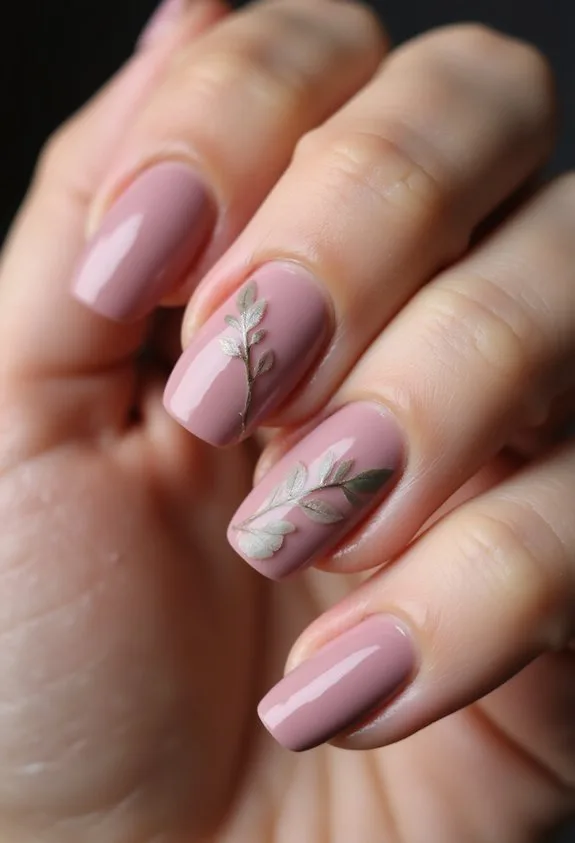
For a softer romantic aesthetic, dusty rose offers a warmer alternative to cool-toned sage. This muted pink shade creates understated elegance on your nails. You’ll apply a creamy base coat first, ensuring smooth coverage. Then layer two coats of dusty rose polish for ideal depth and dimension.
The botanical lines are where the magic happens. You’ll use a thin detail brush to sketch delicate leaf patterns across each nail. These hand-painted designs shouldn’t overwhelm the base color. Instead, they add sophisticated texture and visual interest.
Consider using a dark forest green or muted bronze for botanical details. The contrast remains subtle yet intentional. A glossy top coat seals everything beautifully, enhancing the refined finish.
This combination works perfectly for professional settings and special occasions alike.
Pale Pink Base With Silver Constellation Art

Create a celestial-inspired manicure by starting with a pale pink foundation that captures moonlight elegantly. You’ll build a dreamy aesthetic that feels both sophisticated and wearable. Consider these essential steps:
- Apply two coats of a creamy pale pink base, like OPI’s “Tickle My France-y,” ensuring smooth, opaque coverage
- Use a fine-detail brush with silver gel polish to map constellation patterns across your nails
- Add tiny rhinestones at key star points for subtle dimension and light-catching sparkle
The constellation design transforms your manicure into wearable art. You’re creating constellations with intentional spacing—think Orion or the Big Dipper. A beauty industry expert notes that silver accents against pale pink “elevate minimalist designs into statement-worthy looks.” This combination captures understated elegance while maintaining visual interest. Your nails become conversation starters without demanding attention.
Frequently Asked Questions
How Long Do Elegant Touch Nails Typically Last Before Needing a Refill?
You’ll typically enjoy your Elegant Touch nails for about 2-3 weeks before you’ll need a refill. However, you can extend their lifespan by 1-2 weeks if you’re careful with maintenance and avoid excessive water exposure or harsh chemicals.
What Is the Best Nail Shape for Beginners Interested in Elegant Nail Designs?
You’ll find that square or rounded square shapes work best for beginners. They’re easier to maintain, less prone to breaking, and they’ll give you plenty of surface area to showcase elegant designs without requiring advanced application skills.
Can Elegant Touch Nails Be Applied at Home or Require Professional Application?
You can apply Elegant Touch Nails at home yourself, though professional application guarantees better results. You’ll find the process straightforward with practice, but you’ll need patience and proper application techniques to achieve that polished, refined look you’re after.
How Much Does an Elegant Touch Manicure Cost at a Typical Salon?
You’ll typically pay between $25 to $50 for an elegant touch manicure at most salons, depending on your location and the salon’s prestige. Premium establishments may charge up to $75, while budget-friendly options offer services for less.
What Products Are Recommended for Maintaining the Shine and Longevity of Nails?
You’ll want to use a quality cuticle oil daily, apply a protective top coat weekly, and moisturize your hands regularly. You should also avoid harsh chemicals and wear gloves when cleaning. These steps’ll keep your nails shiny and strong longer.
Conclusion
You’ve explored refined nail artistry that balances sophistication with personal expression. These designs prove that elegance doesn’t require complexity—strategic layering, thoughtful color placement, and dimensional finishes elevate your manicure. Whether you’re drawn to subtle ombre shifts or bold chrome accents, you can achieve polished results by investing in quality gel products and mastering basic technique. Your nails become a refined extension of your style.