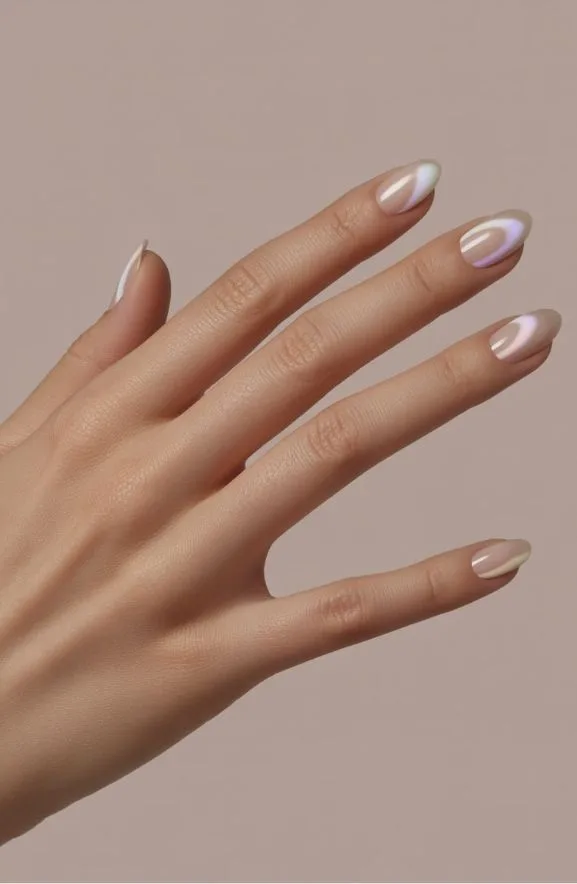
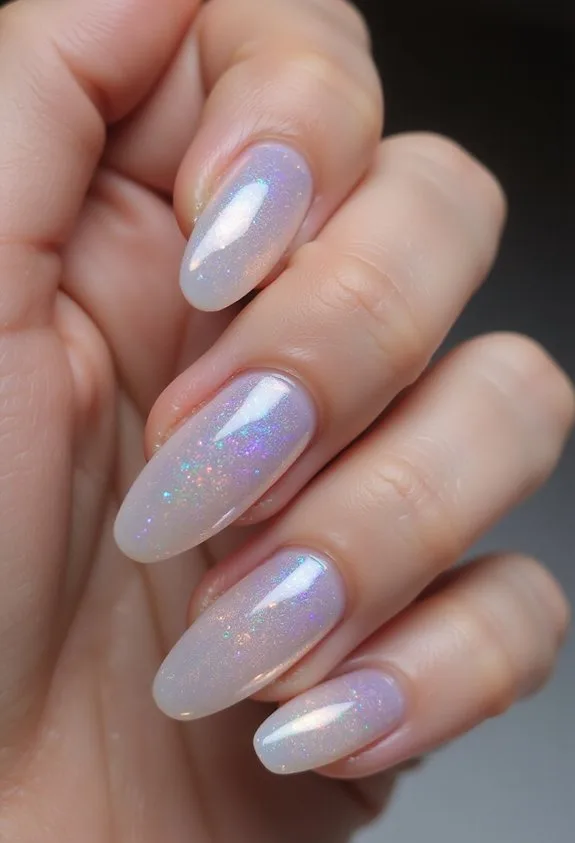
Aura nails deliver that ethereal, otherworldly glow everyone’s obsessing over this season. The soft iridescent shimmer makes your nails look like pure magic. This trend proves subtle can still feel incredibly luxe.
What makes aura nails special is their dreamy, multidimensional finish that shifts in different light. Each design feels personal and effortlessly elegant without trying too hard. They work brilliantly on any nail shape or length.
These 39 aura nail designs range from barely-there shimmer to bold, statement-making finishes. Whether you prefer soft blush tones or rich metallics, you’ll find your perfect match here. Scroll down and prepare to be inspired.
Table of Contents
- What Are Aura Nails and Why They’re Taking Over
- What Makes Aura Nails Shimmer: The Iridescent Magic Explained
- Pastel Aura Nails: Dreamy and Soft
- Cosmic Aura Nails: Purple With Starry Accents
- Minimalist Aura Nails: Neutral Tones and Understated Glow
- Jewel-Tone Aura Nails: Bold and Attention-Grabbing
- Sunset Gradient Aura Nails: Warm Hues
- Ocean-Inspired Aura Nails: Cool Blues and Teals
- Metallic Gold Aura Nails: Glamorous Elegance
- Rose Gold Aura Nails: Delicate Shimmer
- Rainbow Aura Nails: Celebrating the Full Color Spectrum
- Glitter-Infused Aura Nails: Extra Sparkle
- Matte Aura Nails: Subtle Glow Underneath
- Chrome Aura Nails: Mirror-Like Finish
- Ombre Aura Nails: Transitioning Between Two Shades
- Marble Pattern Aura Nails: Swirled Design
- Holographic Aura Nails: Shifting Colors in Light
- Nail Art Combinations: Aura Meets Florals
- Aura Nails With Negative Space: Modern Edge
- Clear Base Aura Nails: Understated Beauty
- Double-Color Aura Nails: Creating Depth and Dimension
- Aura Nails on Short Nails: Proving Size Doesn’t Matter
- Long Stiletto Aura Nails: Maximum Drama
- Aura Nails on Square Shape: Balanced Elegance
- Almond-Shaped Aura Nails: The Perfect Canvas
- Prepping Your Nails: The Foundation for Perfect Aura Glow
- Best Aura Polish Brands: Duochrome, Longevity, and Price Compared
- Application Techniques to Achieve the Ethereal Glow
- Layering Tips for Maximum Color Dimension
- Sealing the Glow: Why Top Coat Makes All the Difference
- How Long Do Aura Nails Last on Natural Nails?
- Quick Touch-Ups: Repairing Chipped Aura Nails at Home
- Removing Aura Nails Without Damaging Natural Nails
- At-Home vs. Professional Aura Nail Application
- Budget-Friendly Aura Nail Alternatives to Try
- Seasonal Color Palettes for Year-Round Aura Nails
- Aura Nails for Special Occasions and Events
- Keep Your Aura Nails Glowing: Daily Care and Maintenance
- Cost vs. Lifespan: Why Aura Nails Outperform Regular Manicures
- Frequently Asked Questions
- Can I Achieve Aura Nails With Regular Nail Polish or Do I Need Special Products?
- How Do Aura Nails Compare in Cost to Gel Manicures and Traditional Polish Applications?
- Will Aura Nails Work on Very Short Natural Nails or Only Longer Lengths?
- What’s the Difference Between Aura Nails and Similar Iridescent or Chrome Nail Finishes?
- How Can I Prevent My Aura Nails From Losing Their Shimmer and Glow Quickly?
- Conclusion
What Are Aura Nails and Why They’re Taking Over
Aura nails represent a soft, multi-tonal gradient effect that creates an ethereal glow across your nail surface. You’re fundamentally blending two to three complementary shades that blur seamlessly together, producing dimension without harsh lines. The technique uses sponging methods or airbrush application to achieve that cloudlike appearance.
What makes aura nails so popular? They’re incredibly versatile. You can create cool-toned versions using lavender and silver, or warm combinations featuring peach and gold. According to nail artist Maria Chen, “Aura nails work because they’re forgiving—imperfect blending actually enhances the ethereal quality.”
You’ll find brands like Essie and OPI offer perfect gradient shades for this style. The effect photographs beautifully and flatters all skin tones. You’re getting professional results without committing to bold designs. That’s why we can’t get enough of them right now.
Also read: Fall Nail Inspo Almond | Autumn Design
What Makes Aura Nails Shimmer: The Iridescent Magic Explained

What’s really behind that mesmerizing glow you’re seeing on aura nails? The magic lies in specialized pigments and light-reflecting technology that creates dimensional shimmer across your nail surface.
You’re working with multiple layers of iridescent materials:
- Chrome powders that shift colors depending on light angles and viewing perspectives
- Holographic particles suspended in gel polish bases for multi-directional sparkle
- Duochrome pigments that display two distinct colors from different angles
- Pearl essences that catch and refract light naturally across your nail bed
These components work together, creating that ethereal, almost otherworldly appearance. “The key’s layering translucent shades with reflective elements,” explains nail artist Marcus Chen. You’ll notice how aura nails seem to glow from within, shifting between soft purples, blues, and pinks. That’s your iridescent particles responding to environmental light, making your manicure genuinely enchanting.
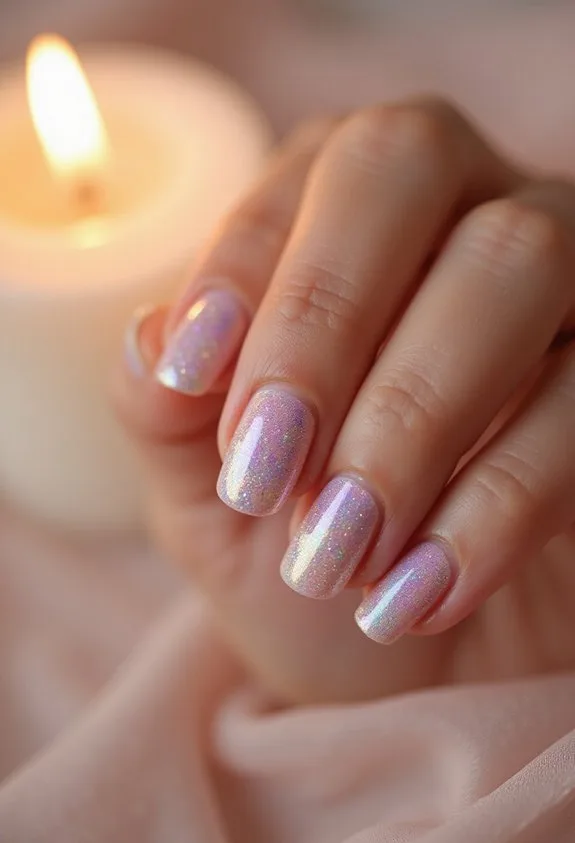
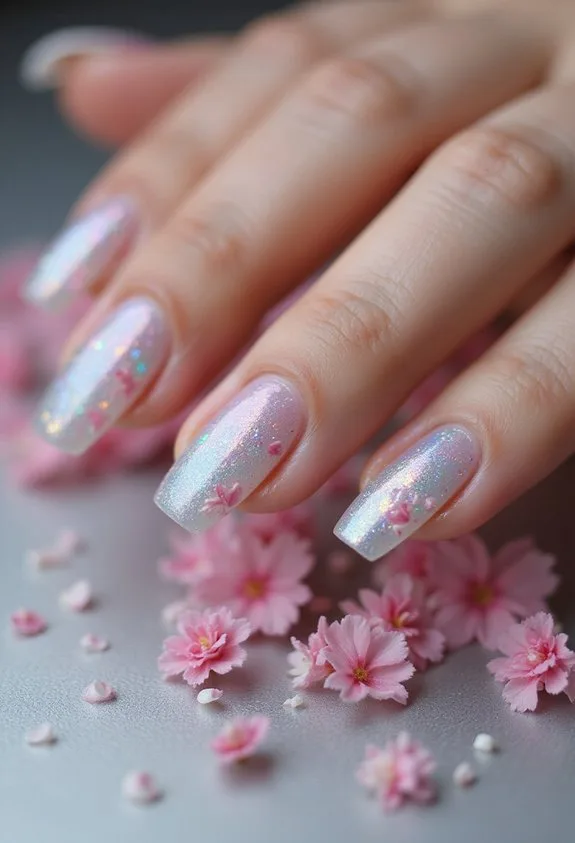
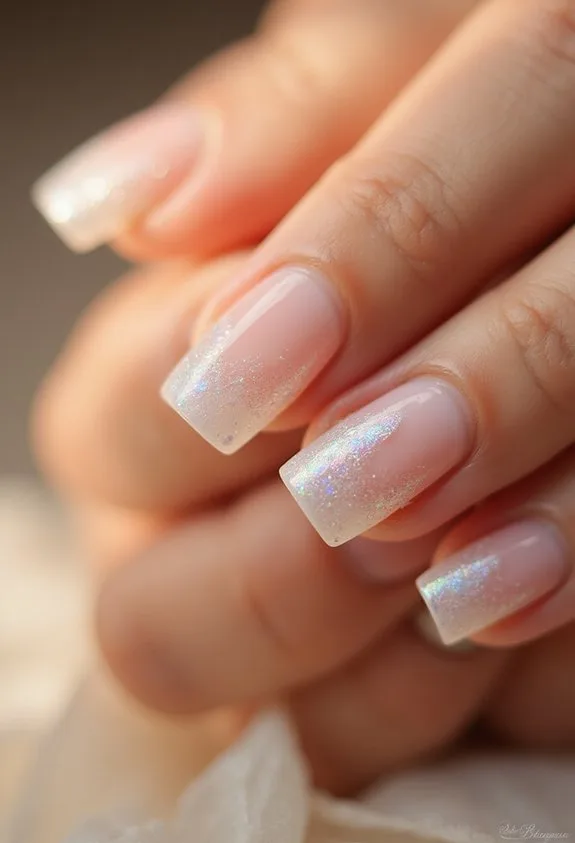
Pastel Aura Nails: Dreamy and Soft
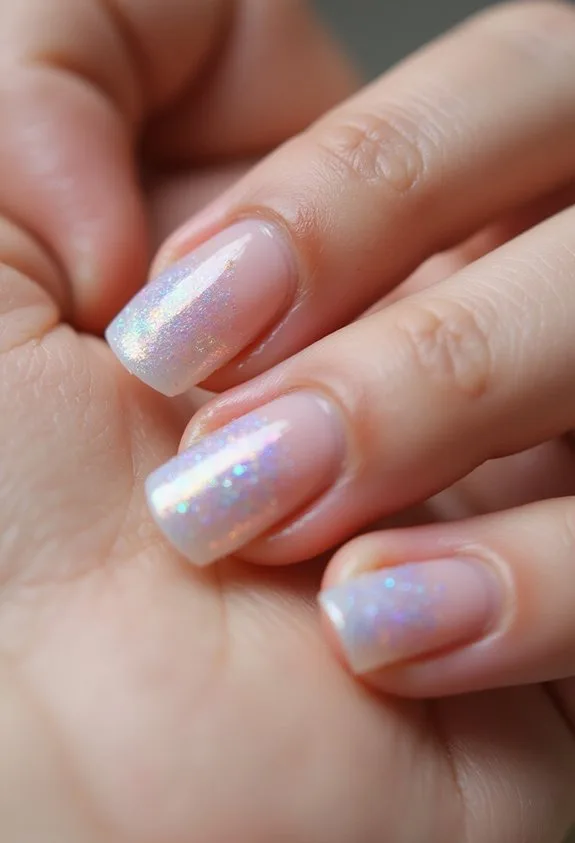
Soft, dreamy pastels transform the aura nail trend into something genuinely wearable for everyday elegance. You’ll find pastel aura nails perfect for understated sophistication rather than bold statement-making. The technique uses pale pink, lavender, mint, and peach tones layered with translucent shimmer for ethereal dimension.
Start with a soft base color—try OPI’s “Bubble Bath” or Essie’s “Cascade” for neutral foundations. Layer iridescent topcoats using gentle brushwork to build that signature glow without overwhelming your nails. The result shouldn’t look chunky; instead, it catches light subtly.
Nail technician Maria Chen notes, “Pastels work beautifully because they complement all skin tones while maintaining that mystical aura quality.” Apply thin coats and allow proper drying between layers for ideal translucency. Your finished nails will shimmer delicately with every hand movement.
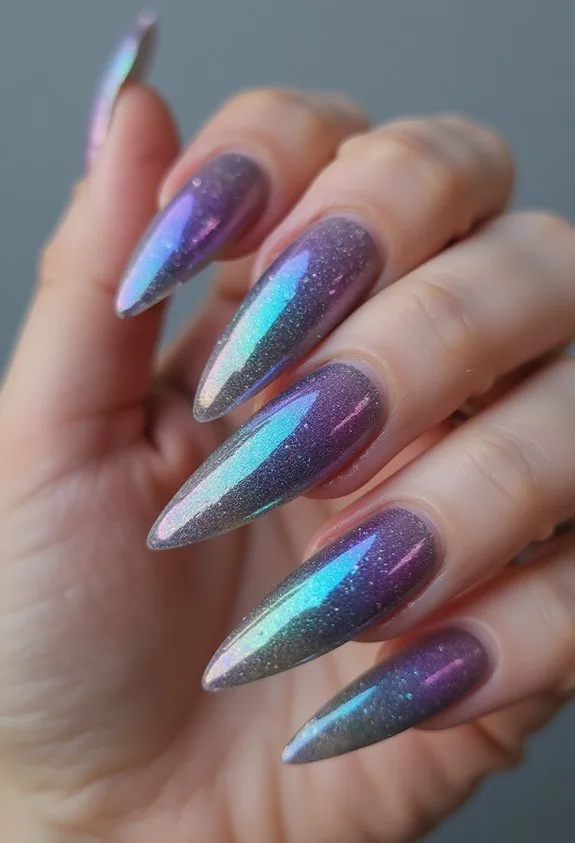
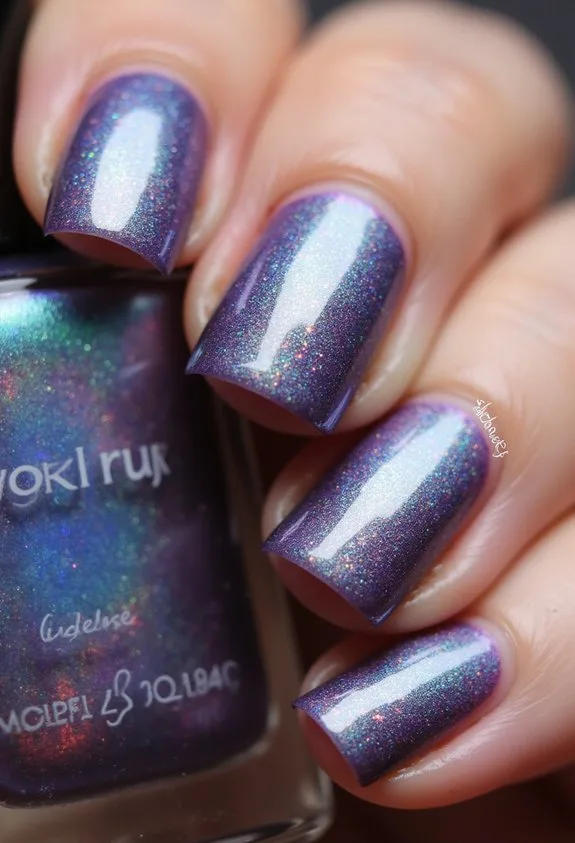
Cosmic Aura Nails: Purple With Starry Accents

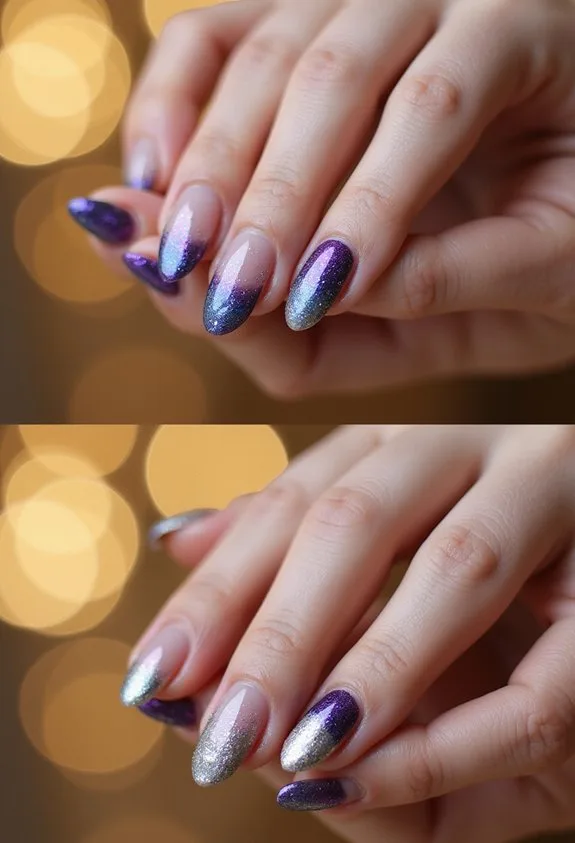
For those ready to amplify the aura nail aesthetic beyond pastels, cosmic versions introduce deeper purples and celestial sparkle. You’re transforming your nails into a starlit sky with this elevated design.
The technique combines layering and precision placement. Here’s what you’ll need:
- Deep purple base polish (think eggplant or grape)
- Translucent purple gel for dimensional aura effect
- Holographic or silver glitter for starry accents
- Fine detail brush for celestial placement
Start with your purple base, then apply the translucent gel in soft, blurred layers around the nail edges. This creates that signature ethereal glow. Add tiny stars and sparkles using holographic specks strategically placed across the design.
The result? Nails that capture nighttime mystery. You’re fundamentally wearing wearable art that shifts with light, making each angle unique and engaging.
Minimalist Aura Nails: Neutral Tones and Understated Glow
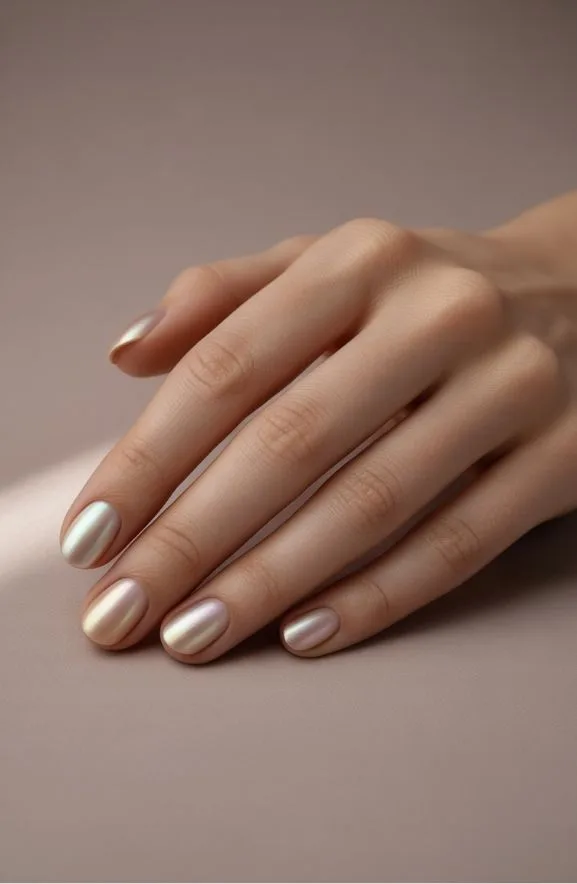
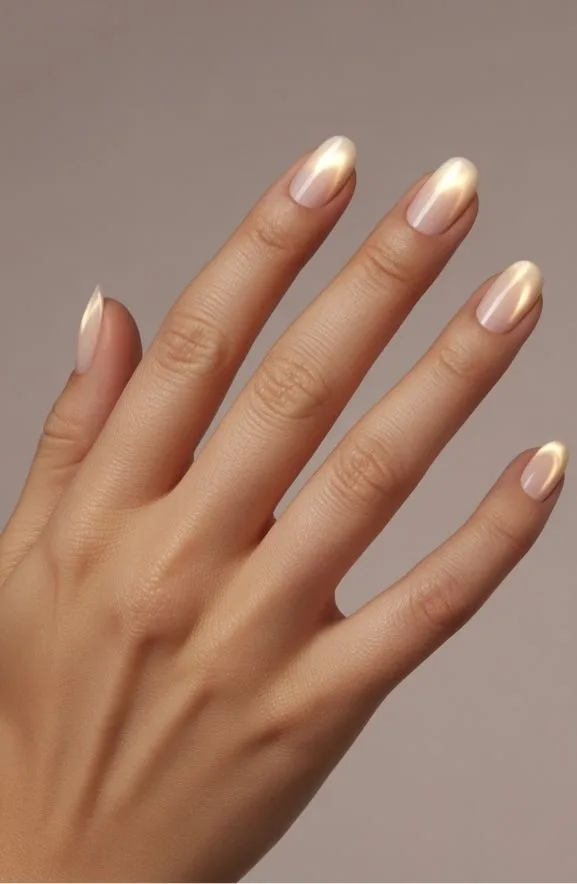
If you’re craving the ethereal aura effect without the drama of bold purples and sparkle, minimalist versions deliver sophisticated glow through restraint. Soft beiges, warm nudes, and pale pinks create the foundation. You’ll layer translucent shimmer over neutral bases for understated radiance. Think creamy champagne polish topped with barely-there holographic dust.
Minimalist aura nails work brilliantly for professional settings. They’re elegant without demanding attention. A single accent nail with delicate gradient effects adds dimension without overwhelming. Try brands like Essie or OPI’s nude collections for quality bases.
Nail artist Sarah Chen notes that “minimalist auras suit all skin tones when you select complementary neutrals.” Keep application clean and precise. Avoid heavy glitter or stark contrasts. Your nails whisper rather than shout, proving ethereal beauty thrives in simplicity.
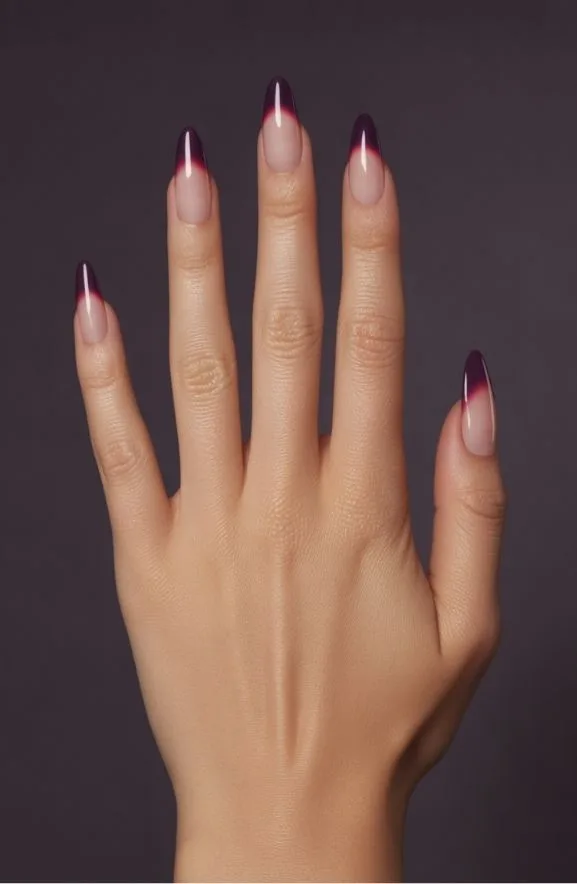
Jewel-Tone Aura Nails: Bold and Attention-Grabbing
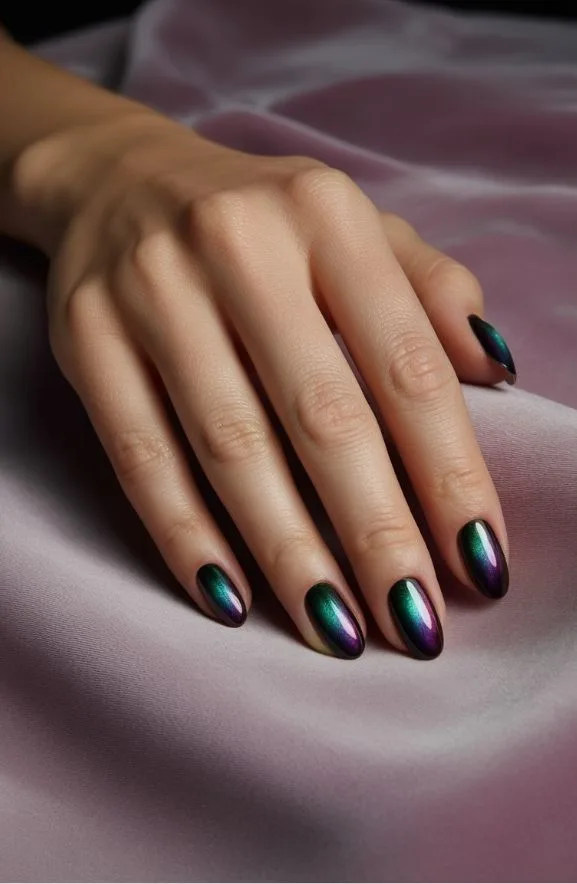
Ready to make your aura nails truly unforgettable? Jewel-tone aura nails deliver bold, attention-grabbing results that command every room you enter. These rich, saturated hues create stunning dimensional effects when paired with the aura technique’s signature glow.
Consider these key jewel-tone options:
- Emerald green creates luxurious depth and pairs beautifully with gold chrome accents
- Sapphire blue offers sophisticated elegance with iridescent shimmer effects
- Amethyst purple provides mystical appeal and catches light dramatically
- Deep ruby red makes powerful statements with reflective metallics
Layer these shades strategically using gradient techniques. Apply your jewel-tone base, then blend lighter chrome powders into the nail edges for that ethereal radiance. The contrast between dark, rich color and luminous shimmer creates professional-level dimension. You’ll achieve gallery-worthy results that last two to three weeks with proper gel application and top coat sealing.
Sunset Gradient Aura Nails: Warm Hues

Sunset gradient aura nails capture warmth and movement through layered warm hues that shift from deep orange to soft peach across your nail surface. You’ll blend these colors using a sponge technique, creating that coveted gradient effect. Start with your lightest shade as the base. Apply deeper tones gradually, building dimension with each layer.
The magic happens when you seal everything with a glossy topcoat. This amplifies the ethereal glow that defines aura nails. Try brands like Gelish or OPI for their rich pigmentation. A nail artist explains, “Sunset gradients work because warm tones naturally complement most skin undertones.”
You can enhance the effect by adding subtle iridescent shimmer to your tips. This catches light beautifully. The result? Nails that look professionally airbrushed and absolutely luminous.
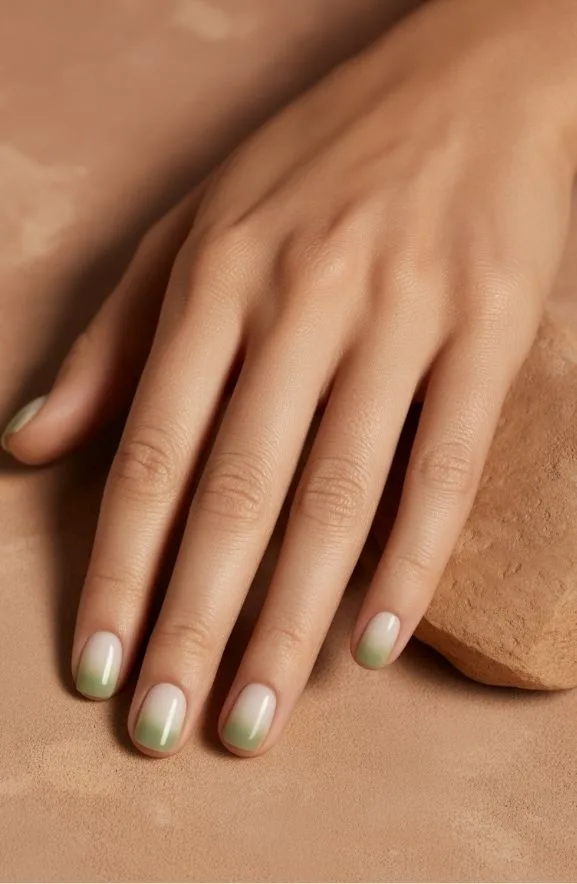
Ocean-Inspired Aura Nails: Cool Blues and Teals
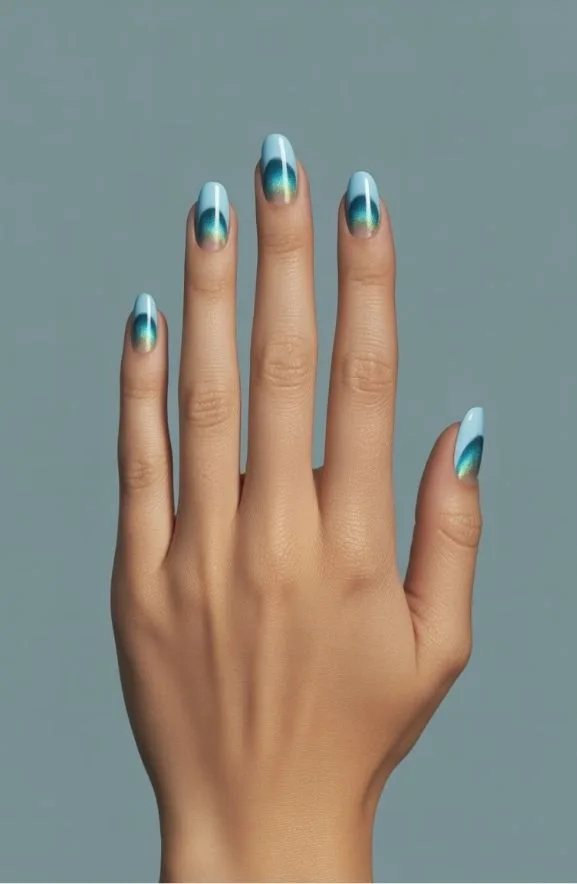
While warm sunset tones celebrate golden light, cool blues and teals invite you into ocean depths. These serene shades create an ethereal effect that’s absolutely stunning. You’ll love how ocean-inspired aura nails capture movement and dimension.
Consider these application techniques:
- Layer translucent teals over white bases for depth
- Blend multiple blue shades using sponging methods
- Add iridescent topcoats for shimmer and glow
- Use negative space to enhance the aura effect
Start with CND’s Shellac in “Frosted Seaglass” as your foundation. Layer Gelish “Ocean Treasure” in the center, then blend outward. The sponging technique creates those soft, diffused edges you’re after.
According to celebrity nail artist Tom Bachik, “Cool auras work best with strategic translucency.” Your nails deserve this sophisticated, calming aesthetic that mirrors water’s natural beauty and tranquility.
Metallic Gold Aura Nails: Glamorous Elegance
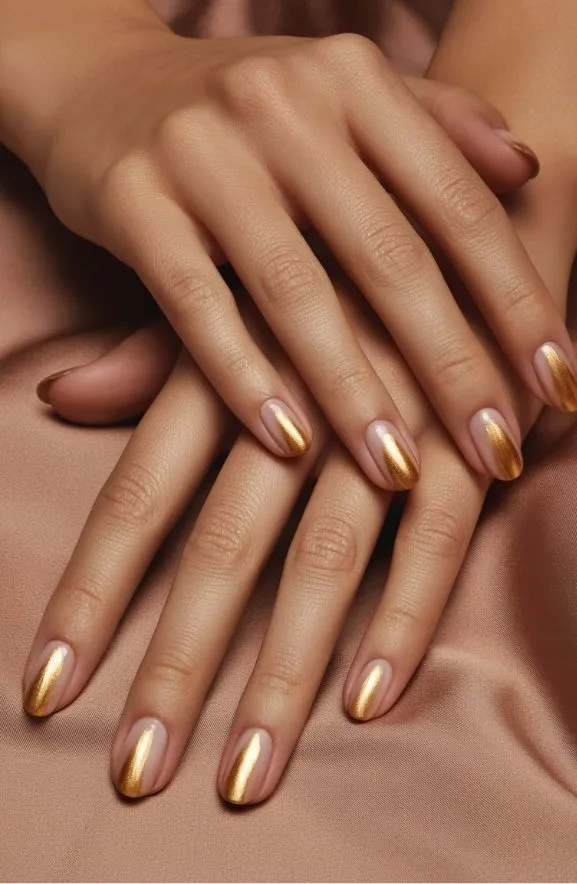
When you’re ready to elevate your nail game, metallic gold aura nails deliver pure sophistication. This technique combines shimmering gold pigments with soft, diffused edges that create an ethereal glow around your nail beds.
You’ll start with a neutral base coat, then layer translucent gold chrome powder using a velvet applicator. The key is building subtle dimension rather than creating bold contrast. Blend carefully where the gold meets your natural nail.
“Metallic aura effects work best on medium to long nails,” says celebrity nail artist Marcus Chen. The extended length gives you canvas space for gradient shifts.
Seal everything with a glossy topcoat for maximum luminosity. Your fingertips’ll radiate understated luxury and refined elegance that photographs beautifully in natural light.
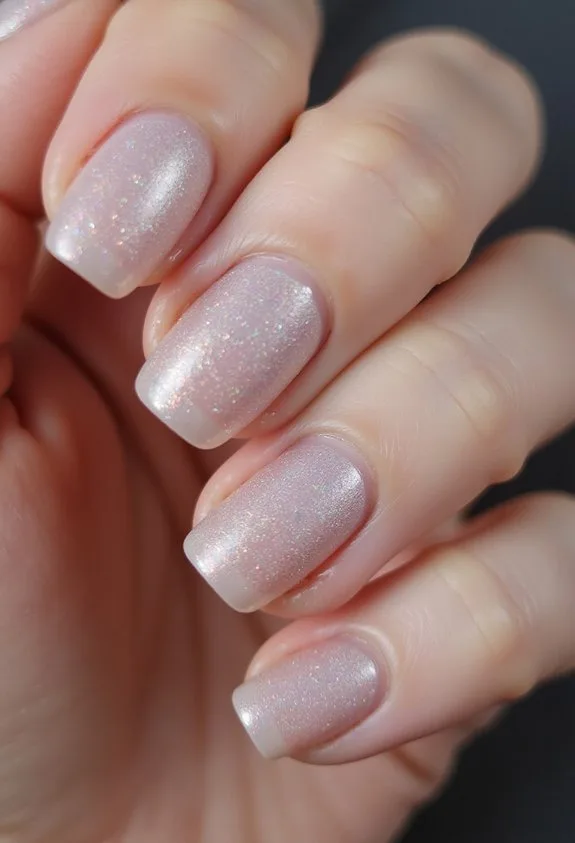
Rose Gold Aura Nails: Delicate Shimmer
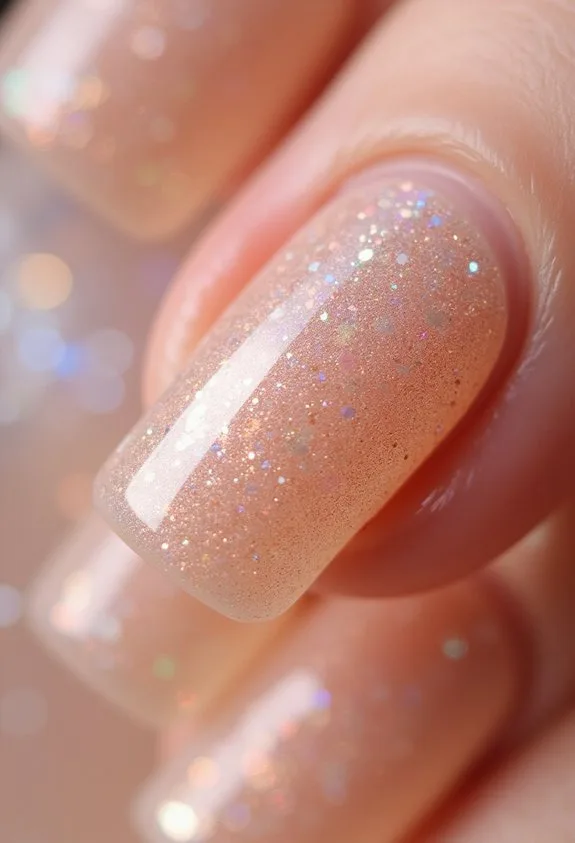
If you’re seeking a softer alternative to bold metallics, rose gold aura nails offer the perfect balance of warmth and subtlety. This sophisticated shade works beautifully on every skin tone, creating an ethereal glow that doesn’t overwhelm.
Rose gold captures light differently than traditional metallics. You’ll achieve that coveted dimensional effect through these techniques:
- Apply a nude or champagne base coat for depth
- Layer translucent rose gold polish with a soft brush
- Use gel top coat to amplify the shimmer
- Add fine glitter accents near the cuticle area
The result? Nails that catch light without screaming for attention. Celebrity nail artist Mei Chen notes, “Rose gold’s versatility makes it perfect for both everyday wear and special occasions.”
You’re creating understated elegance here. This shade transcends trends while maintaining contemporary appeal.
Rainbow Aura Nails: Celebrating the Full Color Spectrum

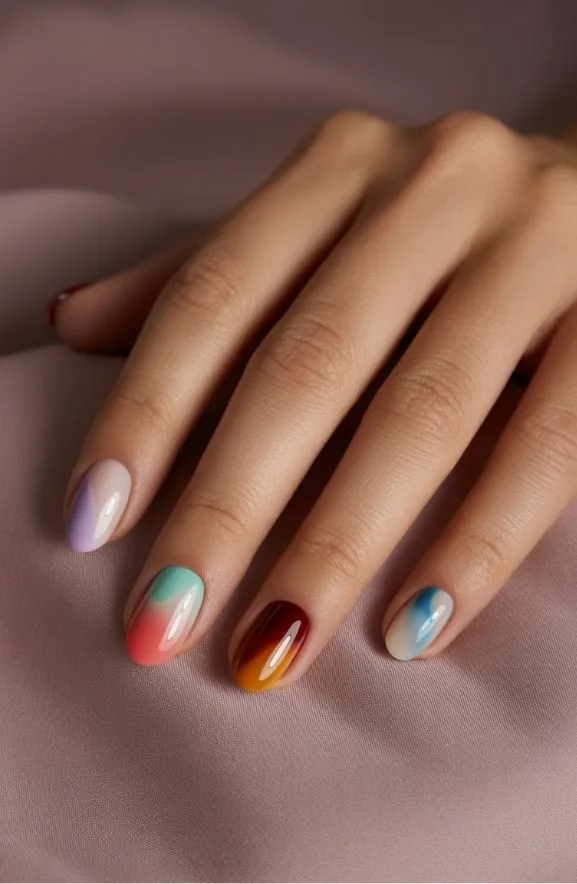
Because you’re ready to make a bold statement, rainbow aura nails deliver maximum impact through prismatic color layering. You’ll layer translucent polish in violet, blue, green, yellow, orange, and red across your nail surface, creating dimensional depth that shifts with light. Start with a pale base coat. Then apply each hue strategically, blending edges where colors meet for seamless changes. The result? A multifaceted nail art that celebrates full chromatic expression.
This technique works beautifully on longer nail shapes, where you have adequate canvas space. You’re essentially painting a miniature spectrum. Apply glossy top coat to amplify the light-refracting properties. Consider adding holographic flakes between layers for extra shimmer and complexity. The versatility is remarkable—you can customize which colors dominate based on your mood or outfit preferences.
Glitter-Infused Aura Nails: Extra Sparkle
Taking your aura nail design beyond solid color layering, glitter infusion adds textural dimension and light-catching drama to every angle. You’ll elevate the ethereal aesthetic with strategic sparkle placement.
Consider these glitter application techniques:
- Gradient blending: Layer fine glitter from nail tip toward the base, creating depth within your aura’s color shift
- Accent placement: Apply chunky glitter to specific nails for intentional focal points rather than full coverage
- Chrome-glitter fusion: Combine metallic powders with holographic glitter for multidimensional shimmer
- Gel encapsulation: Seal glitter between gel layers to prevent migration and preserve longevity
According to nail artist Maria Chen, “Glitter works best when it complements your aura’s existing color story, not overwhelms it.” You’re balancing luminosity with the design’s spiritual essence. Quality gel bases prevent chipping while sustaining that coveted glow.
Matte Aura Nails: Subtle Glow Underneath
While glitter commands attention with its sparkle, matte finishes offer a different kind of sophistication—one that whispers instead of shouts. You’ll create an understated elegance that feels modern and refined.
Matte aura nails feature a velvety texture that diffuses light softly across your nail surface. The subdued glow underneath creates dimension without obvious shimmer, giving you that coveted “no-makeup makeup” aesthetic for nails.
Layer sheer nude or soft pink bases with matte top coats. Add chrome dust to just your nail beds for gentle luminosity. This technique produces depth while maintaining restraint.
Celebrity nail artist Jin Soon explains: “Matte finishes showcase nail shape and hand structure beautifully.” You’re investing in timeless appeal rather than temporary trends.
Pair matte aura nails with minimalist jewelry. They’ll complement both professional settings and casual occasions seamlessly.
Chrome Aura Nails: Mirror-Like Finish
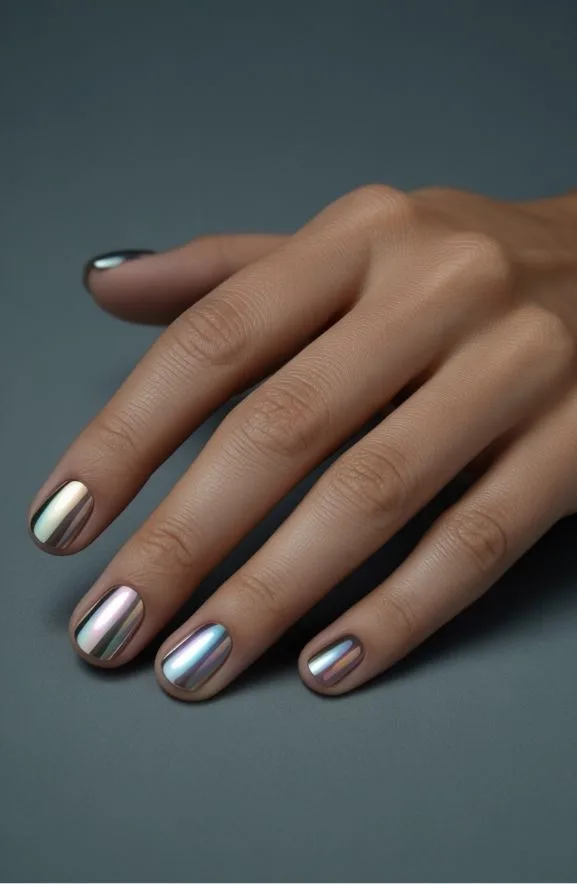
Chrome aura nails transform your fingertips into polished mirrors—a bold upgrade from matte’s understated elegance. You’ll achieve that coveted reflective finish through specialized chrome powders and precise application techniques.
- Apply a gel base coat, then use a tacky topcoat for ideal powder adhesion
- Buff chrome powder onto nails using circular motions with a soft applicator
- Seal everything with a glossy topcoat for maximum shine and durability
- Combine chrome accents with subtle aura gradient backgrounds for dimensional depth
The mirror-like effect catches light beautifully, creating an almost liquid appearance across your nails. You’re fundamentally wearing portable jewelry. Professional nail technicians recommend Kiara Sky or Lechat products for superior chrome results. The finish demands steady hands and quality tools, but the payoff? Undeniably stunning nails that command attention.
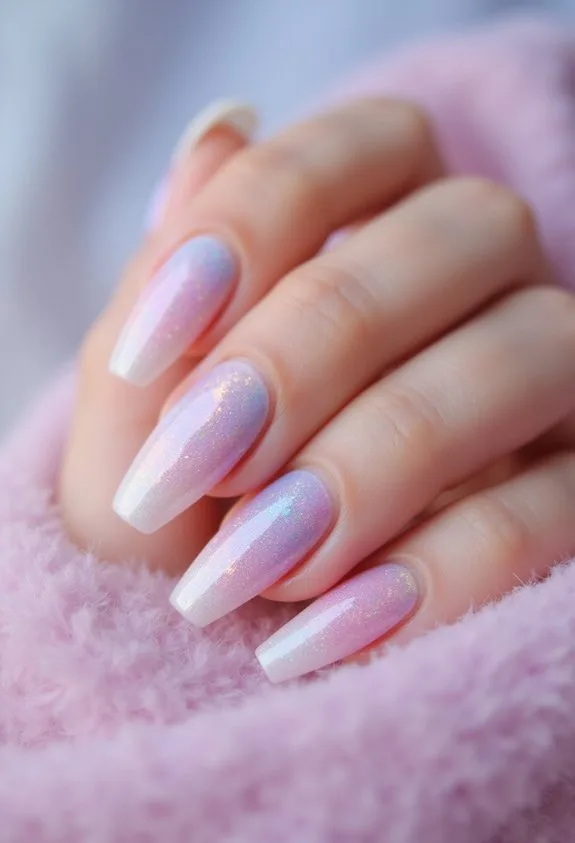
Ombre Aura Nails: Transitioning Between Two Shades

If you’re ready to master gradient artistry, ombre aura nails deliver a sophisticated color shift that’ll elevate your entire look. This technique blends two complementary shades seamlessly across your nail surface, creating depth and dimension that catches light beautifully.
Start with a base color on your nail tip, then apply your second shade to the nail bed. Use a makeup sponge to dab and blend where the colors meet, creating that signature gradient effect. Build layers gradually for smoother progressions.
Professional colorists recommend using gel polishes for ombre designs since they blend without streaking. The aura effect intensifies when you select shades with similar undertones—think dusty rose to mauve or soft gold to champagne.
Apply a glossy topcoat to enhance the ethereal quality. Your gradient nails’ll showcase stunning color movement with every hand gesture.
Marble Pattern Aura Nails: Swirled Design
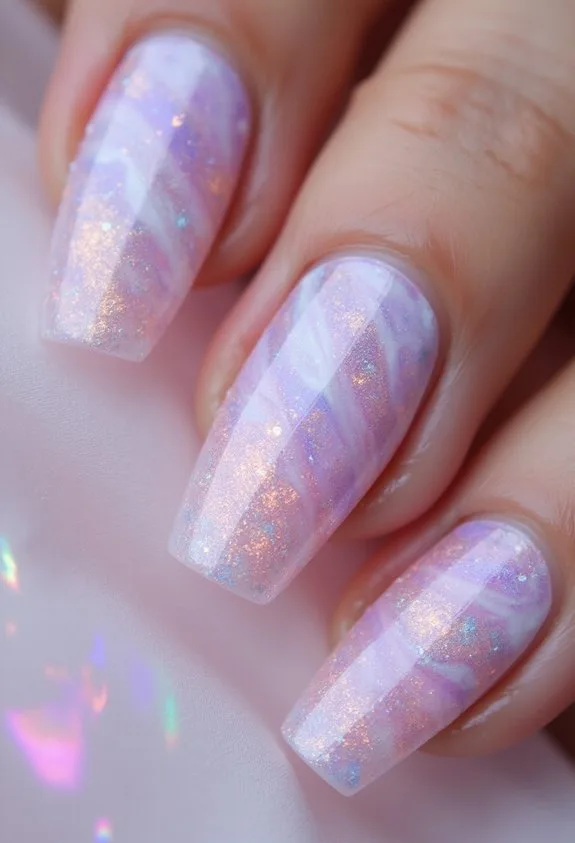
Marble aura nails transform your manicure into an artistic masterpiece through swirled, veined patterns that mimic natural stone. You’ll create stunning visual depth by layering complementary polish shades with intentional blending techniques.
- Apply a neutral or pastel base coat as your foundation layer
- Drop contrasting polish onto the nail and swirl using a thin brush or dotting tool
- Blend edges with a sponge for seamless color shifts
- Seal with glossy or matte topcoat depending on desired finish
Professional nail technician Maria Chen notes, “The key’s controlling your swirl direction—consistent patterns feel deliberate rather than chaotic.” You’re essentially painting organic marble veining that catches light beautifully. Start with two-shade combinations before attempting complex multi-color designs. Practice on nail wheels first.
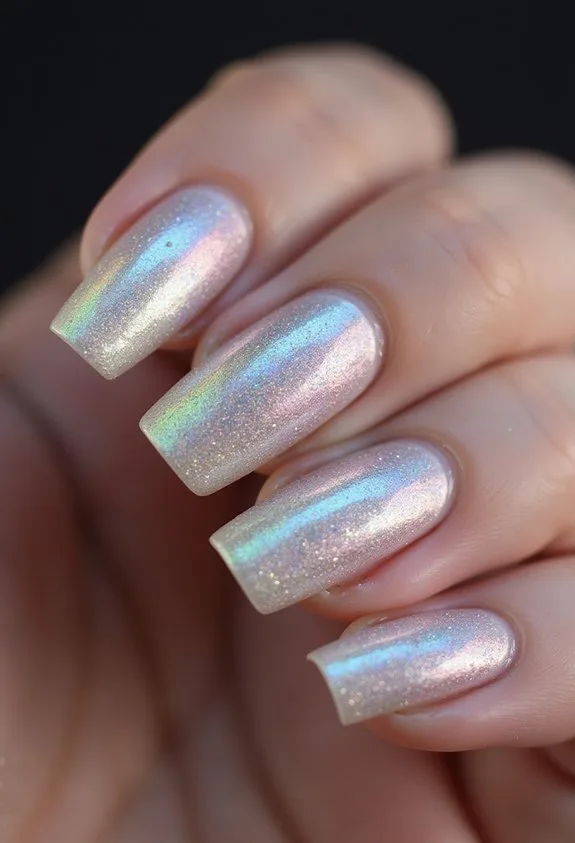
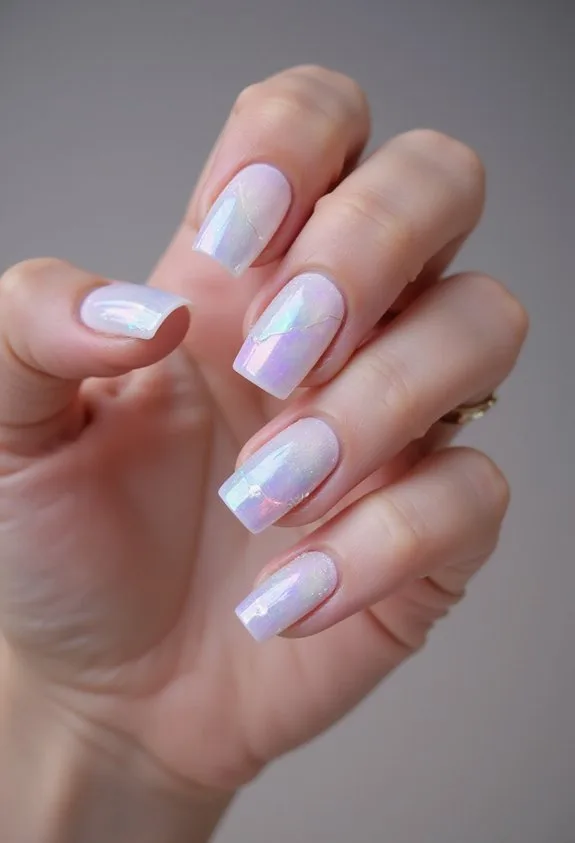
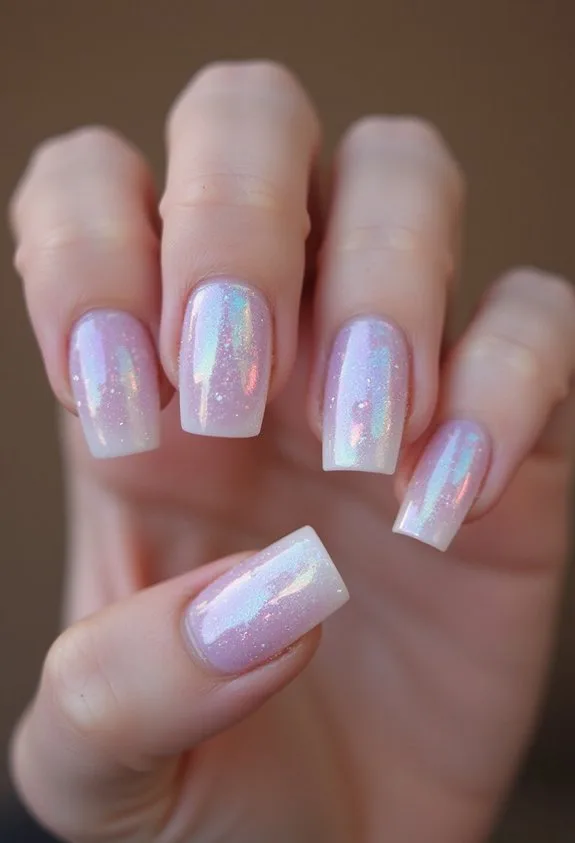
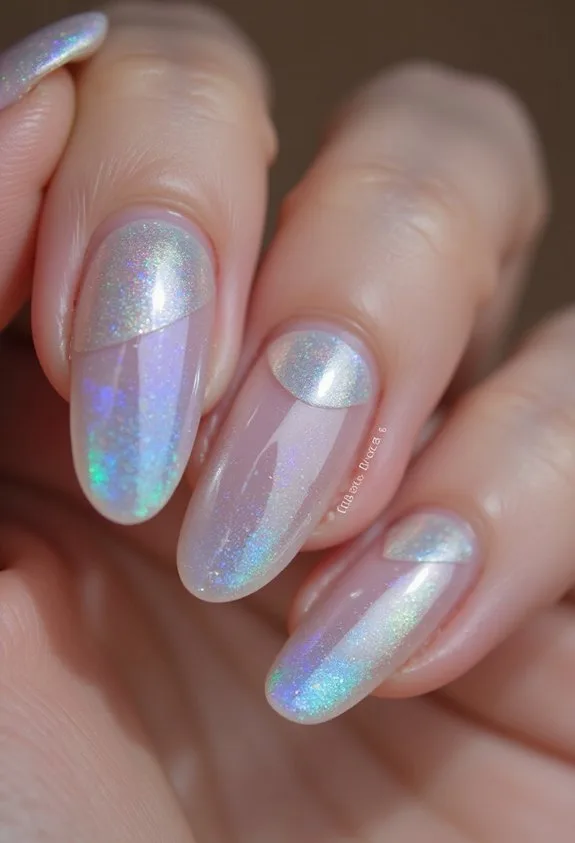
Holographic Aura Nails: Shifting Colors in Light

Every nail artist’s dream involves creating nails that shift and shimmer with every movement. Holographic aura nails deliver exactly that magic. You’ll apply a holographic powder or chrome finish over your base color, creating an iridescent effect that transforms under different lighting. The shimmer changes from pink to blue to green as you move your hand.
Start with a glossy nude or soft pink base. Layer holographic pigment using a fluffy brush in circular motions. Seal everything with a thick gel topcoat for protection and shine intensity. The result? Nails that catch light beautifully from every angle.
Celebrity nail artist Jin Soon recommends: “Holographic effects work best on longer nail shapes where light can really play across the surface.”
You’ll love how dimensional and ethereal this technique looks.
Nail Art Combinations: Aura Meets Florals
Since holographic auras create such stunning dimension, combining them with delicate florals takes your nail art to another level. You’re layering two distinct aesthetics that complement each other beautifully.
Consider these combinations:
- Pastel aura bases with hand-painted cherry blossoms for soft femininity
- Chrome aura accents paired with botanical line art on nude backgrounds
- Rainbow holographic tips featuring pressed flower inclusions for dimensional texture
- Gradient aura foundations supporting watercolor floral designs in muted tones
Start with a quality holographic powder like Lechat Chrome or Moyra Mirror Effect. Layer delicate florals using thin brushes or stamping plates for precision. The contrast between ethereal auras and botanical details creates visual interest without overwhelming your nails.
Pro tip: Apply flowers after your aura base fully cures, ensuring crisp details. This combination works exceptionally well for spring events and wedding aesthetics.
Aura Nails With Negative Space: Modern Edge
When you leave strategic bare patches on your nails, you’re creating a contemporary look that balances the ethereal quality of aura effects with clean, minimalist design. This technique combines soft gradient colors with intentional bare spaces, producing visual interest through contrast.
You’ll apply your aura base using sheer pinks and purples, then deliberately expose nail bed sections. The negative space interrupts the gradient flow, creating architectural definition. Try positioning bare patches along the nail’s sides or center for maximum impact.
Nail artist Sarah Chen notes, “Negative space elevates aura designs by adding sophistication and modernity.” Layer translucent gel polishes like OPI’s “Do You Have This Color in Stock-holm” over nude bases.
This approach works especially well on shorter nails, where minimalism feels intentional rather than accidental.
Clear Base Aura Nails: Understated Beauty
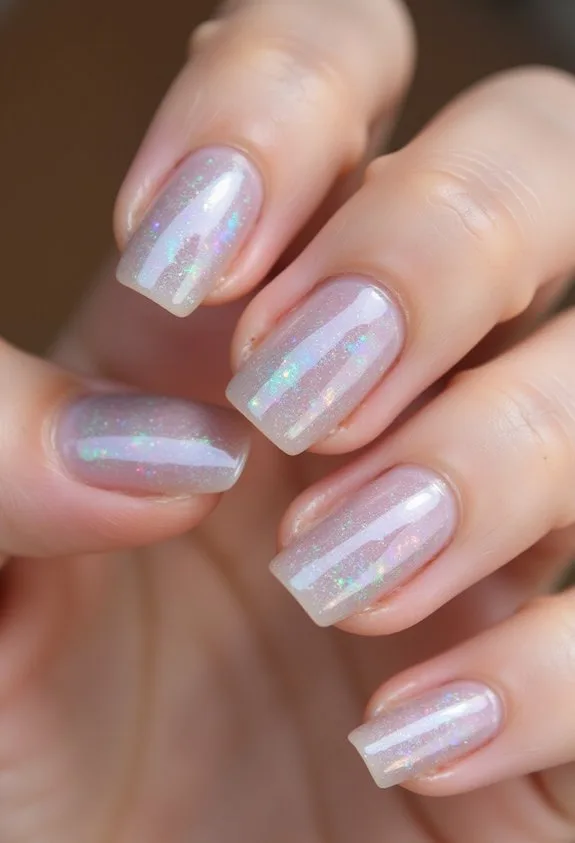
Most nail designs rely on opaque bases, but clear base aura nails flip that approach entirely—you’re building soft color gradients directly over your natural nail or a sheer nude foundation. This technique celebrates your nail’s natural beauty while adding ethereal dimension.
Here’s how to master this look:
- Apply a clear gel base coat to lock in moisture and create a smooth canvas
- Layer translucent gel colors in soft pastels, blending edges where hues meet
- Use a dry brush technique to deposit pigment gradually and control intensity
- Seal with a glossy topcoat for seamless, luminous finish
The result? Nails that glow from within. Brands like ORLY’s gel collections work beautifully for this approach. You’ll achieve sophisticated understated elegance that feels effortlessly polished without demanding attention.
Double-Color Aura Nails: Creating Depth and Dimension
While clear base aura nails offer understated elegance, layering two complementary colors elevates the effect dramatically—you’re building visual depth that catches light from multiple angles. Choose colors that contrast subtly: soft pink with lavender, or nude with champagne shimmer. Apply your base coat first, then add the second shade using a thin brush or sponging technique for seamless blending. The key is feathering where colors meet. Try OPI’s “Pink In My Pajamas” layered under “Bubble Bath” for ethereal softness. Celebrity nail artist Zoya Sharipova notes: “Double-color auras work because they mimic how light naturally filters through translucent surfaces.” Seal with a glossy top coat to amplify the dimensional effect. This technique transforms your nails into miniature light-catching artwork.
Aura Nails on Short Nails: Proving Size Doesn’t Matter
Because aura nail designs rely on light-catching translucence rather than length, short nails become the perfect canvas for this technique—you’re actually working with built-in advantages. The shimmer displays beautifully on compact surfaces. Your fingertips showcase dimensional color shifts without overwhelming proportions.
Consider these styling approaches:
- Soft pastel bases with iridescent topcoats create ethereal effects on shorter beds
- Glossy finishes amplify light reflection across compact nail canvases
- Gradient placements from cuticle to tip maximize visual flow
- Strategic glitter placement enhances dimension without requiring extended lengths
Celebrity nail artist Jin Soon notes, “Short nails demand precise technique—every millimeter counts.” Apply translucent gel polishes in thin layers, building gradual color shifts. The CND Shellac system works exceptionally well here. Your short nails become sophisticated statements, proving that aura designs transcend length requirements entirely.
Long Stiletto Aura Nails: Maximum Drama
Stiletto shapes transform aura nail designs into bold, statement-making art. Your elongated canvas amplifies the ethereal glow that makes aura nails alluring. The pointed silhouette stretches color gradients vertically, creating dimensional depth that shorter lengths simply can’t achieve.
You’ll want to apply a creamy base coat like Gel-X tips in clear or soft pink. Layer iridescent chrome powders—brands like Notox and Revel offer superior color-shifting pigments. Build your aura effect with pastel purples, soft blues, and shimmering whites, blending edges seamlessly.
“Stilettos demand precision blending,” explains nail artist Marcus Chen. “The length showcases your gradient work dramatically.”
Your drama multiplies with strategic placement of holographic flakes near the tips. Seal everything with a glossy top coat for maximum impact. Long stilettos prove aura nails deserve center stage.
Aura Nails on Square Shape: Balanced Elegance
Sophistication meets wearability when you choose square nails for your aura design. This shape grounds your ethereal aesthetic without sacrificing visual impact. Square aura nails offer the perfect canvas for those iridescent, color-shifting effects you’re craving.
- Enhanced surface area showcases gradient shifts smoothly
- Structured edges complement both casual and formal settings
- Durability increases compared to delicate pointed styles
- Versatile length options range from short to medium
The geometric precision of square nails allows your aura’s luminous qualities to shine. You’ll notice how light catches the multidimensional pigments differently across the flat surface. Choose brands like Essie or Cirque Colors for their advanced chrome and holographic formulas. This balanced approach delivers ethereal elegance with practical staying power.
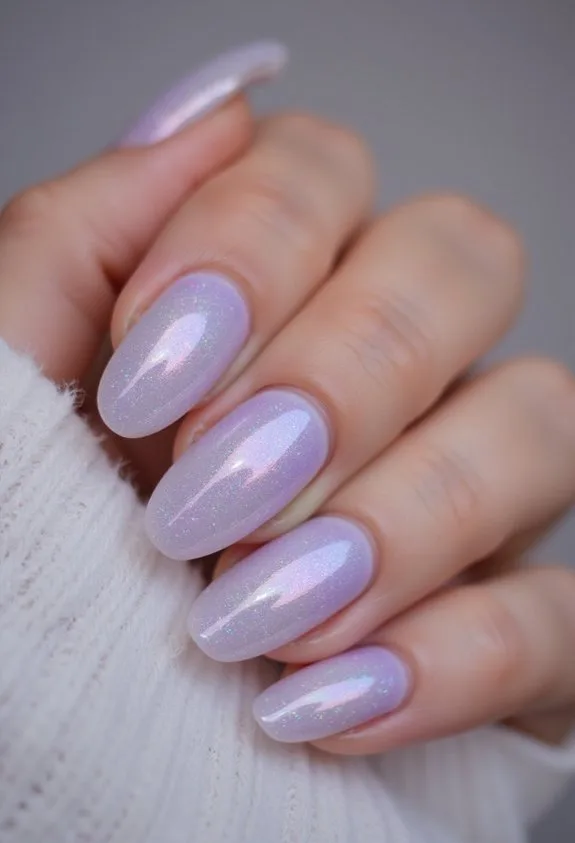
Almond-Shaped Aura Nails: The Perfect Canvas
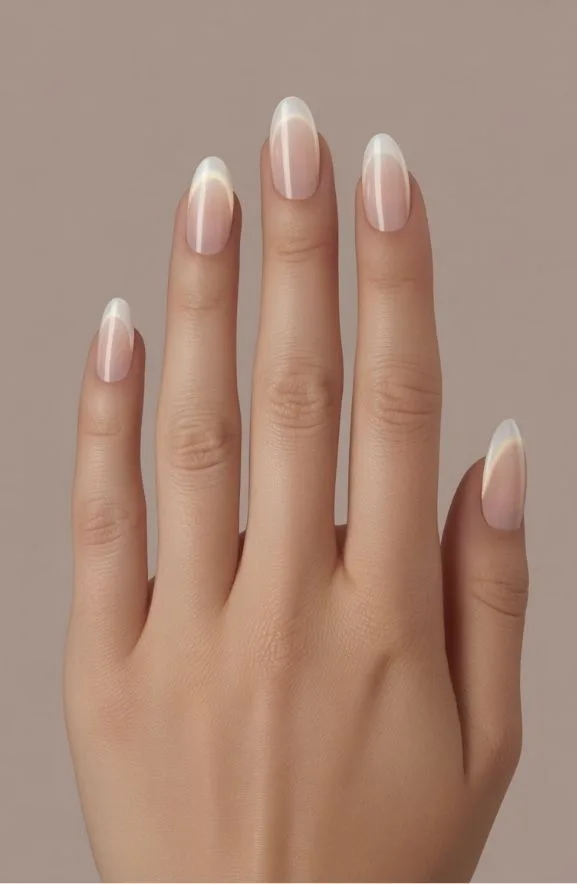
When you’re ready to elevate your aura nail game, almond-shaped nails deliver the ideal balance between elegance and practicality. This silhouette elongates your fingers beautifully. The tapered design accommodates intricate aura nail art without overwhelming your nail bed.
You’ll find that almond shapes work perfectly with gradient chrome finishes and holographic accents. Apply a nude or soft pink base layer first. Layer translucent pastels—think lavender, peach, and pale blue—using a sponging technique for that signature ethereal glow.
Consider products like Beetles Gel Polish for smooth application and Layla Cosmetics Chrome Powders for dimensional shimmer. A nail technician explains: “Almond nails showcase color shifts exceptionally well because of their natural curve.”
Seal everything with a quality glossy topcoat. Your aura nails’ll catch light from every angle.
Prepping Your Nails: The Foundation for Perfect Aura Glow
The foundation you build now determines whether your aura nails’ll truly glow or fall flat. You’re setting yourself up for success by taking these prep steps seriously.
Start with these essential preparation techniques:
- Push back cuticles gently using a wooden stick, creating clean nail beds for seamless polish application
- File nails into your desired almond shape, working at forty-five-degree angles for smooth, even edges
- Buff the nail surface lightly to remove shine and improve polish adhesion greatly
- Apply a hydrating base coat like Zoya’s Naked Manicure, which protects while creating ideal color grip
Moisturize your hands thoroughly before application. Dehydrated skin interferes with polish longevity and vibrancy. You’ll notice immediate differences in how beautifully your aura polish settles and maintains its ethereal shimmer throughout wear.
Best Aura Polish Brands: Duochrome, Longevity, and Price Compared
How do you choose an aura polish that delivers genuine color-shifting magic without draining your budget? You’ll find three key factors matter most: duochrome quality, wear longevity, and overall value.
High-end brands like Cirque Colors and Beetle offer exceptional duochrome effects lasting three weeks. Mid-range options including Essie and OPI provide solid color-shifting for two-week wear. Budget-friendly alternatives like Wet n Wild deliver surprising duochrome payoff lasting seven to ten days.
“Investment polishes justify their cost through superior pigmentation and formula stability,” explains nail technician Marcus Chen. For everyday wear, mid-range selections balance quality and affordability. Premium brands suit special occasions. Budget options work perfectly for trend-testing without commitment. Your choice depends on frequency of application and desired longevity.
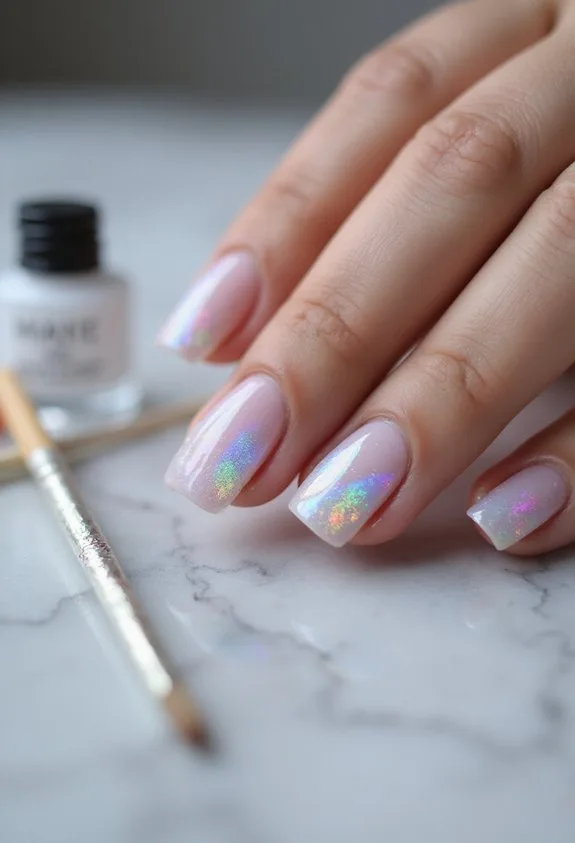
Application Techniques to Achieve the Ethereal Glow
To access that signature ethereal shimmer, you’ll need to master the foundational application method—because even premium aura polish won’t deliver its full color-shifting potential without proper technique.
The secret lies in layering and light reflection. Follow these essential steps:
- Apply a smooth base coat to create an even foundation for color payoff
- Use thin, deliberate strokes with your brush at a 45-degree angle for ideal shimmer distribution
- Build coverage gradually across two to three coats rather than applying one thick layer
- Finish with a glossy top coat that amplifies the duochrome effect
Professional colorist Maya Chen notes, “Patience during application transforms ordinary polish into wearable art.” Your angle matters tremendously. The ethereal glow emerges when light dances across those carefully applied layers, revealing hidden color dimensions beneath the surface.
Layering Tips for Maximum Color Dimension

Building on that foundational technique, strategic layering is what truly discloses aura polish’s transformative power. You’ll want to start with a sheer base shade—think soft rose or champagne—that establishes your glow foundation. Then add a deeper complementary tone on top. This creates dimension that catches light beautifully.
Layer translucent metallics over cream bases for ethereal depth. Apply thin coats rather than one thick application. This prevents muddiness and lets colors interact naturally. As nail artist Maya Chen explains, “Layering requires patience—each coat should be nearly dry before adding the next.”
Try pairing peachy undertones with iridescent toppers. You’re building visual interest, not covering mistakes. The key involves restraint: two to three strategic layers maximum. This approach gives you that coveted multidimensional finish without overwhelming the nail’s natural luminosity.
Sealing the Glow: Why Top Coat Makes All the Difference

While your layered aura nails look stunning, they’ll only stay that way with the right top coat. A quality glossy or matte finish seals your color work and extends wear time considerably. You’re protecting your investment when you apply that final layer correctly.
Consider these essential top coat factors:
- UV protection features prevent color fading and yellowing over time
- High-gloss formulas enhance dimension and create that coveted luminous effect
- Matte options offer sophisticated alternatives for modern aura designs
- Quick-dry technology saves time without compromising durability
Expert nail technician Maria Chen states, “Top coat application determines whether your aura nails last one week or three.” Apply in thin, even strokes, avoiding thick pooling at the edges. You’ll notice immediate depth enhancement and lasting brilliance. Your ethereal design deserves that protective seal for maximum visual impact and longevity.
How Long Do Aura Nails Last on Natural Nails?

Your aura nails’ lifespan depends on several factors beyond that protective top coat you’ve just applied. With natural nails, expect your aura manicure to last two to three weeks before showing noticeable wear. Your nail growth rate matters considerably here. Faster-growing nails reveal the natural nail bed sooner. Daily activities also impact longevity. Frequent water exposure weakens adhesion between layers. As nail technician Sarah Chen explains, “Proper application technique extends wear time substantially.” Using cuticle oil daily strengthens the nail-polish bond. Avoid harsh chemicals when possible. Your lifestyle determines everything. Gentle hands preserve that ethereal glow longer. Consistent moisturizing prevents chipping at edges. Environmental factors—humidity, temperature, sun exposure—subtly affect durability. Quality products like gel-infused top coats add extra staying power. You’re investing in both beauty and maintenance.
Quick Touch-Ups: Repairing Chipped Aura Nails at Home
A small chip doesn’t mean you’ve lost that ethereal glow—you can fix it yourself in minutes.
You’ll need these essentials for quick repairs:
- Nail file with fine grit for smoothing edges
- Gel polish matching your original aura shade
- UV lamp for curing between layers
- Top coat sealer for protection and shine
Start by filing the chipped area at a 45-degree angle. This creates a seamless blend with existing polish. Apply a thin gel base layer over the damage, curing for thirty seconds. Add your color coat carefully, feathering edges outward. A professional manicurist once noted, “Precision matters more than speed during repairs.” Finish with glossy top coat for that luminous dimension.
These touch-ups extend your manicure’s lifespan considerably, keeping your nails looking salon-fresh between appointments and maintaining that coveted ethereal aesthetic.
Removing Aura Nails Without Damaging Natural Nails
Removing gel aura nails requires patience and the right technique—rushing this process risks peeling away layers of your natural nail. You’ll want to soak your nails in acetone for 10-15 minutes using a glass bowl, not plastic. Gently file the top glossy layer away first. This reduces soaking time considerably. Once softened, use a cuticle pusher—not your fingers—to lift the gel carefully from edges inward. A nail technician advises, “The key’s working slowly around the entire nail perimeter before attempting full removal.” Pat nails dry completely afterward. Apply nourishing cuticle oil and a strengthening base coat immediately. Your natural nails will thank you. This method preserves nail integrity while keeping them looking ethereal for your next aura design.
At-Home vs. Professional Aura Nail Application
Where should you invest your time and money when creating aura nails? The answer depends on your skill level, budget, and desired results.
Consider these key factors:
- Professional application delivers salon-quality finishes using advanced airbrush technology and premium products like Gelish or OPI.
- At-home application requires starter kits costing $50–$150, including gel polish, UV lamps, and brushes.
- Time investment varies: professionals complete sets in 60–90 minutes; DIY takes 2–3 hours initially.
- Maintenance costs differ greatly—professional fills run $30–$50 every 3 weeks versus $10–$20 for home touch-ups.
Professional technicians possess expertise in color blending and placement precision. At-home application offers convenience and creative control. We can’t get enough of either approach—your choice reflects personal priorities and comfort level with nail artistry techniques.
Budget-Friendly Aura Nail Alternatives to Try
If you’re drawn to aura nails but hesitant about professional pricing, several budget-friendly alternatives can deliver that ethereal, blended aesthetic without draining your wallet. You can achieve similar results using drugstore gel polishes and a basic UV lamp. Layer soft pastels and metallics, blending edges with a sponge for that signature gradient effect. Nail artist Sarah Chen notes, “Budget builders can recreate aura nails using affordable brands like Essie or Sally Hansen’s gel collections.” Try ombre techniques with regular polish and a makeup sponge instead. Invest in quality tools rather than premium products. You’ll need a dotting tool, thin brush, and patience. Semi-sheer polishes naturally create that luminous quality auras demand. Experiment with chrome powders over base colors for dimensional shine.
Seasonal Color Palettes for Year-Round Aura Nails
As the seasons shift, your aura nail palette can transform to match nature’s ever-changing mood. Each quarter brings distinct color opportunities that enhance your natural glow.
Consider these seasonal approaches:
- Spring: Pastel pinks, soft yellows, and mint greens reflect fresh energy and renewal vibes
- Summer: Bold corals, vibrant teals, and shimmering golds capture sun-kissed radiance and warmth
- Fall: Warm terracottas, deep burgundies, and amber tones mirror harvest abundance and depth
- Winter: Cool silvers, icy blues, and pearl whites embody crystalline elegance and sophistication
Pro tip: Layer complementary shades within each season for dimensional depth. Use CND Shellac in seasonal collections for lasting color accuracy. Our stylists recommend blending translucent topcoats with metallic accents, creating that ethereal luminosity you’re after. This rotation keeps your aura nails relevant, intentional, and visually alluring year-round without feeling dated or monotonous.
Aura Nails for Special Occasions and Events
While seasonal rotations keep your everyday aura nails fresh and intentional, special occasions demand elevated designs that capture attention and reflect the significance of the moment. Consider layering holographic pigments with metallic accents for weddings, creating dimensional depth that catches light beautifully. For galas, you’ll want to incorporate chrome powder finishes paired with subtle glitter placement for sophisticated shimmer. A celebrity nail artist notes, “Special occasion nails should enhance your overall look without overwhelming your aesthetic.” Apply gel base coats with precision before adding aura effects. Graduation calls for bold, statement-making gradients. Holiday parties benefit from rich jewel tones blended with pearl finishes. Each event deserves intentional color choices reflecting the occasion’s energy and your personal style.
Keep Your Aura Nails Glowing: Daily Care and Maintenance
Your aura nails’ luminous finish demands consistent care to maintain that ethereal glow you’ve worked hard to achieve. Daily maintenance keeps your manicure looking fresh and vibrant.
Follow these essential care steps:
- Avoid prolonged water exposure, which dulls the reflective shimmer coating
- Apply cuticle oil twice daily to prevent lifting and maintain nail flexibility
- Use gentle, non-abrasive cleansers around the nail edges
- Wear gloves during household tasks to protect against chipping
Keep your nails moisturized. Dry nails become brittle and crack easily, compromising that luminous quality. Professional nail technician Maria Chen recommends, “Hydrated nails hold color and shimmer far longer than dehydrated ones.”
Invest in quality top coats specifically formulated for gel-based aura finishes. These products seal in that magical glow while providing protective barriers against everyday wear and environmental stressors that fade polish prematurely.
Cost vs. Lifespan: Why Aura Nails Outperform Regular Manicures
Maintaining aura nails requires investment, but here’s where you’ll see real returns: they’ll outlast traditional manicures by weeks, not days. You’re looking at three to four weeks of wear versus seven to ten days with regular polish.
That longevity matters financially. One aura application costs around $50–$75, but it eliminates weekly salon visits. Traditional manicures at $25–$35 weekly add up quickly. Over a month, you’ll spend $100–$140 on regular manicures versus one $65 aura treatment.
The durability comes from gel-infused formulas and UV-cured technology. Your nails resist chipping, fading, and peeling during daily activities. You’ll maintain that luminous shimmer without constant touch-ups.
Consider this: fewer appointments mean less damage to your nail beds. Investment upfront delivers genuine savings and healthier nails long-term.
Frequently Asked Questions
Can I Achieve Aura Nails With Regular Nail Polish or Do I Need Special Products?
You can achieve aura nails with regular polish, but you’ll get better results with gel polish or special ombre products. You’ll need a sponge for blending and patience to create that ethereal, gradient effect you’re looking for.
How Do Aura Nails Compare in Cost to Gel Manicures and Traditional Polish Applications?
You’ll typically spend more on aura nails than traditional polish, but they’re comparable to gel manicures. You’re investing in specialized products and skilled application techniques that create that ethereal effect, making them a premium nail service option.
Will Aura Nails Work on Very Short Natural Nails or Only Longer Lengths?
You can absolutely get aura nails on short natural nails. They’ll work beautifully on any length you’ve got. Your technician’ll apply the ethereal design directly to your nail bed, creating that stunning aura effect regardless of your nail length.
What’s the Difference Between Aura Nails and Similar Iridescent or Chrome Nail Finishes?
You’ll find that aura nails create a multi-dimensional, holographic glow that shifts across your nails, while chrome finishes offer a flat, mirror-like reflection. Aura nails’ ethereal effect is more dynamic and magical compared to iridescent options’ limited color-shifting range.
How Can I Prevent My Aura Nails From Losing Their Shimmer and Glow Quickly?
You’ll preserve your aura nails’ shimmer by applying a quality top coat regularly, avoiding harsh chemicals, and protecting them from excessive sun exposure. You should also moisturize your cuticles and handle your nails gently to maintain their ethereal glow.
Conclusion
You’ve got everything you need to rock aura nails that genuinely turn heads. Whether you’re drawn to soft pastels or cosmic purples, these iridescent designs work year-round. Investment in quality products like holographic powders and sealants keeps your manicure glowing longer than standard polish. You’ll notice the shimmer catches light differently each day. Start with a minimalist approach if you’re new to the trend—it’s easier to layer complexity once you’ve mastered the base technique.