
Elegant nails are calling your name this season, and this refined aesthetic is genuinely breathtaking. The sophisticated finish elevates your entire appearance with understated luxury and grace. Pure class wrapped around your fingertips, honestly.
What you’re getting with elegant nails is that coveted polished look that screams confidence without effort. Soft finishes, thoughtful details, and beautiful colour choices create an expensive feel naturally. They work brilliantly whether you’re dressed up or keeping it casual.
Check out these 40 stunning elegant nail designs that’ll make you feel absolutely gorgeous. Each one celebrates refinement and beauty in its own unique way. Scroll through and find the look that makes your heart skip a beat.
Table of Contents
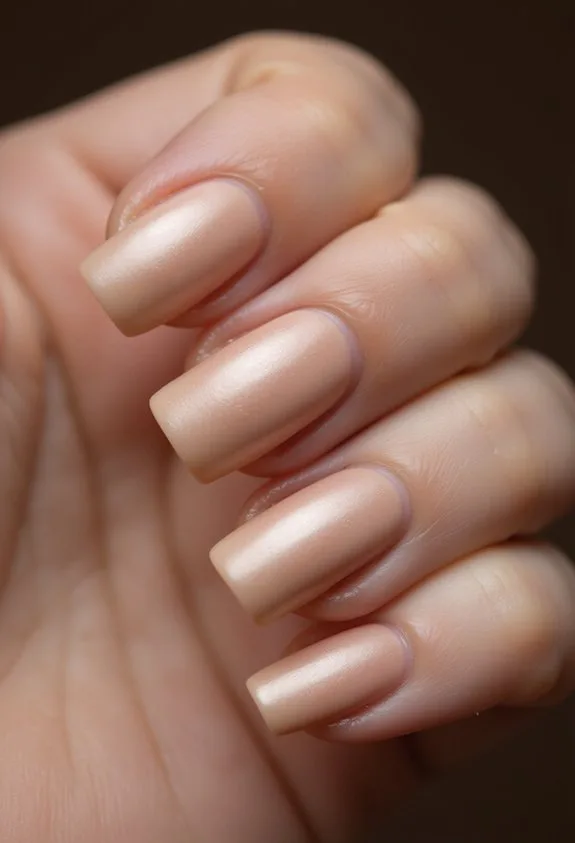
- Soft Nude Nails With Pearl Finish
- Classic French Tips With Thin Gradient
- Creamy Vanilla Nails in Glossy Polish
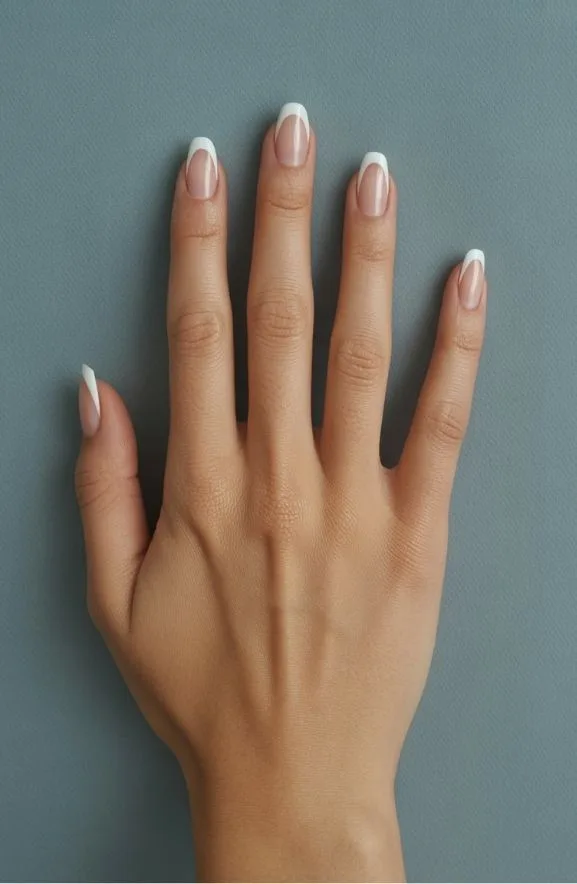
- Sheer Pink With Crisp White Tips
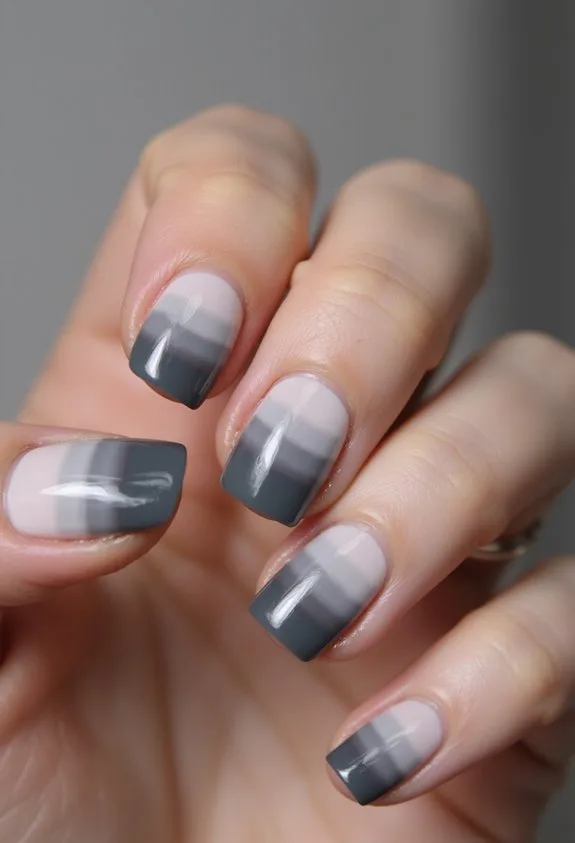
- Soft Gray With Luminous Pearl Accent
- Minimalist White Nails With Single Line Detail
- Timeless Red Nails in High-Shine Finish
- Deep Burgundy for Evening Elegance
- Sophisticated Navy Blue With Metallic Rim
- Deep Plum and Gold Combination
- Taupe and Bronze Blend
- Negative Space Design With Geometric Cutout
- Monochromatic Layered Nail Art
- Matte Finish With Minimalist Aesthetic
- Delicate Striping Technique in Neutral Tones
- Minimalist Dot Pattern in Monochrome
- Thin Metallic Gold Line on Nude Base
- Matte Black Nails With Glossy Stripe
- Satin Finish for Soft Visual Depth
- High-Shine Polish for Maximum Glow
- Semi-Sheer Glazed Nails With Translucent Finish
- Textured Matte Velvet Effect
- Metallic Gold Accents on Neutral Base
- Chrome Mirror Finish Nails
- Champagne to Rose Gold Ombre Fade
- Subtle Glitter Gradient in Neutral Tones
- Neutral Base With Gold Foil Flakes
- Two-Tone Color Blocking in Complementary Shades
- Gradient Fade From Light to Deep
- Pastel Ombre Transition Across Nail Bed
- Marble Effect With Black Veining
- Geometric Patterns in Monochrome
- Delicate Floral Design in Muted Tones
- Minimalist Dot Array Pattern
- Soft Sage Green Nails in Matte Finish
- Blush Pink Nails With Pearl Shimmer
- Soft Cream With Subtle Gold Accent
- Nude With Barely-There Glitter
- Nude Base With Single Diamond Stone
- Two-Tone Metal
- Frequently Asked Questions
- How Long Do Elegant Nail Designs Typically Last Before Needing a Touch-Up?
- What Is the Best Nail Shape for Displaying Refined and Sophisticated Nail Art?
- How Can I Maintain the Shine and Finish of My Elegant Manicure at Home?
- Are Gel or Traditional Polish Better for Achieving Elegant Nail Designs and Longevity?
- What Nail Care Routine Should I Follow Before Applying Elegant Nail Polish Designs?
- Conclusion
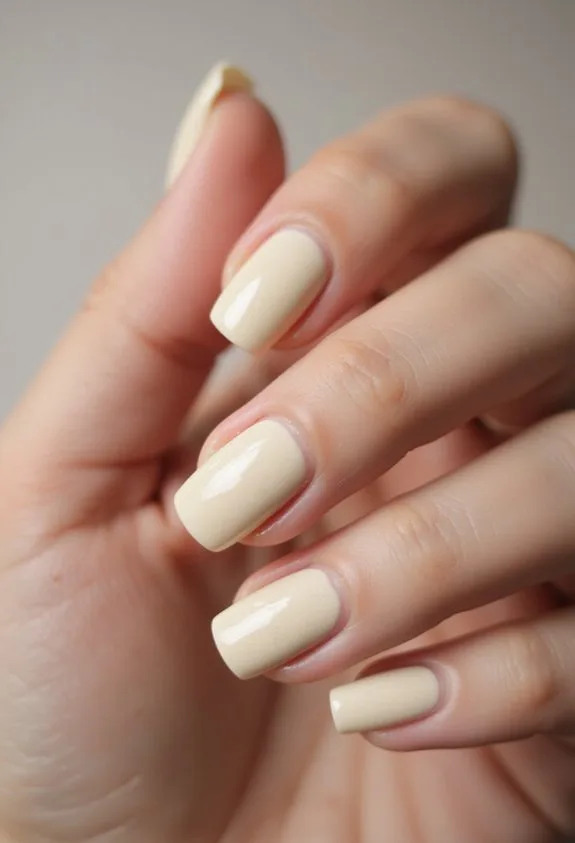
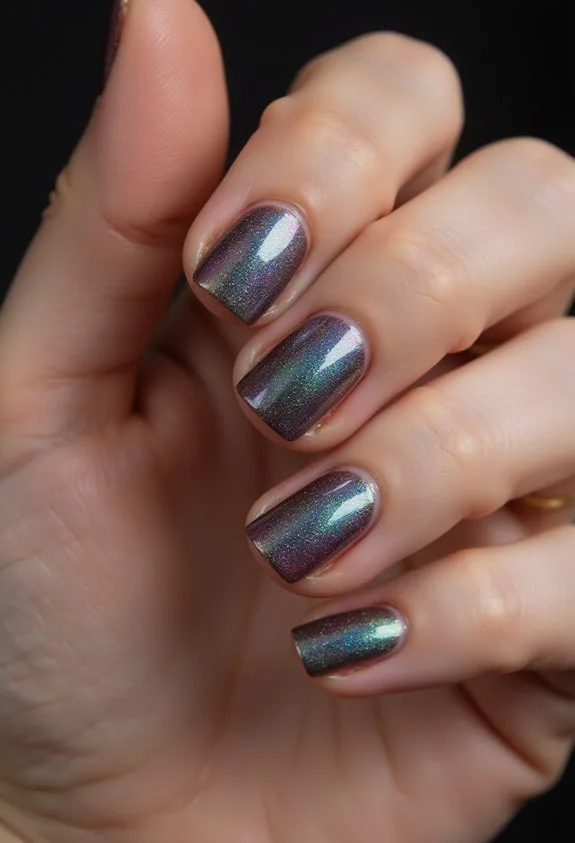
Soft Nude Nails With Pearl Finish

Three key elements create the soft nude nail with pearl finish look: the right base shade, quality pearl pigment, and precise application technique. You’ll want to start with a creamy nude base—think warm beiges or cool pinks that complement your skin tone. Apply two thin coats for even coverage without bulk.
Next comes the pearl magic. Mix pearl pigment into a clear gel or use pre-made pearl topcoats like Gelish “Cashmere Kind of Gal.” The luminous particles catch light beautifully, creating subtle dimension.
Finally, perfect your application. Brush the pearl layer smoothly across the nail surface. The result? A sophisticated, understated elegance that works everywhere—boardrooms, weddings, everyday wear.
Expert nail technician Maria Chen notes: “Pearl finishes elevate simple nudes into luxury territory through light-reflecting chemistry.
Also read: Brown Nails | Simple Almond Design Ideas
Classic French Tips With Thin Gradient

While French tips have remained timeless, adding a thin gradient transforms them into something distinctly modern and sophisticated. You’ll create depth by blending soft color into white tips seamlessly.
- Base coat for protection and adhesion
- Nude or pale pink polish as your foundation shade
- Gradient sponge to blend translucent color toward tips
Start with two base coat layers. Apply your foundation polish across the entire nail. Sponge the gradient color onto your tip area, feathering edges upward. Build layers gradually for subtle shifts.
The result? Nails that elongate your fingers while maintaining elegance. This technique works beautifully with gel polish for extended wear. Your gradient should fade rather than stripe—think ombré, not blocked color.
You’re creating visual interest without abandoning sophistication. That’s the modern French advantage.
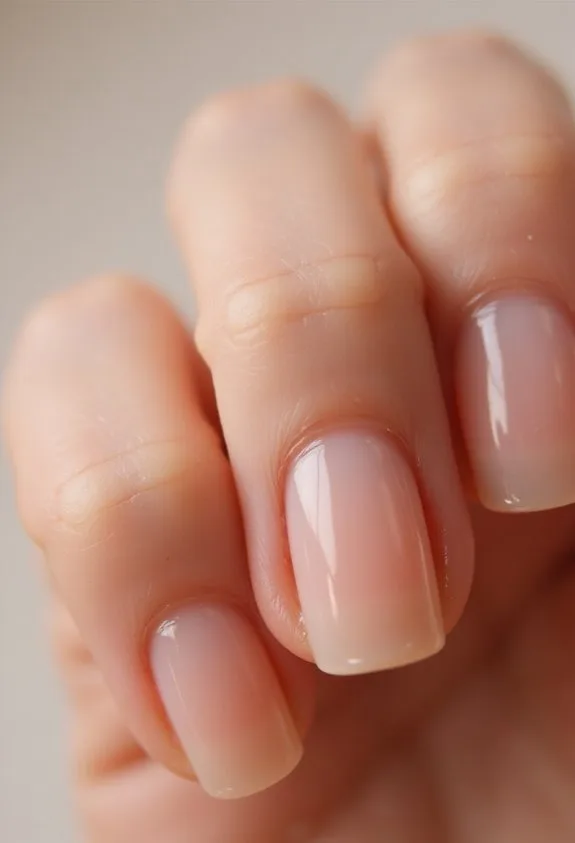
Creamy Vanilla Nails in Glossy Polish
If you’re craving a nail look that feels effortlessly luxurious without demanding high maintenance, creamy vanilla nails in glossy polish deliver exactly that vibe. This timeless shade works beautifully on all skin tones and nail shapes. The glossy finish creates dimension and reflects light elegantly across your nail bed.
Start with a quality base coat to prevent staining. Apply two thin coats of your chosen vanilla polish—brands like OPI “Bubble Bath” or Essie “Ballet Slippers” offer superior coverage and longevity. The glossy topcoat amplifies the creamy richness, making nails appear healthier and more polished.
Nail artist Maria Chen explains, “Vanilla’s versatility makes it perfect for professional settings or casual wear.” Consider adding subtle nail art—delicate gold accents or minimalist line work enhance sophistication without overwhelming the clean aesthetic.
Sheer Pink With Crisp White Tips

For those wanting to elevate their nail game beyond solid shades, sheer pink with crisp white tips offers a refined alternative to traditional French manicure. You’ll achieve a sophisticated look that feels modern yet timeless.
This style requires precision and the right products. Here’s what you need:
- A sheer pink base like OPI’s “Bubble Bath” for natural-looking coverage
- Crisp white tips using a fine brush or nail guide for clean lines
- A glossy top coat to seal your design with shine
Start by applying two coats of sheer pink to your entire nail. Once dry, carefully paint white tips using steady, controlled strokes. The translucent base creates depth while white tips pop dramatically. Professional nail technician Maria Chen notes, “This combination works beautifully because sheer tones elongate fingers while white adds definition.” You’ll notice how this design photographs exceptionally well and photographs work perfectly in professional settings.
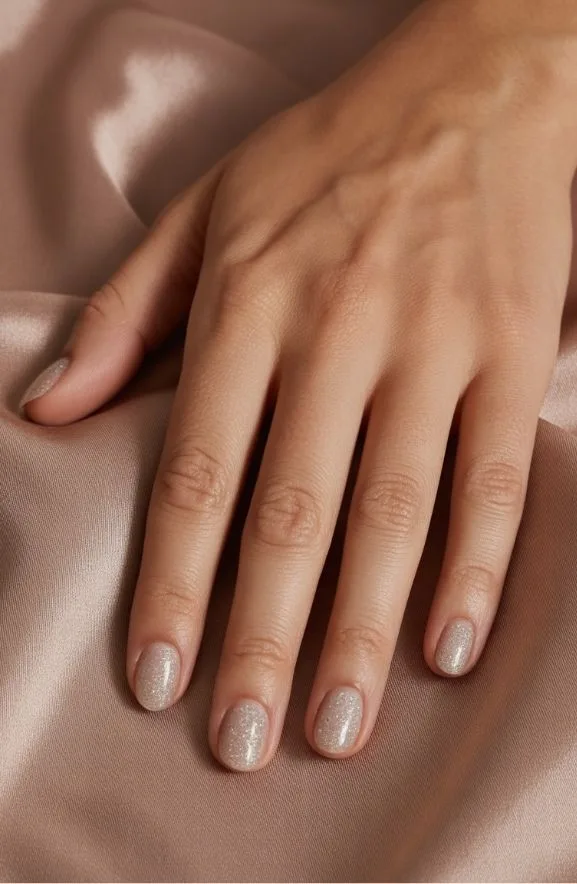
Soft Gray With Luminous Pearl Accent
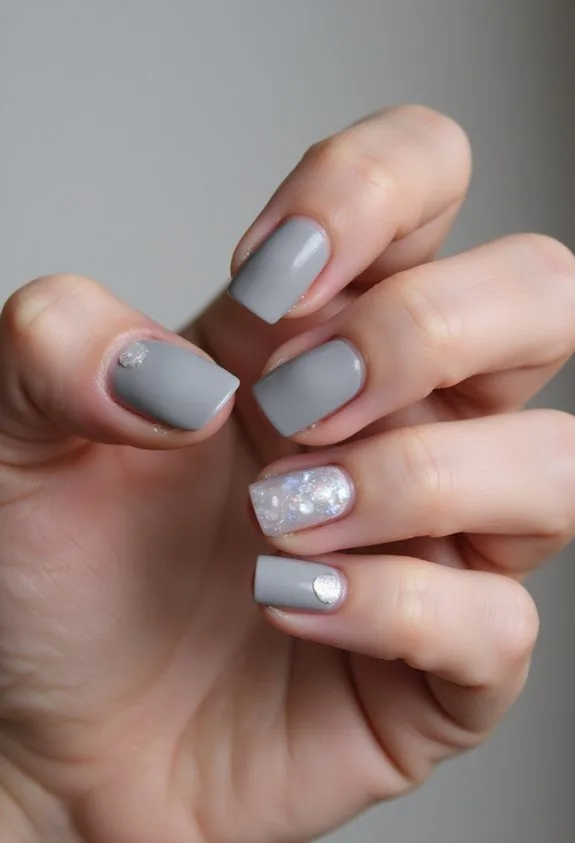
Soft gray serves as the perfect canvas for luminous pearl accents, creating a sophisticated manicure that catches light from every angle. You’ll love how this combination elevates your everyday look with understated elegance. Apply a creamy gray base coat across all nails, ensuring smooth, even coverage in two thin layers. Once dry, use a fine-tipped brush to add pearl accents on your ring and pinky fingers, concentrating shimmer along the nail’s center. Try OPI’s “Rig Some Rings” or Essie’s “Chinchilly” for your base. For luminous details, layer Sally Hansen’s pearl topcoat over the accent areas. The result? A refined manicure that doesn’t scream for attention but absolutely commands it. This design works perfectly for professional settings and special occasions alike.
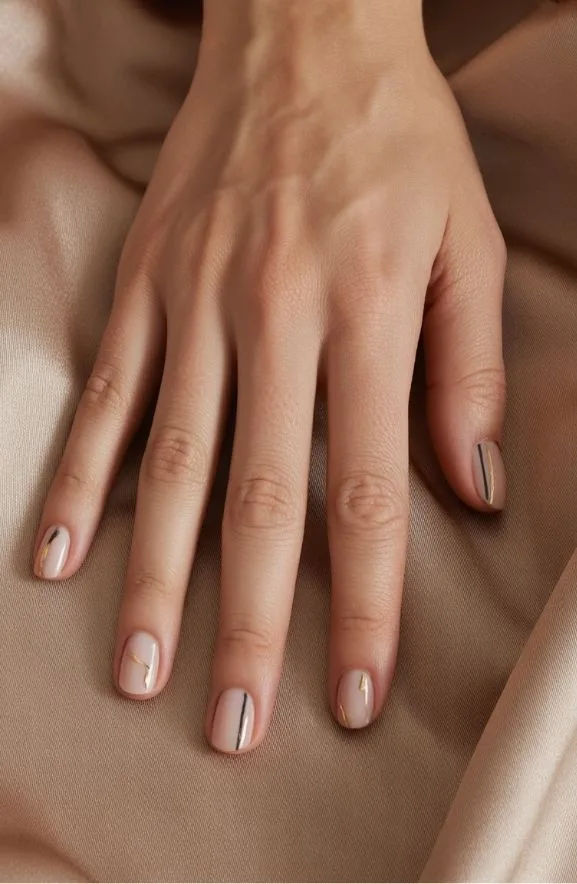
Minimalist White Nails With Single Line Detail
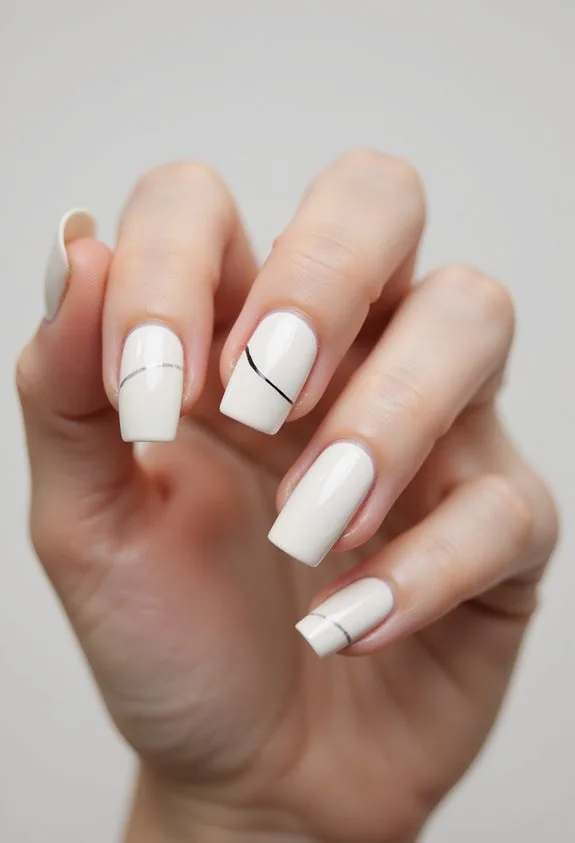
When you’re ready to embrace true minimalism, white nails with a single line detail deliver maximum impact through pure simplicity.
This design works because it’s understated yet striking. You’ll need a quality white base polish and a fine-tip brush or thin liner tool. Here’s what makes this look work:
- Apply two coats of white polish for opacity
- Use a contrasting color—black, navy, or gold—for your single line
- Place the line horizontally, diagonally, or vertically across each nail
The line becomes your focal point. Position it where you want eyes drawn. A beauty pro notes that “negative space creates sophistication.” Try placing the line slightly off-center for modern appeal. This minimalist approach suits professional settings while remaining fashion-forward. You’ll appreciate how this design shifts seamlessly from office to evening wear.
Timeless Red Nails in High-Shine Finish

Nothing quite captures timeless elegance like a bold red nail in a high-shine finish—it’s the ultimate power move that’s worked for decades and shows no signs of fading. You’ll want to invest in a quality formula with excellent opacity and reflective properties. Look for products like Essie’s “Forever Red” or OPI’s “Big Apple Red” that deliver rich pigmentation in just two coats.
The high-shine finish requires a premium top coat. Apply a glossy sealer that creates that mirror-like effect you’re after. Expert colorist Maria Chen notes, “A true red demands flawless application—any streaks become visible.”
Keep your nails perfectly manicured with clean edges. Round or oval shapes elongate fingers beautifully. This classic combination works for professional settings and evening events alike, offering sophisticated versatility that newer trend-focused designs simply can’t match.
Deep Burgundy for Evening Elegance

While deep burgundy lacks the boldness of classic red, it delivers something equally powerful for evening wear—sophisticated depth that commands attention in low light. You’ll find this wine-toned shade transforms your look instantly.
Here’s what makes burgundy your evening essential:
- Pair with metallic accents—gold leaf or champagne shimmer elevates the depth without competing for attention
- Apply gel formula for longevity—your evening look stays flawless through dinner and dancing
- Use a creamy base coat—this prevents staining while enhancing the rich pigmentation
The formula matters tremendously. OPI’s “An Affair in Red Square” or Essie’s “Bordeaux” deliver that luxurious depth you’re seeking. Apply two thin coats rather than one thick layer for ideal color saturation.
Burgundy nails signal refined taste. The shade works beautifully against evening gowns, jewelry, and candlelit settings. You’re choosing elegance over flash.

If you’re ready to move beyond solid colors, navy blue with a metallic rim offers understated luxury that works for both professional settings and upscale evenings. This design combines deep, calming navy as your base with a thin gold or silver border along the nail edge.
You’ll achieve this look by applying two coats of navy polish first. Then carefully paint a metallic line using a thin detail brush or metallic pen. The contrast creates dimension without overwhelming your fingertips.
Nail artist Maria Chen explains, “Metallic rims add sophistication while keeping the overall aesthetic grounded.” This technique works beautifully on square or almond shapes. Choose warm golds for autumn occasions or cool silvers for winter events. Your polished appearance speaks volumes.
Deep Plum and Gold Combination
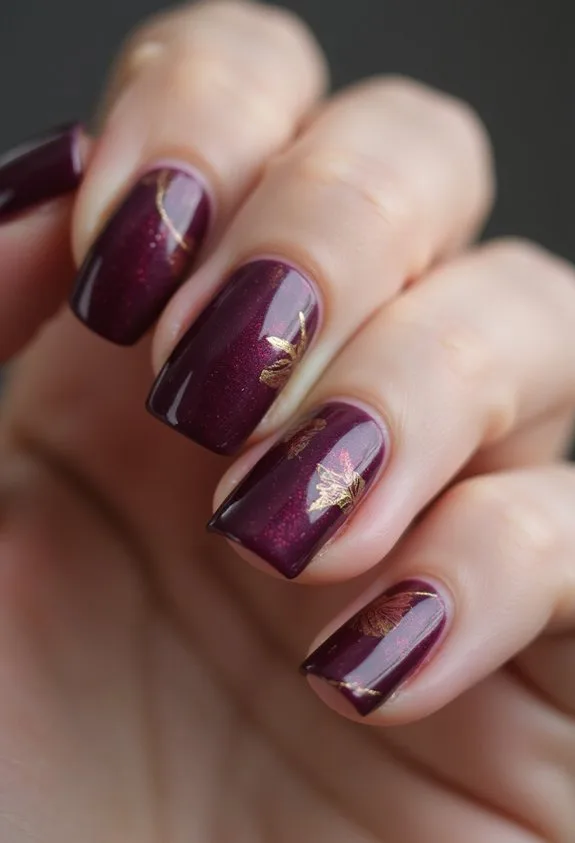
For those who’ve mastered metallics on navy, deep plum opens up richer possibilities that feel more luxurious and bold. You’re stepping into sophisticated territory that commands attention.
This combination works because plum brings warmth while gold adds prestige. Here’s how to nail it:
- Apply two coats of deep plum base (try OPI’s “Black Onyx” mixed with burgundy undertones)
- Paint thin gold lines along cuticles and free edges using a detail brush
- Seal with glossy topcoat for dimensional shine
The contrast creates depth that catches light beautifully. Gold accents on plum read as more refined than on navy, suggesting luxury without screaming it. You’ll achieve that coveted salon-quality finish at home. This pairing suits both professional settings and evening wear effortlessly.
Taupe and Bronze Blend
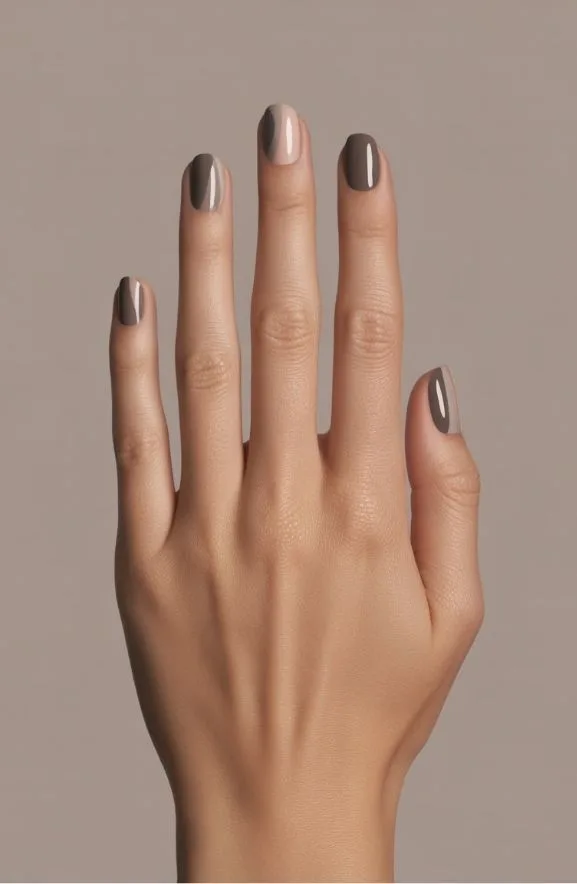
Neutral palettes don’t have to feel boring—taupe and bronze prove that understated elegance can still turn heads. You’ll create dimension by layering a warm taupe base across your nail bed, then carefully applying bronze metallics to your tips and accent nails. This combination works beautifully on shorter nails. Apply a quality base coat first to prevent staining. Layer your taupe polish—we recommend OPI’s “Worth a Pretty Penne”—then add bronze shimmer to create depth. Try painting bronze only on your ring finger for sophistication. “This pairing appeals to clients wanting understated luxury,” notes nail artist Sarah Chen. Seal everything with a glossy topcoat for maximum shine. You’ll achieve professional-looking nails that complement any skin tone while maintaining timeless elegance.
Negative Space Design With Geometric Cutout
While taupe and bronze blend beautifully, negative space designs offer a completely different approach to modern nail art. You’ll create striking visual interest by leaving portions of your nail bare, strategically placing color and geometric patterns around empty space.
This technique demands precision and planning:
- Map your design using a thin nail art brush and light pencil marks before applying polish
- Apply base coats selectively, leaving intentional gaps that showcase your natural nail
- Use geometric stencils or freehand lines to create clean cutouts with contrasting colors
You can achieve this look with OPI’s gel formulas, which maintain sharp edges beautifully. The result? A contemporary, sophisticated aesthetic that feels effortlessly modern. Negative space designs work particularly well on square or coffin-shaped nails, where geometric lines command attention without overwhelming the overall composition.
Monochromatic Layered Nail Art
When you stack varying shades of a single color, you’ll discover the surprising depth that monochromatic layering creates on your nails. Start with a pale base coat, then apply medium and dark tones strategically on the tips and sides. This technique builds visual interest without clashing colors. You’ll want to use a matte topcoat on some layers and glossy on others for textural contrast. Consider brands like OPI and Essie for their extensive shade ranges within single color families. As nail artist Sarah Chen notes, “Monochromatic designs communicate sophistication through subtle variation rather than bold contrast.” The result? Nails that look professionally sculpted and refined. Layer thoughtfully, and you’ll achieve an undeniably elegant aesthetic that we can’t get enough of.
Matte Finish With Minimalist Aesthetic

If you’re drawn to understated elegance, matte finishes paired with minimalist nail designs deliver exactly that refined look. You’ll create sophistication through restraint and intentional simplicity.
Here’s what makes this aesthetic work:
- Soft neutral tones like taupe, greige, or warm beige create a canvas for subtle detail
- Negative space designs showcase your natural nail beds strategically throughout the manicure
- Single accent lines or geometric shapes in muted colors provide visual interest without overwhelming
Apply a quality matte top coat over your base polish for that velvety finish. Consider brands like Essie or OPI for reliable formulas. Keep designs geometric or linear rather than ornate. As nail artist Sarah Mitchell notes, “Matte finishes demand precision because you can’t hide imperfections with shine.” Your restraint speaks volumes about your personal style and taste.
Delicate Striping Technique in Neutral Tones

Thin, precise lines transform your matte manicure into sophisticated nail art that feels effortlessly refined. You’ll use a fine striping brush or thin liner to create delicate patterns across neutral bases like taupe, greige, and warm beige. Layer soft gold or champagne stripes horizontally for dimensional interest without overwhelming the design.
Apply your base coat first, then your matte neutral polish. Once dry, carefully paint your stripes with steady hand pressure. As nail artist Sarah Chen notes, “Control comes from resting your brush hand on the table—never float above the nail.”
Vertical striping elongates fingers beautifully. Horizontal patterns feel modern and architectural. You can combine both directions for geometric sophistication. Seal everything with a matte topcoat to preserve that refined aesthetic. This technique works perfectly for professional settings while maintaining pure elegance.
Minimalist Dot Pattern in Monochrome

Because less is truly more in nail design, you’ll find that perfectly placed dots create stunning visual impact without any fuss. You’re working with monochrome palettes that whisper sophistication rather than shout it.
Start with these foundational steps:
- Apply a creamy base coat in your chosen neutral—white, black, or soft gray work beautifully
- Use a dotting tool or thin brush to place dots with intentional spacing and rhythm
- Seal everything with glossy or matte topcoat depending on your desired finish
You’ll want precision here. According to nail artist Maria Chen, “Strategic dot placement transforms simplicity into elegance.” Experiment with varying dot sizes for visual interest. Dots clustered near the cuticle create height; scattered patterns feel modern and artistic. You can’t rush this technique—patience delivers polish that feels effortlessly refined.
Thin Metallic Gold Line on Nude Base

Where monochrome dots celebrate restraint, a single metallic stroke takes minimalism into luxe territory. You’ll apply a nude base—think soft beige or warm taupe—across all five nails using two coats for opacity.
Once dry, you’re ready for precision. Thin metallic gold lines work best with a fine liner brush or gel pen applicator. You can position the line vertically down the nail’s center or diagonally from corner to corner. Each placement creates distinct visual interest.
According to nail artist Maria Chen, “The key is steadiness—one confident stroke beats multiple hesitant ones.” Layer a glossy top coat to seal everything and amplify that gold shimmer.
This design demands minimal effort while delivering maximum sophistication. You’ve achieved elegant restraint without sacrificing that luxe appeal.
Matte Black Nails With Glossy Stripe

If you’re ready to flip the script on texture, matte black nails with a glossy stripe deliver drama through contrast. This design commands attention effortlessly.
Here’s why we can’t get enough:
- Texture contrast creates visual depth and sophistication that catches light beautifully
- Versatility works for both casual and formal occasions without looking overdone
- Easy application requires just two products: matte base and glossy top coat
Start with a quality matte black like OPI’s “Black Onyx.” Apply two coats for full coverage. Once dry, use a thin striping brush to paint a glossy stripe down the center or side. A professional nail artist recommends placing the stripe vertically for elongating effect.
The matte finish grounds the look while the glossy stripe adds dimensional movement. You’ve created an elegant statement. This design proves that sometimes simplicity, executed precisely, speaks loudest.
Satin Finish for Soft Visual Depth
While matte finishes make bold statements, satin finishes offer something equally compelling: understated elegance with soft visual depth. You’ll create dimension without harsh shine. This semi-glossy coating catches light beautifully. Apply two thin coats for ideal coverage and durability.
Satin finishes work wonderfully on longer nails, where they enhance natural curves. Try OPI’s “Satin Sheets” or Essie’s “Satin Slip” for sophisticated neutrals. Layer complementary gloss topcoats strategically on select nails for visual interest.
A nail technician explains, “Satin finishes provide that luxe feel clients crave—polished yet understated.” You can combine satin with matte accents for contrast. This approach elevates everyday elegance.
The texture invites touch and admiration. Satin finishes require quality base coats to prevent chipping. Regular maintenance keeps that signature softness intact throughout your week.
High-Shine Polish for Maximum Glow
When you’re ready to turn heads, high-shine polish delivers that mirror-like brilliance nothing else can match. This lustrous finish creates depth and dimension on your nails, elevating your overall elegance instantly.
- Gel-based formulas provide extended wear and superior reflectivity that lasts two to three weeks without dulling
- Top coat application amplifies shine exponentially, creating a glass-like surface that catches light beautifully
- Light-reflecting pigments in premium polishes intensify glow under any lighting condition
Professional nail technician Maria Chen explains, “High-shine finishes work best on longer nails where light can bounce across the surface.” Apply thin, even layers for ideal results. Brands like Essie and OPI offer exceptional high-gloss options that won’t chip easily. Your nails’ll radiate sophistication when you choose strategic shine over matte alternatives.
Semi-Sheer Glazed Nails With Translucent Finish
For those who prefer subtlety over mirror-bright intensity, semi-sheer glazed nails offer an elegant alternative that celebrates your natural nail bed. This translucent finish creates a soft, luminous glow without full opacity. You’ll apply thin layers of tinted gel or cream polish, building color gradually for control. The technique reveals your nail’s natural pink undertones beneath peachy, nude, or rose-tinted glazes. Try OPI’s “Bubble Bath” or Essie’s “Ballet Slippers” for timeless options. The glazed effect comes from high-shine top coats applied over sheer bases. This approach works beautifully for professional settings where you want polish presence without boldness. According to nail artist Jamie Genevieve, “Semi-sheer glazes offer sophistication through restraint.” The finish catches light subtly, giving hands an elongated, refined appearance that flatters all skin tones effectively.
Textured Matte Velvet Effect

If you’re craving tactile luxury on your fingertips, the matte velvet effect delivers a sophisticated finish that’s distinctly different from glossy alternatives. This velvety texture creates visual depth while maintaining an understated elegance that works for any occasion.
Here’s what makes this trend so compelling:
- Powder application – A specialized velvet powder adheres to wet base coat, creating that signature soft-touch finish
- Color versatility – Deep burgundies, charcoal grays, and nude tones showcase the texture beautifully without overwhelming nails
- Longevity – Top coat selection matters; matte sealers preserve the effect longer than standard glossy finishes
The velvet effect requires precision during application. You’ll want steady hands and quality products like OPI’s matte lacquer or Zoya’s velvety collection. This finish demands regular maintenance since texture shows imperfections more readily than smooth surfaces. The payoff? Refined nails that whisper sophistication rather than shout it.
Metallic Gold Accents on Neutral Base
While velvet textures command attention through tactile subtlety, metallic gold accents offer a different kind of sophistication—one that catches light and draws the eye without demanding constant texture maintenance. You’ll apply a neutral base—think warm beige, soft taupe, or creamy ivory—across all five nails, creating a clean canvas. Once dry, strategically place gold metallic strokes along the nail edges or as delicate geometric shapes using a thin liner brush. A champagne shimmer base layer works wonderfully underneath for added dimension. Apply your metallic gold polish in thin, controlled layers to prevent clumping. Seal everything with a high-shine topcoat that amplifies the luminous effect. This combination delivers understated elegance that shifts seamlessly from professional settings to evening occasions without appearing overdone.
Chrome Mirror Finish Nails

Chrome mirror finish nails represent the next evolution in nail artistry, delivering a futuristic gleam that transforms your fingertips into polished metal surfaces. This trending technique creates an ultra-reflective effect that catches light beautifully.
You’ll achieve this look through specialized chrome powders applied over gel base coats. The process requires precision and patience for flawless results.
Apply a sticky gel base coat to your nails
Buff the chrome powder onto the tacky surface using a soft applicator
Seal everything with a glossy top coat for protection
The finish demands quality products. OPI’s chrome collection and Gelish metallic powders deliver superior mirror effects. Professional nail technicians recommend two thin layers rather than one ideal application for perfect reflectivity and durability throughout your wear period.
Champagne to Rose Gold Ombre Fade

A gradient that flows from soft champagne to warm rose gold creates an elegant ombre effect that’s both sophisticated and wearable. You’ll start with a pale champagne base on your nail beds. Layer rose gold pigments toward the tips, blending where the two shades meet. Use a soft, fluffy brush to diffuse the color shift seamlessly.
Apply two coats of champagne polish first. Then load your blending brush with rose gold and feather it across the nail’s upper third. The result? A dimensional nail art that catches light beautifully. Seal everything with a glossy top coat.
As nail artist Sarah Chen notes, “Warm metallics flatter every skin tone when blended properly.” This ombre works especially well for special occasions. You’re creating luxury through gradient technique and color psychology combined.
Subtle Glitter Gradient in Neutral Tones
If you’re looking for understated sophistication, subtle glitter gradient in neutral tones delivers exactly that. This technique combines soft shimmer with muted palettes for timeless elegance.
- Start with a nude or taupe base coat, applying two thin layers for even coverage
- Layer a barely-there glitter polish from the tip inward, creating dimension without overwhelming shine
- Blend the gradient using a dry brush technique, feathering edges where colors meet
You’ll achieve professional results using OPI’s “Worth a Pretty Penny” or Essie’s “Cascade of Color.” The gradient shouldn’t feel chalky or heavy. As nail artist Sarah Chen notes, “Restraint separates elegant from overdone.” Build glitter gradually—you can always add more shimmer. This look moves seamlessly from boardroom to evening events, proving that less genuinely is more when executed with precision and care.
Neutral Base With Gold Foil Flakes
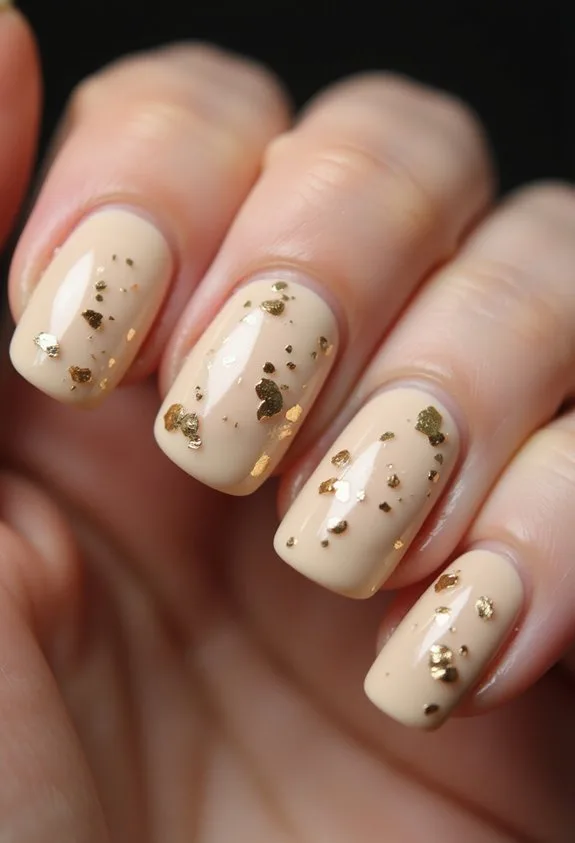
Want to elevate your neutral manicure with luxe dimension that catches light beautifully? Gold foil flakes create that sophisticated shimmer you’re after. Apply your chosen neutral base—soft beige, warm taupe, or creamy ivory work exceptionally well. While the base remains tacky, sprinkle fine gold foil pieces across the nail surface. Press them gently to guarantee proper adhesion. The flakes scatter irregularly, creating an organic, high-fashion aesthetic. Seal everything with a glossy topcoat for protection and luminosity. As beauty expert Jennifer Davis notes, “Gold foil elevates neutrals without overwhelming them.” This technique works beautifully for both everyday elegance and special occasions. The result? A refined manicure that whispers sophistication rather than shouts it.
Two-Tone Color Blocking in Complementary Shades

Geometric precision replaces the scattered luxe of foil work when you’re ready to make a bolder statement. Color blocking divides your nails into distinct sections using complementary shades that intensify each other visually.
Consider these striking approaches:
- Vertical splits – Paint one half in deep plum, the other in soft sage for sophisticated contrast
- Horizontal bands – Layer navy blue atop cream for clean, architectural appeal
- Diagonal angles – Try burnt orange against charcoal for dynamic movement
You’ll want to invest in quality gel polishes with excellent opacity. Apply thin, even coats for crisp boundaries between colors. A steady hand matters here—precision creates elegance.
Nail artist Michelle Chen notes, “Color blocking’s power lies in proportion. Equal sections feel balanced; unequal ones feel intentional.”
Seal everything with glossy topcoat to enhance depth and dimension. This technique transforms your nails into wearable art.
Gradient Fade From Light to Deep

How do you create a seamless shift that draws the eye across your entire nail?
Start with a pale base shade. Apply it to your nail’s tip and gradually blend toward deeper tones. Use a damp sponge to feather the color transitions smoothly. This technique requires patience and precision.
Layer complementary shades strategically. Begin with a light nude or blush tone, then introduce medium hues midway. Finish with rich, saturated colors at the cuticle area. The gradient should flow naturally without harsh lines.
Professional nail artist Maria Chen explains: “A quality ombre sponge and thin brush strokes prevent muddy blending.” She recommends using semi-sheer polishes for ideal layering.
Apply a glossy top coat to unify the entire design. This creates dimension while maintaining elegance. The result? A sophisticated gradient that looks professionally executed.
Pastel Ombre Transition Across Nail Bed

While the gradient fade technique builds your foundational skills, pastel ombre takes that knowledge into softer, more romantic territory. You’re creating seamless color shifts using delicate, whisper-soft hues that blend beautifully across your nail bed.
- Soft color selection – Choose pastels like blush pink, mint, or lavender for sophisticated results
- Sponge application – Dab colors onto a makeup sponge, then press gently onto nails for smooth blending
- Seal with top coat – Lock in your design with a quality glossy finish
You’ll notice how these muted tones create dimension without screaming for attention. The beauty industry calls this “understated elegance.” Layer your pastels strategically, allowing each shade to peek through slightly. Your nails become wearable art that whispers rather than shouts sophistication.
Marble Effect With Black Veining

After mastering soft pastels, you’re ready to embrace bold sophistication through marble veining. You’ll create a luxurious look by layering white or cream base polish across your nail bed. Apply thin black lines using a fine detail brush or specialized marble pen. Allow these veins to flow naturally, mimicking actual marble stone patterns. The key is keeping lines irregular and slightly curved rather than perfectly straight. Consider using OPI’s Black Onyx as your veining color for maximum contrast and durability. Build depth by layering a glossy topcoat that catches light dramatically. As nail artist Maria Chen states, “Marble effects elevate everyday elegance into gallery-worthy artistry.” You can customize this design by adjusting vein thickness or adding subtle gray undertones. This technique transforms your nails into wearable art that commands attention and sophistication.
Geometric Patterns in Monochrome

Geometric patterns in monochrome offer you a modern, sophisticated approach that doesn’t require multiple colors. You’ll create stunning visual interest using only black and white shades.
Consider these striking options:
- Linear designs – Paint clean, straight lines across your nail beds using thin brushes or striping tape for precision
- Triangle arrangements – Layer triangular shapes pointing inward or outward, creating depth and movement
- Checkerboard effects – Alternate small black and white squares for classic, timeless elegance
You’ll want quality gel polish and a fine detail brush to execute these patterns cleanly. Apply a white base coat first, then carefully map your geometric layout with black polish.
As nail artist Elena Rodriguez notes, “Monochrome geometry proves you don’t need color saturation for impact.” The contrast itself becomes your statement.
Delicate Floral Design in Muted Tones

If you’re ready to soften your aesthetic beyond stark contrast, floral designs in muted tones offer a refined alternative. These gentle blooms in dusty rose, sage green, and soft taupe create sophisticated nail art that’s wearable for any occasion.
You’ll want to start with a creamy base color using OPI’s “Worth a Pretty Penny” or similar neutral shades. Hand-paint delicate petals using thin detail brushes and watercolor-inspired techniques. Layer translucent florals to build depth without overwhelming the nail.
As celebrity nail artist Miss Pop states, “Muted florals bridge elegance and subtlety.” You can enhance dimension by adding fine line work around petal edges or incorporating negative space strategically.
Seal everything with a glossy top coat for polish that feels both timeless and intentional. This approach rewards patience with stunning, understated results.
Minimalist Dot Array Pattern

While floral designs celebrate organic shapes, dot arrays bring geometric precision to understated elegance. You’ll create modern sophistication by arranging tiny dots in intentional patterns across your nails.
This technique demands patience and a steady hand. Here’s what you’ll need:
- Ultra-fine dotting tools or toothpicks for controlled placement
- Gel polish in contrasting shades for dimensional layering
- Top coat to seal and enhance the pattern’s depth
Start with a neutral base—soft beige or cream works beautifully. Space your dots deliberately across the nail surface. Some nail artists prefer symmetrical grids, while others embrace asymmetrical arrangements for modern appeal.
You’re building visual interest through restraint. The minimalist approach means fewer elements demand flawless execution. Apply dots with light pressure, allowing the polish’s natural finish to showcase your precision. Your finished nails’ll radiate quiet confidence.
Soft Sage Green Nails in Matte Finish
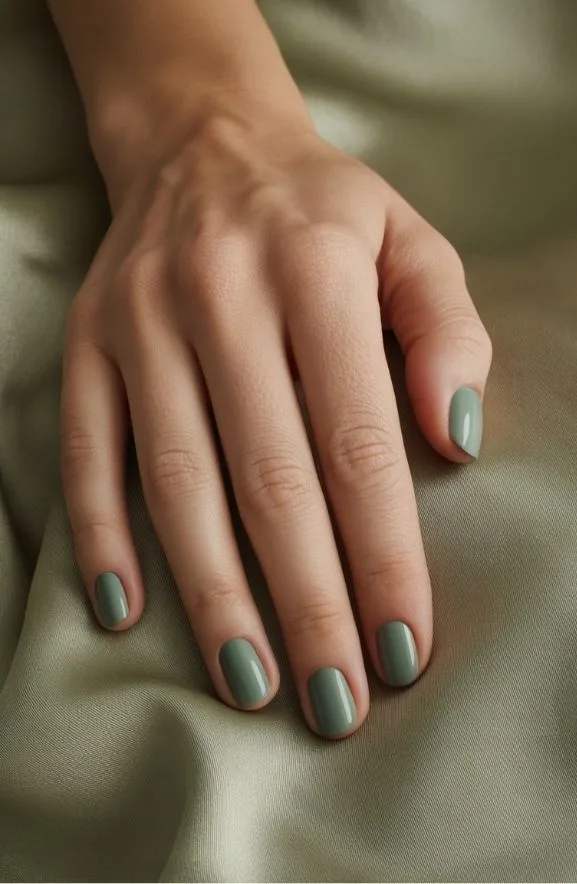
Moving beyond geometric precision, you’re ready to explore color’s quiet power. Soft sage green delivers understated sophistication that works year-round. This muted, earthy tone flatters every skin tone beautifully.
The matte finish eliminates shine, creating a velvety texture that feels modern and refined. You’ll want to apply two thin coats of a quality sage polish like Essie’s “Chinois Green” for even coverage. Avoid thick application; it prevents proper drying and durability.
Pro tip: use a matte top coat to seal your color and enhance that luxurious finish. Layer this shade over a strengthening base coat to protect your nails from staining.
Sage green pairs perfectly with nude accents or minimal gold detailing on accent nails. The result? Effortlessly elegant hands that command attention through restraint.
Blush Pink Nails With Pearl Shimmer

As you’ve mastered matte sophistication, it’s time to embrace luminous femininity through blush pink with pearl shimmer. This elegant combination creates depth and movement across your nails.
- Choose a creamy blush base like OPI’s “Bubble Bath” for ideal pearl adhesion and longevity
- Layer fine pearl shimmer strategically on accent nails or across the entire surface for customized luminosity
- Seal with a glossy topcoat to amplify the iridescent effect and protect your manicure
The pearl particles catch light beautifully, creating subtle dimension without overwhelming the design. Celebrity nail artist Jin Soon notes that “blush and pearl combinations represent modern elegance, offering sophistication that translates across all skin tones.”
Apply shimmer with a light hand initially. Build coverage gradually for controlled luminosity. This technique prevents cloudiness while maintaining clarity and refinement throughout your manicure’s wear time.
Soft Cream With Subtle Gold Accent

If you’re ready to elevate your sophistication beyond shimmer, soft cream with subtle gold accents delivers understated luxury that feels both modern and timeless. This combination works beautifully on any skin tone.
Start with a creamy base polish in ivory or warm beige. Apply two thin coats for even coverage. Once dry, use a fine detail brush to trace delicate gold lines along your nail edges or create minimalist geometric patterns. You can also accent just your ring finger for dimensional interest.
As nail artist Jennifer Chen notes, “The key is restraint—less gold creates more impact.” Consider matte topcoat over the cream for a sophisticated finish that diffuses shine. Pair this look with natural eyeshadow and nude lips for cohesive elegance that whispers rather than shouts.
Nude With Barely-There Glitter

For those seeking elegance that doesn’t demand attention, nude with barely-there glitter offers the perfect balance between polish and restraint. You’ll achieve sophistication without overwhelming your look.
This manicure style combines neutral base colors with minimal sparkle for understated glamour. Consider these essential elements:
- Choose a warm nude shade matching your skin tone
- Apply one thin glitter layer to accent nails only
- Seal everything with a glossy top coat
The technique requires precision. A nude base like OPI’s “Be There in a Prosecco” provides the foundation. Layer fine glitter sparingly—you’re aiming for a subtle shimmer, not disco vibes.
Professional nail technician Maria Chen notes, “Restraint defines elegance. Less glitter showcases intentional design choices.” This approach works beautifully for professional settings while maintaining that polished aesthetic you’re after.
Nude Base With Single Diamond Stone

A single diamond stone elevates nude nails from simple to striking with minimal effort. You’ll apply a creamy nude polish—think warm beige or soft taupe—creating a clean, sophisticated canvas. Then place one glittering diamond at the nail’s center or upper corner for dimensional interest.
The beauty of this design lies in its restraint. One strategically positioned stone catches light beautifully without overwhelming your look. You can use crystal rhinestones or genuine diamond accents depending on your budget and occasion.
Celebrity manicurist Zoya Chen notes, “A single focal point creates elegance through simplicity—it’s about quality over quantity.”
Layer your nude base with two thin coats for opacity. Secure your diamond with clear gel or nail glue. Seal everything with a glossy topcoat for professional polish.
This timeless combination works for any setting, from boardrooms to celebrations.
Two-Tone Metal

When you blend gold and silver on the same nail, you’re creating a modern contrast that feels both luxe and wearable. This technique elevates your manicure beyond basic elegance into contemporary sophistication.
You’ll achieve stunning results by following these steps:
- Apply a neutral base coat to all nails for seamless metal application
- Paint half the nail with gold polish, half with silver using precision brushes
- Seal everything with a glossy topcoat for dimensional shine
The beauty of two-tone metal lies in its versatility. You can position the metals vertically, diagonally, or create geometric sections depending on your preference. The contrast catches light beautifully, drawing attention to your hands throughout the day.
Essie’s “Good as Gold” and OPI’s “Silver On” work exceptionally well together. This approach works for both casual and formal occasions.
Frequently Asked Questions
How Long Do Elegant Nail Designs Typically Last Before Needing a Touch-Up?
You’ll typically enjoy your elegant nail designs for two to three weeks before needing a touch-up. However, you can extend this timeframe by maintaining proper nail care, avoiding harsh chemicals, and scheduling regular maintenance appointments to keep your nails looking beautifully refined.
What Is the Best Nail Shape for Displaying Refined and Sophisticated Nail Art?
You’ll find that almond and oval shapes best showcase refined nail art. They’re long enough to display intricate designs while maintaining elegance. These shapes elongate your fingers beautifully and provide ample canvas space for sophisticated patterns, creating that polished, refined aesthetic you’re seeking.
How Can I Maintain the Shine and Finish of My Elegant Manicure at Home?
You’ll maintain your manicure’s shine by applying a fresh top coat every three days, avoiding harsh chemicals with gloves, moisturizing cuticles daily, and keeping your nails dry. You should also minimize water exposure and use gentle handling to preserve that elegant finish.
Are Gel or Traditional Polish Better for Achieving Elegant Nail Designs and Longevity?
You’ll find gel polish superior for elegant designs and longevity. Gel manicures resist chipping, maintain shine longer, and showcase intricate designs beautifully. However, traditional polish lets you change designs frequently if you prefer versatility and easier removal.
What Nail Care Routine Should I Follow Before Applying Elegant Nail Polish Designs?
You should start by pushing back your cuticles, filing your nails into your desired shape, and buffing the surface smooth. Then wash your hands thoroughly, apply a base coat, and you’re ready for your elegant polish design.
Conclusion
You’ve got endless options to elevate your nail game with sophisticated elegance. From soft nudes with pearl accents to metallic rims paired with deep jewel tones, these designs work for any occasion. We can’t get enough of how these refined styles balance simplicity with visual interest. Pick your favorite technique—whether that’s glossy finishes, matte textures, or subtle glitter—and you’ll nail the refined look you’re after.