Simple nail designs offer that elegant, quick solution that actually fits your real life and schedule. This refreshingly straightforward approach celebrates minimalism, quality, and intentional beauty authentically. Your nails become polished and refined without requiring endless hours or complicated techniques.
The genius of simple nail designs is their remarkable ability to feel sophisticated and current simultaneously. Quick application, easy maintenance, and versatile styles work across professions, seasons, and personal aesthetics. You’ll reach for these designs again and again because they genuinely work for everything.
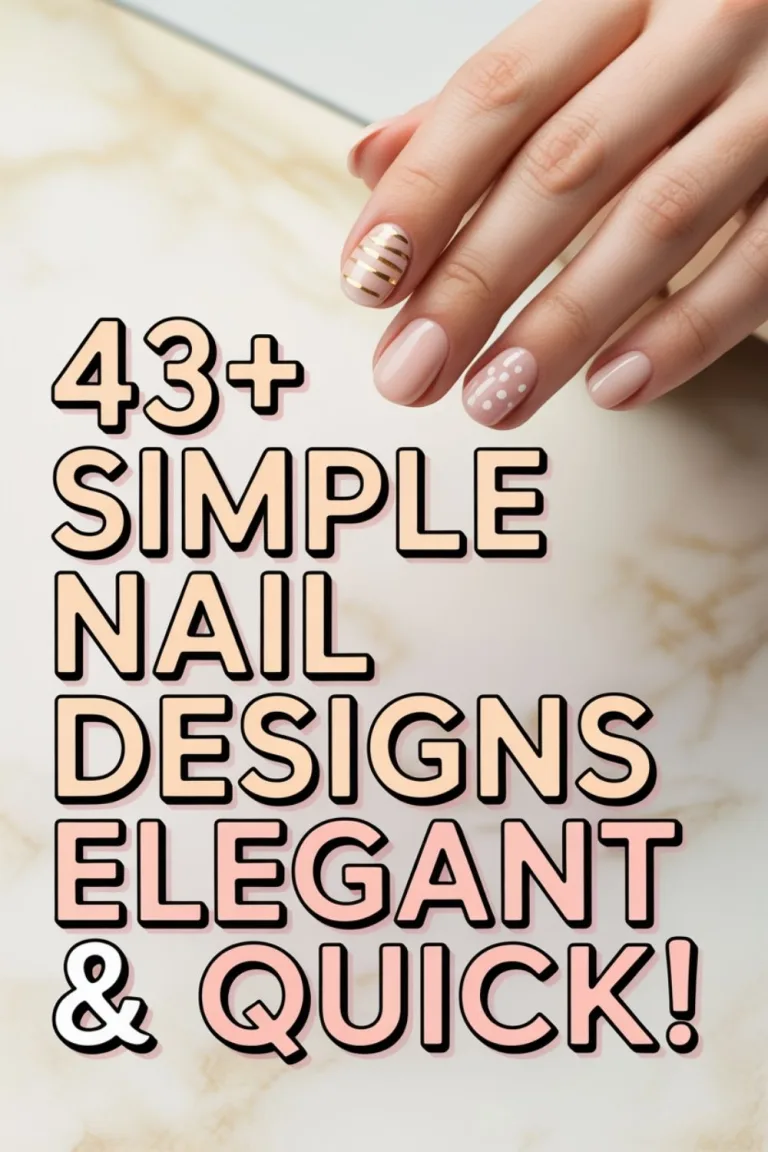
We’ve gathered 43 stunning simple nail designs that celebrate elegant minimalism with authentic style and grace. From soft neutrals to bold single colours, these looks inspire confidence and ease. Explore which quick, elegant design fits your lifestyle and makes you feel absolutely brilliant.
Table of Contents
- Classic French Tips in Minutes
- Reverse French Tips With Color
- Colored Tips on Neutral Base
- Gradient Tips on Solid Nails
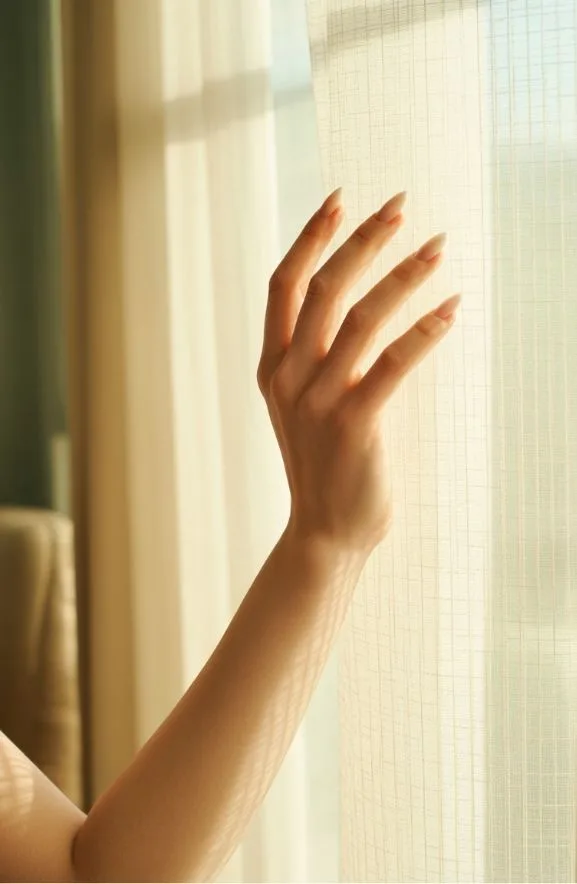
- Elegant Solid Colors That Never Disappoint
- Nude Nails With Pearl Finish
- Minimalist Single-Line Designs
- Hand-Painted Floral Vines
- Soft Ombre Gradient Nails
- Gentle Shadow Gradient
- Simple Sunset Gradient Design
- Easy Ombré Fade Technique
- Negative Space Nail Art Basics
- Half-Moon Nail Art Without Tools
- Minimalist Moon Manicure
- Two-Tone Color Block Patterns
- Diagonal Color Blocking
- Clean Color Blocking With Straight Lines
- Subtle Geometric Shapes for Beginners
- Geometric Triangle Design Tutorial
- Simple Houndstooth Pattern
- Chevron V-Shape Stripes
- Simple Striped Nail Designs
- Horizontal Stripe Patterns
- Vertical Stripe Nail Design
- Easy Abstract Line Art
- Freehand Line Designs Without Sketching
- Brushstroke Accent Nails
- Dotting Tool Flowers in 10 Minutes
- Polka Dot Placement for Beginners
- Barely-There Confetti Specks
- Marble Effect With Two Colors
- Watercolor Wash Technique
- Matte and Glossy Contrast Nails
- Metallic Foil Accent Nail
- Nude With Thin Gold Lines
- Stamping Designs Even Beginners Can Master
- Lace Details With a Thin Brush
- Inverted French Tips
- Two-Color Manicure With Clean Lines
- Textured Manicure With a Single Hue
- Cat-Eye Nails for Short Lengths
- Simple Pastel Nail Designs
- Frequently Asked Questions
- How Long Do Simple Nail Designs Typically Last Before Chipping or Fading?
- What Are the Best Base Coats and Top Coats for Elegant Manicure Longevity?
- Can I Create These Designs Without Any Special Tools or Equipment at Home?
- How Do I Remove Nail Polish Safely Without Damaging My Natural Nails?
- What Nail Shapes Work Best for Displaying Simple Elegant Nail Designs?
- Conclusion
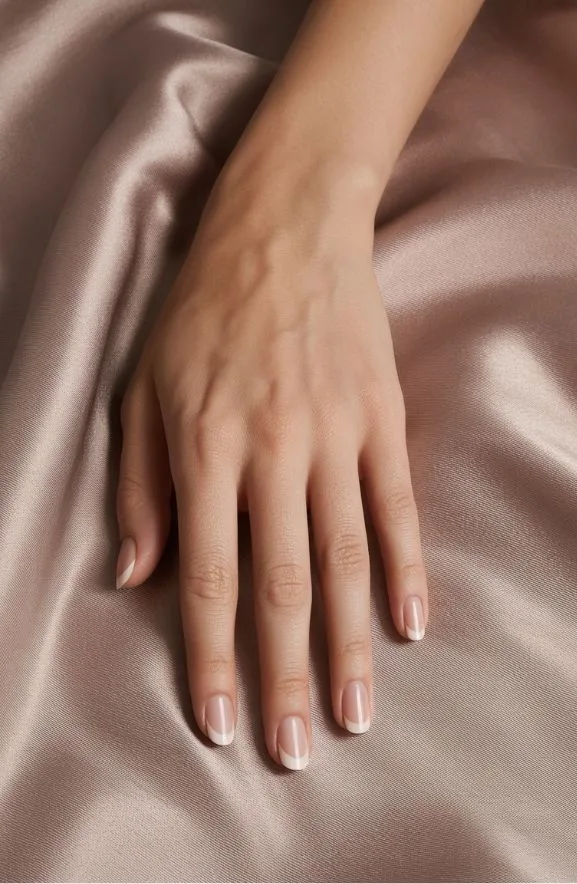
Classic French Tips in Minutes

French manicures have remained a go-to nail style for decades. You’ll love how quickly you can achieve this timeless look at home.
Start by applying a base coat to protect your nails. Paint your entire nail with a creamy white polish, letting it dry completely. Use a thin nail art brush or specialized French tip guide to outline your white tips with precision.
Here’s the key: keep your white line thin and slightly curved. Most professionals recommend a 2-3mm white edge for balanced proportions. According to nail technician Maria Chen, “The curve should follow your nail’s natural shape, not fight against it.”
Seal everything with a glossy top coat for durability. Your elegant French tips are ready in under fifteen minutes, giving you that salon-quality finish you’ve earned.
Also read: Pink Valentines Day Nails | Sweet Design
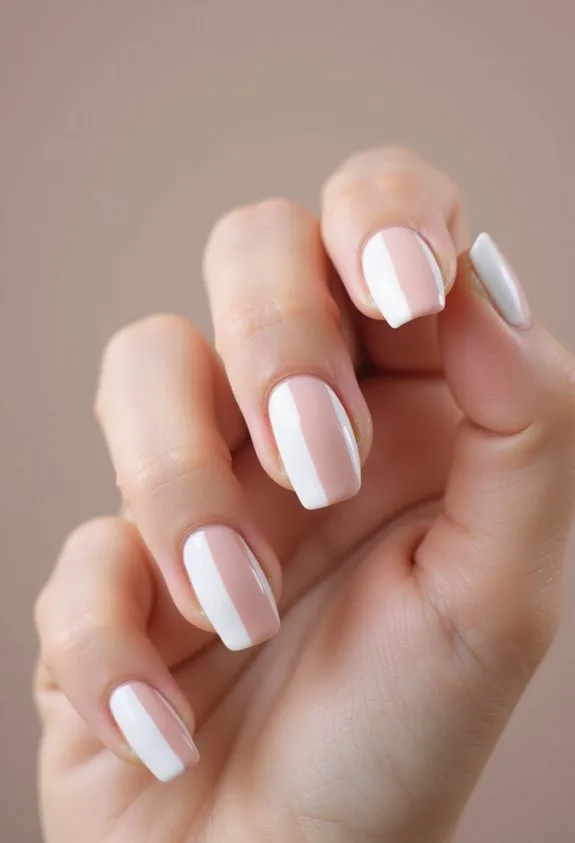
Reverse French Tips With Color

If you’ve mastered the classic French manicure, you’re ready to flip the script entirely. Reverse French tips swap the traditional white tip for bold color on the nail base, leaving just the tip bare or sheer.
Start by applying your chosen base color—think deep burgundy, emerald, or rich navy—to most of your nail. You’ll paint carefully, leaving approximately one-quarter inch unpainted at the tip. Use a thin brush or nail art pen for precision. The contrast creates visual interest and modern sophistication.
Seal everything with a glossy top coat. This technique works beautifully with chrome, matte, or metallic finishes. You’re fundamentally reversing expectations while maintaining elegance. The result? A fresh take on timeless French manicure styling that feels current and intentional.
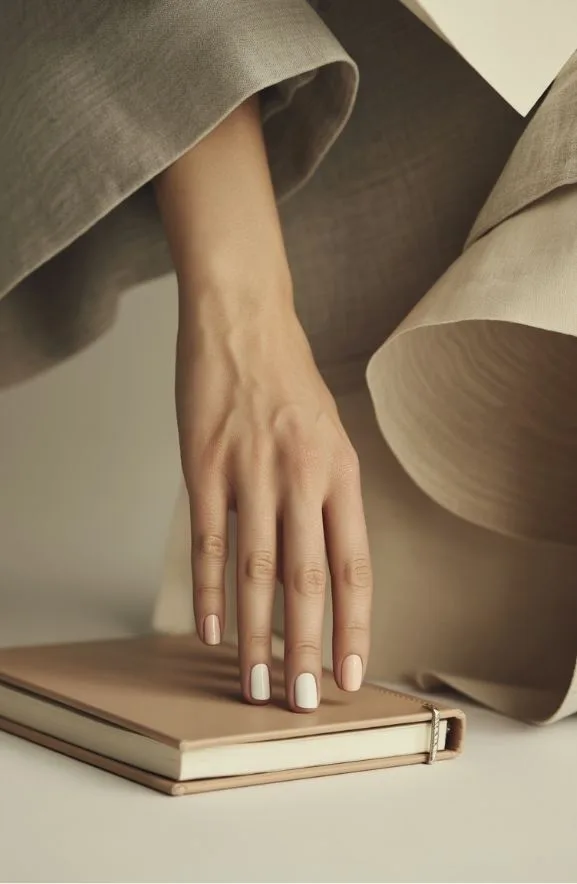
Colored Tips on Neutral Base
Three timeless shades—soft beige, creamy ivory, or pale pink—create the perfect canvas for vibrant nail tips. You’ll appreciate how neutral bases let bold colors truly shine without overwhelming your hands. This approach balances sophistication with playfulness, making it incredibly versatile for any occasion.
- Apply a sheer base coat to protect your nails and guarantee smooth color application across the entire nail bed
- Create clean tip lines using painter’s tape, then apply 2-3 coats of your chosen vibrant shade for opacity and dimension
- Seal with a glossy topcoat to enhance shine and extend wear time, safeguarding your meticulous design
The contrast between muted bases and saturated tips creates visual interest. You’re fundamentally building dimension through color strategy. Choose cream polish like OPI’s “Bubble Bath” paired with electric blue tips for maximum impact.
Gradient Tips on Solid Nails

When you’re ready to elevate beyond solid color, gradient tips create stunning depth on a foundation of uniform shade. You’ll start with a cream or neutral base across your entire nail, establishing clean visual balance.
Next, apply your gradient color to the tip area using a sponge technique. Dab two complementary shades onto a makeup sponge, then press gently onto your nail edge. This creates seamless color shifts from base to tip.
Pro tip: Use semi-sheer polishes for the most elegant results. According to nail artist Michelle Chen, “Gradient tips work beautifully because they add dimension without overwhelming minimalist aesthetics.”
Try pairing soft pink bases with peachy-rose tips. You can also reverse the technique—darker base with lighter gradient tips. The contrast draws attention to your fingertips while maintaining sophisticated simplicity.
Elegant Solid Colors That Never Disappoint
While gradient designs add dimension, sometimes the most sophisticated choice is embracing a single, carefully selected hue that commands attention through pure color quality. You’ll discover that solid colors offer versatility most trends can’t match. Classic shades work across seasons and occasions seamlessly.
Consider these foundational color choices:
- Deep burgundy or wine tones – Perfect for fall and winter, conveying elegance without demanding constant maintenance or touch-ups.
- Soft nude or beige shades – These universally flattering options elongate fingers while maintaining a professional appearance in any setting.
- Rich navy or charcoal – Sophisticated alternatives to black that won’t chip as visibly, offering understated luxury.
Celebrity colorist Elle Kahuna notes, “A quality solid demands excellent application and premium polish.” Invest in long-wear formulas with built-in shine. You’re creating intentional beauty through restraint and precision.
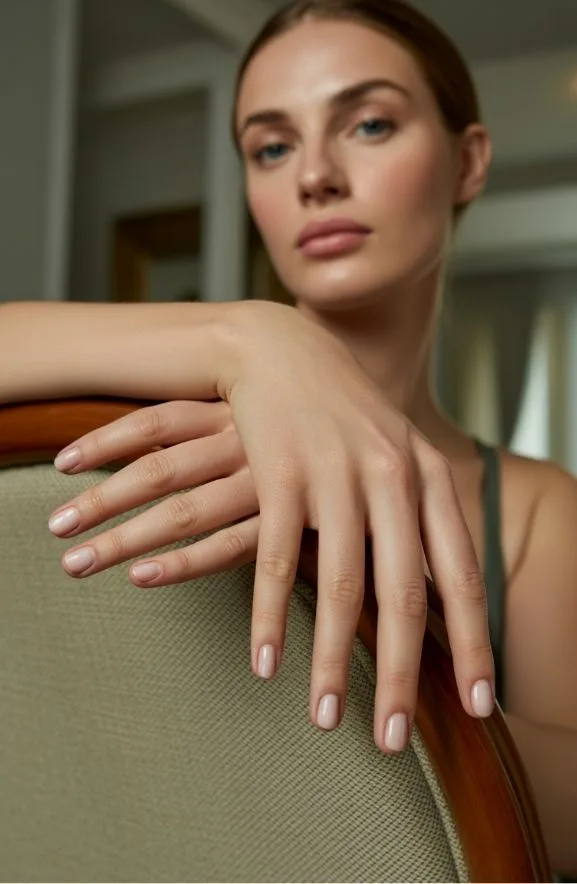
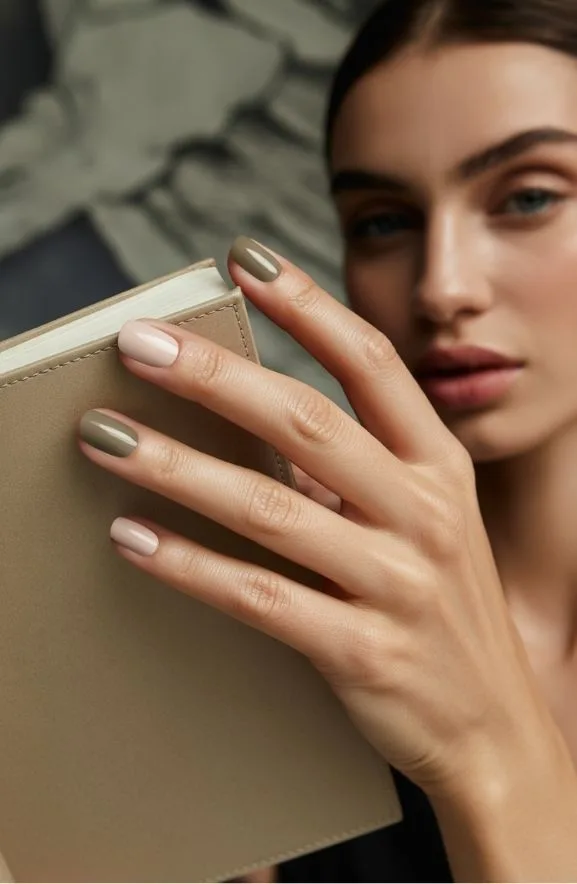
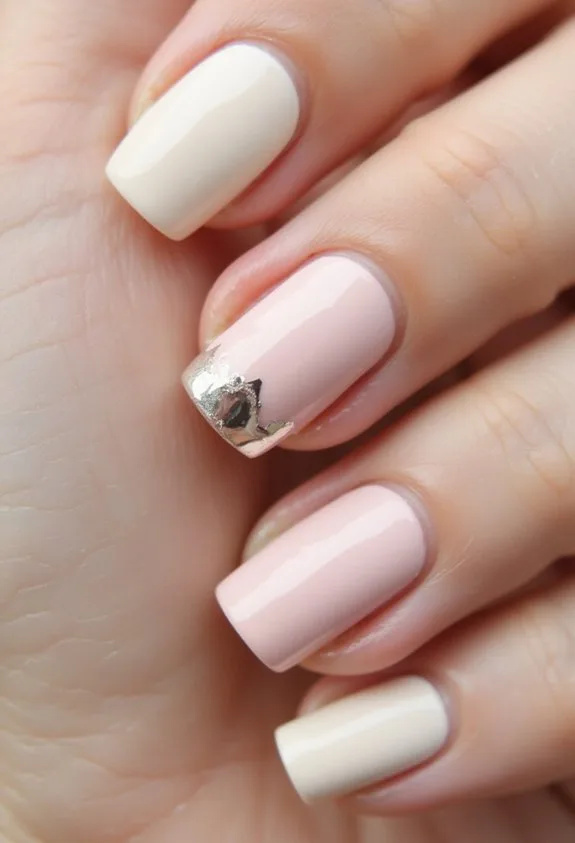
Nude Nails With Pearl Finish

Pearl-finish nude nails represent the sophisticated evolution of solid color manicures—they’ve got all the versatility of classic nude while adding subtle shimmer that catches light beautifully. You’ll appreciate how this finish works across every skin tone and occasion.
The pearl effect comes from micro-particles suspended in the polish base. Apply two coats of a quality nude-pearl formula like OPI’s “Bubble Bath” or Essie’s “Ballet Slippers” for ideal coverage. Build the shimmer gradually; rushing application creates uneven texture.
Pro tip: buff your nails lightly before polish application for better adherence. The pearl particles reflect differently depending on lighting, creating dimension without looking glittery. Top with a glossy sealer to enhance the luminous quality.
This design works perfectly for professional settings while maintaining understated elegance that we can’t get enough of.
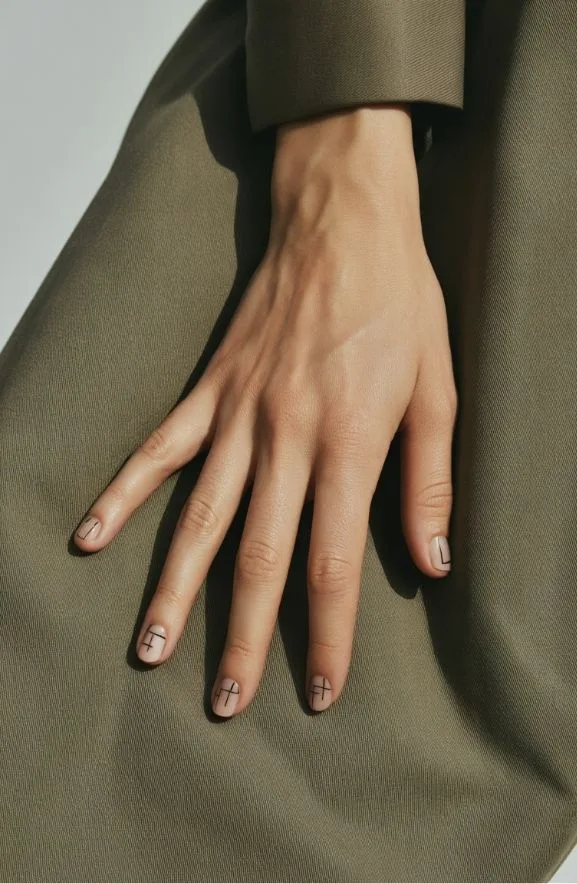
Minimalist Single-Line Designs

Minimalist single-line designs strip away the shimmer for pure artistic expression. You’re creating elegance through restraint, using just one continuous line across your nail. This approach demands precision and confidence.
Here’s what makes these designs so compelling:
- Geometric precision — Clean lines force you to master steady hands and proper brush control techniques
- Versatile sophistication — Single strokes work on any nail shape, from square to almond, adapting beautifully to your natural nails
- Quick application — You’ll finish manicures faster without elaborate details, making this perfect for busy schedules
Use fine-tipped gel liners or thin nail art brushes for crisp results. Try black or deep burgundy against nude bases. A professional tip: let your hand rest against the table edge for stability. These designs prove that simplicity isn’t boring—it’s expertly intentional.
Hand-Painted Floral Vines

Hand-painted floral vines elevate your nails from simple to sophisticated with flowing, organic linework that mimics nature’s beauty. You’ll create delicate stems that wrap gracefully around each nail. Start with a neutral base—soft beige or cream works wonderfully. Use a thin liner brush and dark green polish for stems. Add tiny leaves with quick, angled strokes. Incorporate small flowers like forget-me-nots or roses using a dotting tool. The key is keeping lines wispy and natural-looking.
Gel polishes work best for longevity. Sally Hansen Hard as Nails provides excellent color payoff. According to nail artist Maria Chen, “Curved lines feel more organic than perfectly straight designs.” Layer sheer pinks over white for dimension. You’ll find this style shifts beautifully from professional settings to casual outings.
Soft Ombre Gradient Nails

Creating a seamless color blend across your nails offers a modern alternative to hand-painted details. You’ll achieve this gradient effect by layering complementary polish shades that shift smoothly from light to dark. Start with a base coat, then apply your lightest shade to the nail tip. Gradually blend darker tones toward the cuticle using a makeup sponge or blending brush.
- Use quality polishes like OPI or Essie that blend without streaking or separation
- Allow each layer brief drying time between applications for seamless shifts
- Seal everything with glossy top coat to enhance dimension and longevity
The ombre technique works beautifully on natural nails. You’re creating depth without intricate brushwork. Professional manicurists recommend practicing on practice wheels first. This approach saves time while delivering salon-quality results you can maintain at home.
Gentle Shadow Gradient
If you’re drawn to understated elegance, the shadow gradient technique delivers subtle depth without overwhelming your fingertips. You’ll blend two complementary shades seamlessly across your nail surface. Start with your lighter base color using a quality polish like OPI’s soft neutrals. Sponge your darker shade—think warm taupe or muted grey—onto the tip using a makeup sponge. The key lies in feathering edges gently where colors meet. Build layers gradually rather than applying heavy coverage instantly. Apply a glossy top coat to enhance dimension and longevity. This approach creates sophisticated nail art that appears effortlessly refined. You won’t need advanced skills or expensive tools. The result? Professional-looking nails that complement any aesthetic, from minimalist to modern professional. This design works year-round and suits all nail lengths beautifully.
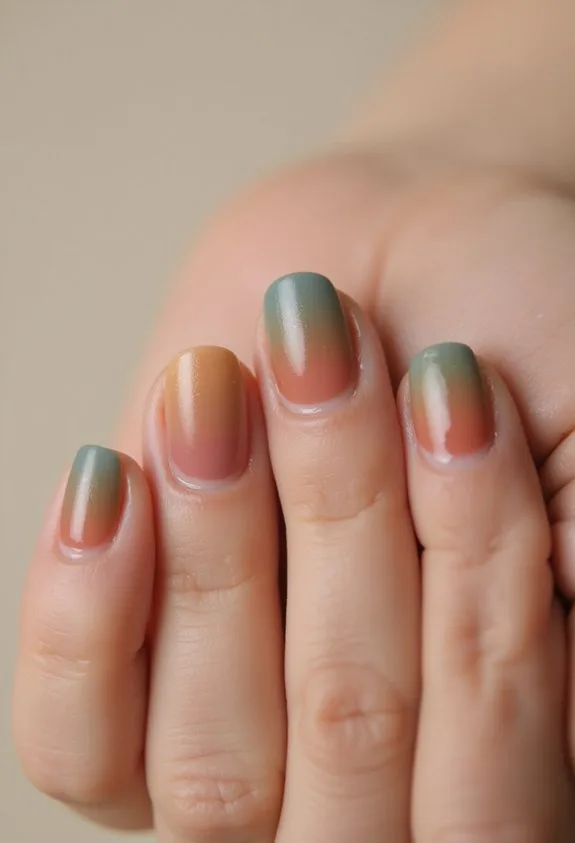
Simple Sunset Gradient Design
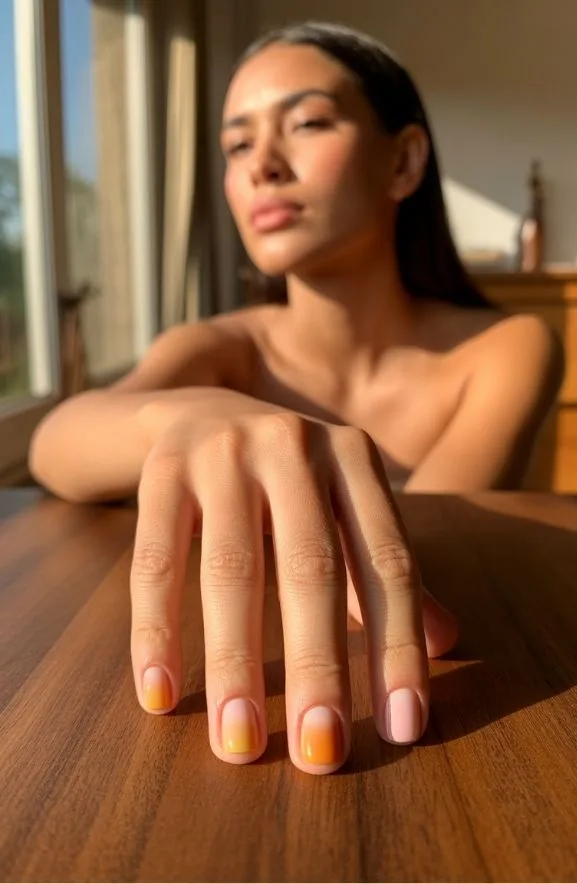
Warm oranges, peachy tones, and deep corals transform your nails into a miniature sunset. You’ll start with a pale yellow base, then blend burnt orange and coral across the nail bed using a damp sponge. This ombré effect creates dimension without requiring advanced skills.
- Layering creates visual depth – multiple transparent color applications build richness that single-coat designs can’t achieve
- Warm undertones flatter diverse skin tones – sunset palettes work universally with strategic shade selection
- Gradient techniques develop steady hands – practicing blending improves your overall nail artistry foundation
Apply a glossy top coat to amplify the gradient’s luminosity. A matte topcoat offers alternative sophistication if you prefer subtler finishes. This design suits both casual settings and professional environments, requiring just fifteen minutes from start to finish.
Easy Ombré Fade Technique

An ombré fade blends two or more nail polish shades seamlessly from light to dark across your nail surface. You’ll create a gradient effect that’s both modern and elegant.
Start with a base coat to protect your nails. Apply your lightest shade first, covering the entire nail. Next, use a makeup sponge to dab your darker polish onto the tip, creating that signature mixture. Layer the colors gradually for smooth shifts.
Pro tip: slightly dampen your sponge before applying polish. This prevents streaking and guarantees better color blending. You can use OPI or Essie polishes—they’re reliable and blend beautifully.
The technique works on all nail shapes. Practice makes perfect, so don’t worry about initial attempts. Each manicure builds your skill level, giving you salon-quality results at home with patience and precision.
Negative Space Nail Art Basics

Because you’re leaving intentional gaps of bare nail visible, negative space nail art creates striking contrast and modern sophistication. This technique transforms your manicure into a minimalist masterpiece that feels effortlessly chic.
The beauty of negative space design lies in its versatility and visual impact. You’ll paint strategic patterns while letting your natural nail show through, creating depth without overwhelming detail. This approach works beautifully on short or long nails alike.
Here’s what makes negative space nail art successful:
- Strategic placement of unpainted areas creates geometric interest and prevents cluttered appearance
- Translucent base coats or light polish enhance the negative space effect professionally
- Clean lines and precise brushwork define your design’s overall polished quality
Start with simple geometric shapes using quality gel polish or traditional lacquer. Your design gains dimension through careful color selection and intentional restraint.
Half-Moon Nail Art Without Tools

Building on negative space’s clean aesthetic, the half-moon design takes minimalism further by framing your nail’s natural curve. You’ll create a curved line at your nail’s base using only polish and steady hands.
Apply a base coat, then paint your entire nail with your chosen shade. Once dry, use a thin brush or angled liner to paint a contrasting color along the curved bottom. The key is keeping edges clean and precise. Work slowly. Patience matters more than speed here.
According to nail artist Jamie Genevieve, “The half-moon’s beauty lies in its symmetry and simplicity.” You can swap colors seasonally or keep neutrals for versatility. This design works beautifully on short nails and requires no special tools, making it perfectly accessible for beginners seeking polished results.
Minimalist Moon Manicure

While the half-moon design celebrates bold contrast, the minimalist moon manicure whispers instead of shouts. You’ll create subtle curves using soft neutrals and barely-there pastels that enhance rather than dominate your fingertips.
Start with a sheer base like OPI’s “Bubble Bath” or Essie’s “Ballet Slippers.” Use a thin liner brush to trace delicate crescents at your nail bases. The key is restraint—you’re aiming for sophistication through simplicity.
- Choose muted color palettes that complement your skin tone rather than contrast sharply
- Apply translucent topcoat for dimensional depth without visual heaviness
- Perfect your brush control through steady, confident strokes
As nail artist Jin Soon notes, “Minimalism requires precision; every line matters.” You’ll discover this design works beautifully for professional settings while maintaining artistic interest through understated elegance.
Two-Tone Color Block Patterns

If you’re ready to move beyond subtle whispers, two-tone color block patterns deliver bold geometric impact through contrasting hues and clean lines. You’ll create sharp divisions using complementary shades like navy and coral, or soft pastels in blush and sage.
Start by applying your base color as a full coat. Once dry, use painter’s tape to section off your design—diagonal splits, vertical halves, or geometric shapes work beautifully. Apply your second shade carefully within the taped boundaries for crisp edges.
We can’t get enough of this technique’s versatility. Try OPI’s “Do You Have This Color in Stock-holm” paired with a creamy white for maximum contrast. The result? Professional-looking nails that feel modern and intentional, ready for any occasion.
Diagonal Color Blocking
Diagonal color blocking takes the geometric precision of two-tone designs and tilts it for dynamic visual movement across your nails. You’re creating angled sections that catch light differently, making your manicure feel modern and purposeful.
- Angle placement matters: Position your dividing line from the upper left to lower right corner, or vice versa, for maximum visual impact and elongation.
- Color contrast drives the look: Pair bold opposites like deep navy with cream, or burgundy with soft pink for sophisticated dimension.
- Precision requires the right tools: Use thin angled brushes or striping tape to achieve clean, sharp edges that define the geometric aesthetic.
Paint your base color first. Once dry, apply your second shade along the diagonal. The beauty industry calls this technique “directional blocking.” You’re guiding the viewer’s eye across your nail with intention and style.
Clean Color Blocking With Straight Lines
Straight lines bring precision and clarity where diagonal angles create movement. You’ll create crisp, geometric designs by using tape to section your nail into distinct color blocks. Apply your base coat, then carefully apply painter’s tape in straight horizontal or vertical patterns across your nail bed.
Choose contrasting colors—think deep navy beside bright white or soft blush next to charcoal. Use quality polishes like OPI or Essie for smooth, opaque coverage. Paint each section methodically, allowing slight overlap onto the tape for clean edges. Remove tape while polish is still tacky, not fully dry.
The result? Professional-looking nails with sharp distinctions between colors. “Geometric blocking showcases color theory fundamentals,” says nail artist Michelle Chen. You’re essentially, fundamentally, creating wearable art through intentional color placement and precision technique.
Subtle Geometric Shapes for Beginners
Once you’ve mastered straight lines, you’re ready to explore shapes that’ll elevate your nail game without overwhelming your beginner skills. Geometric designs create visual interest through simple, intentional patterns.
Start with these foundational approaches:
- Triangles and dots – Use a dotting tool to place small triangles in corner sections, building confidence with basic shape control
- Negative space squares – Paint around unpainted areas, letting your base color become part of the design itself
- Thin diagonal lines forming diamonds – Combine your line skills into interconnected shapes for sophisticated results
According to nail artist Jessica Chen, “Geometric work teaches proportion and precision—skills that transfer to advanced techniques.” Begin with one accent nail using contrasting polish. OPI’s Black Onyx and Sally Hansen’s nude shades provide excellent contrast options for beginners tackling subtle geometry.
Geometric Triangle Design Tutorial

Triangles are your gateway to more sophisticated nail art. You’ll start by mapping three points on your nail using a thin liner brush and your chosen base color. Connect these points with clean, steady strokes to form your triangle shape.
Use a contrasting polish—whites, blacks, or metallics work beautifully—to fill in your design. You can layer triangles in various sizes across your nail for dimension. Apply a glossy top coat to seal everything.
According to nail technician Sarah Chen, “Geometric precision elevates simple designs into polished statements.” You’re not just painting; you’re creating intentional patterns that reflect current trends.
Practice this foundational technique, and you’ll build confidence for more complex geometric combinations. Your steady hand develops quickly with repetition.
Simple Houndstooth Pattern

Building on the triangle foundation you’ve mastered, houndstooth patterns combine two interlocking triangular shapes to create a classic checked design that’s surprisingly achievable. You’ll need a thin detail brush and two complementary nail polish colors—think black and white or navy and cream for maximum contrast.
Start by applying your base coat, then map out alternating triangles using a light pencil guide. Here’s what makes this pattern work:
- Precision placement creates visual rhythm and professional sophistication
- Contrasting colors enhance the optical illusion of depth
- Consistent sizing guarantees the pattern reads as intentional rather than accidental
Apply your first color in triangular sections, allowing proper drying time between layers. Fill remaining spaces with your second shade using steady brush strokes. Seal everything with a glossy top coat for dimensional shine that catches light beautifully.
Chevron V-Shape Stripes
Two converging diagonal lines create the iconic V-shape that defines chevron patterns—a design that’s more forgiving than it appears. You’ll use angled striping tape to guide clean lines across your nail surface. Apply your base color first, then layer contrasting shades for dimensional depth.
The key is steady hand placement. Position tape at 45-degree angles, alternating directions for that signature zigzag effect. Use a thin brush or striping tool for precision application. Remove tape while polish remains slightly tacky to prevent peeling.
Consider metallic accents within your chevrons for elevated sophistication. A nude base with gold V-stripes creates professional polish. You can also reverse the pattern—light stripes against darker backgrounds work beautifully too. This design suits both casual and formal occasions effortlessly.
Simple Striped Nail Designs

Striped nails break down into clean, parallel lines that’ll transform your manicure from basic to polished in minutes. You’ll use thin brushes or striping tools to create precision patterns across your base coat. The technique works best with contrasting colors like black on white or metallics on pastels.
- Vertical stripes elongate your nails visually, creating a slimming effect
- Horizontal stripes offer a modern, geometric aesthetic perfect for minimalist styles
- Diagonal stripes add movement and sophistication without overwhelming your design
Apply your base color first, letting it dry completely. Use a thin nail art brush with steady, confident strokes. Consider OPI’s striper brush or Moyou stamping plates for consistent results. Layer your colors strategically—darker stripes over light bases provide maximum contrast. We can’t get enough of how quickly you’ll master this fundamental technique for elevated everyday manicures.
Horizontal Stripe Patterns

When you’re ready to master a design that reads modern and effortless, horizontal stripes deliver exactly that polish. You’ll paint your base coat in a neutral shade—think soft beige or crisp white. Then, using a thin striping brush or nail art pen, you’re creating parallel lines across each nail. Space them evenly, roughly one millimeter apart, for a sophisticated finish.
The beauty of horizontal stripes lies in their versatility. You can alternate colors between lines or keep them monochromatic. Apply a glossy top coat to amplify dimension and protect your work.
Celebrity manicurist Jin Soon recommends this approach: “Horizontal stripes elongate the nail and create visual movement.” This timeless pattern works for professional settings and casual occasions alike. You’ve got yourself an instantly chic design.
Vertical Stripe Nail Design
Unlike their horizontal counterparts, vertical stripes create an entirely different visual effect that elongates your fingertips and adds graphic sophistication to your manicure. You’ll achieve clean, modern lines that draw the eye upward, making your nails appear longer and more elegant.
- Apply base coat and choose your colors – Select complementary shades like navy and white, or go monochromatic for subtlety
- Use thin striping brushes or nail tape – Precision tools prevent wobbly lines and guarantee professional results
- Seal with glossy topcoat – This enhances dimension and safeguards your design
Paint your base color first, then carefully apply vertical lines with steady pressure. Let each layer dry completely between applications. You won’t regret investing in quality striping brushes; they’re game-changers for crisp, defined stripes that elevate your entire look.
Easy Abstract Line Art
If you’re ready to move beyond structured patterns, abstract line art offers total creative freedom on your nails. You’ll use thin nail art brushes to create flowing, organic lines across your base color. Sweep curved strokes diagonally or vertically for visual interest.
Start with a neutral cream or soft gray foundation. Layer black or deep charcoal lines using precision tools. Consider incorporating metallic accents—gold or silver fine-liners add dimension without overwhelming the design.
“Abstract nail art celebrates imperfection,” says nail artist Marina Torres. “Wobbly lines feel intentional and sophisticated.”
You can also experiment with negative space by leaving portions bare. This creates stunning contrast between line work and polish. Apply a glossy top coat to enhance the finished look.
This style demands minimal time yet delivers maximum impact.
Freehand Line Designs Without Sketching

Drawing directly onto your nails without a preliminary sketch builds confidence and creates authentically organic results. You’ll develop steadier hands through repetition and muscle memory as you practice flowing lines across your nail canvas.
Start with thin, steady strokes using a detail brush or liner pen. Here’s what makes freehand designs work:
- Maintaining consistent pressure while moving your brush creates uniform line weight and professional polish
- Allowing your hand to move naturally produces genuine, unrehearsed elegance that sketching often eliminates
- Building speed gradually prevents trembling and develops the fluid motion professionals use daily
Consider using Essie’s thin brush bottles or Sally Hansen’s precision liner pens for better control. Keep your hand relaxed, not rigid. Pro tip: rest your pinky finger on the table for stabilization. Your freehand lines’ll improve dramatically within weeks.
Brushstroke Accent Nails

Once you’ve mastered steady freehand lines, you’re ready to explore brushstroke accents that transform a single nail into a focal point. Brushstrokes use sweeping, curved motions to create dimension and visual interest on one standout nail per hand.
Start with a quality angled brush and pigmented gel polish for better control. Apply your base color first, then load your brush with a contrasting shade. Paint confident, flowing strokes across your accent nail using medium pressure and steady hand movement.
Try metallic golds over nude bases or deep burgundy on soft pink backgrounds. These combinations create sophisticated contrast without overwhelming your design. You’re fundamentally creating an artistic statement piece that doesn’t require perfect precision.
Pro tip: Practice your brushstroke pattern on a color wheel first.
Dotting Tool Flowers in 10 Minutes

Creating delicate flowers with a dotting tool is one of the quickest ways to elevate your manicure without complicated techniques. You’ll achieve professional-looking results in minutes using basic supplies you likely already own.
Here’s what makes dotting tool flowers so effective:
- Minimal skill required – Simple circular motions create petals without freehand brushwork precision
- Speed advantage – Complete a full floral accent in under ten minutes per nail
- Versatile application – Works on any base color and complements various nail shapes
Start with two contrasting polish shades. Dip your dotting tool into the petal color and create five dots in a circular pattern. Add a center dot in a complementary shade. Professional nail artist Maria Chen explains, “The dotting tool removes pressure from precision—you’re simply placing controlled dots that naturally form beautiful shapes.” Practice your spacing consistency for polished, cohesive results.
Polka Dot Placement for Beginners
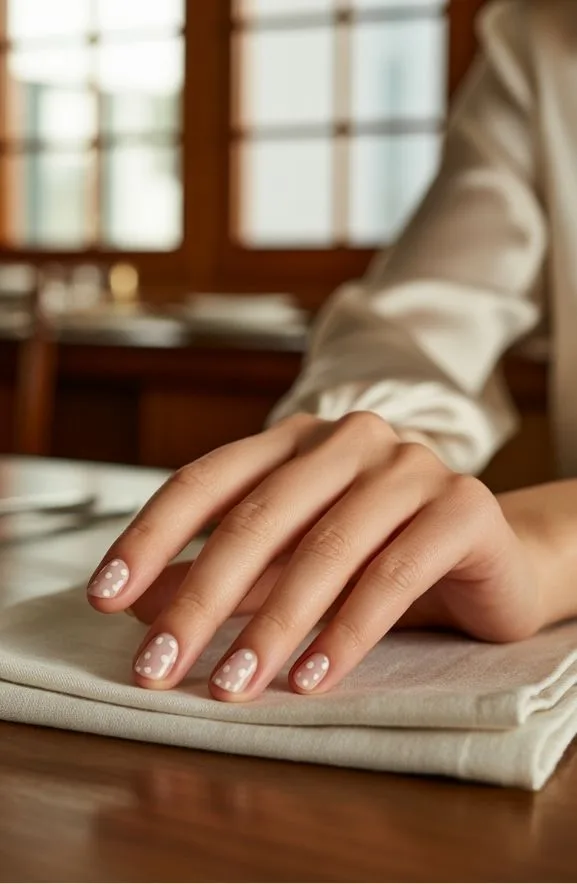
While dotting tool flowers showcase artistic flair, polka dots offer a more structured approach that’s equally rewarding for beginners. You’ll start by selecting your base color and letting it dry completely. Using a dotting tool—or even a bobby pin in a pinch—dip the tip into your contrasting polish. Apply dots in even spacing across your nail surface, maintaining consistent pressure for uniform circles. Space them roughly a quarter-inch apart for balanced visual impact. Work one nail at a time, allowing each dot to set before moving forward. As nail artist Sarah Chen notes, “Polka dot placement teaches precision that transfers to advanced techniques.” You can experiment with geometric grids or scattered patterns. Practice on practice wheels first. This foundational skill builds your confidence and technical control beautifully.
Barely-There Confetti Specks

If polka dots feel too structured for your vibe, barely-there confetti specks offer a subtler alternative that’s just as striking. You’ll apply tiny flecks of contrasting polish using a thin detail brush or toothpick, creating an intentionally random pattern. This technique works beautifully on nude or soft pink bases, giving nails an effortlessly elevated look.
Here’s how to master this design:
- Use a sheer base coat that lets your natural nail peek through, maintaining that “barely-there” aesthetic
- Apply confetti specks in graduating sizes for visual interest and dimension
- Seal everything with a glossy topcoat to enhance the subtle shimmer
Pro tip: Try brands like Essie or Sally Hansen for their precision brush applicators. Layer your specks gradually—you can always add more, but removing excess becomes tricky. The result? Nails that whisper sophistication rather than shout it.
Marble Effect With Two Colors
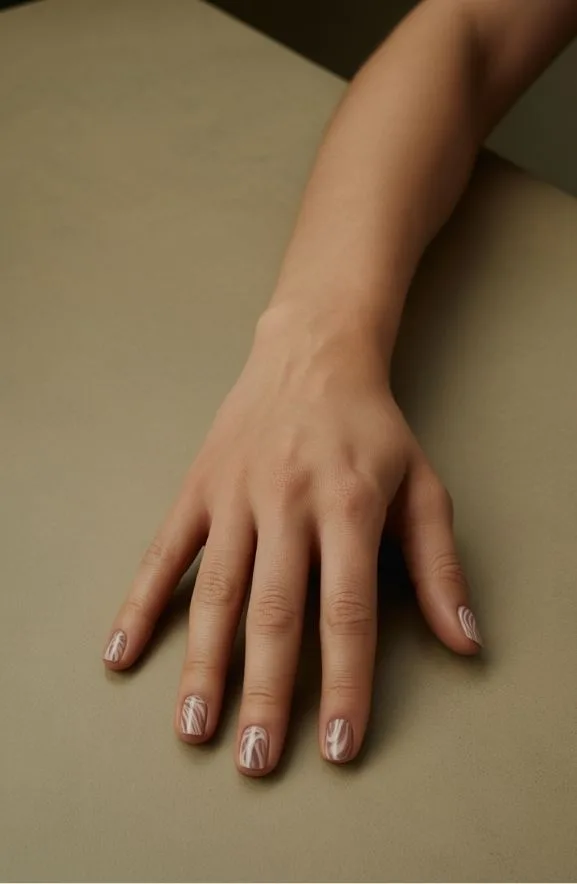
The marble effect transforms your nails into miniature works of art using just two complementary polish colors. You’ll create swirls that mimic natural stone patterns with minimal effort.
Start by applying a base coat in your lighter shade. Once dry, drop small amounts of your darker polish onto the nail’s surface. Use a thin brush or toothpick to gently drag the darker polish through the base color, creating organic veining. Don’t overthink the pattern—imperfection enhances the realistic marble aesthetic.
Professional nail artist Maria Chen notes, “The key is using colors with strong contrast.” Try pairing soft blush with charcoal or cream with sage green.
Seal everything with a glossy topcoat to enhance depth. This technique requires just five minutes per hand, making it perfect for quick, sophisticated manicures that feel intentionally polished.
Watercolor Wash Technique

Moving beyond structured marble patterns, you’ll discover the watercolor wash—a softer, more fluid approach that’s equally stunning. This technique blends multiple polish shades into dreamy, translucent layers that look professionally artistic.
Start with a pale base coat. You’ll build depth by layering two to three complementary colors using a damp brush or sponge. The key is allowing colors to blend naturally without harsh lines.
- Use watered-down gel polish for better color transparency and control
- Apply thin, overlapping strokes that intentionally fade into each other
- Seal everything with a glossy topcoat to enhance the ethereal effect
Try brands like Essie or Gelish for their pigment quality. Celebrity nail artist Jin Soon recommends practicing on practice wheels first. The watercolor wash rewards patience and experimentation, delivering magazine-worthy results effortlessly.
Matte and Glossy Contrast Nails
One of the most striking ways you can elevate your nail game is by combining two opposing finishes on a single manicure. You’ll apply a glossy base coat, then strategically paint matte topcoat on select nails for dramatic contrast. This technique works beautifully on accent nails or geometric patterns. Start with a quality glossy polish like Essie’s Ballet Slippers. Once dry, apply a matte topcoat such as Seche Vite Matte to your chosen design areas. The dimensional effect creates visual interest without requiring intricate artistry. As nail artist Sarah Williams notes, “Finish contrasts instantly elevate simple color palettes.” Try matte on your ring finger while keeping others glossy. This approach transforms basic nail colors into sophisticated, professional-looking designs that catch light dynamically.
Metallic Foil Accent Nail

Foil transfers bring instant glamour to your manicure without requiring steady hands or artistic skill. You’ll achieve a sophisticated look by applying metallic sheets to select nails, creating dimensional depth that catches light beautifully.
Here’s how to master this technique:
- Prep and prime your nail beds with a tacky base coat, ensuring the foil adheres properly to create lasting shine and dimension.
- Apply foil sheets carefully to one or two accent nails, pressing firmly for three to five seconds until the transfer sets completely.
- Seal with topcoat to protect your design and enhance the reflective quality, maintaining brilliance through daily wear.
Try Sally Hansen Chrome Foil or Leafline foils for professional results. The contrast between matte and metallic surfaces elevates your entire design, we can’t get enough of this effortless elegance.
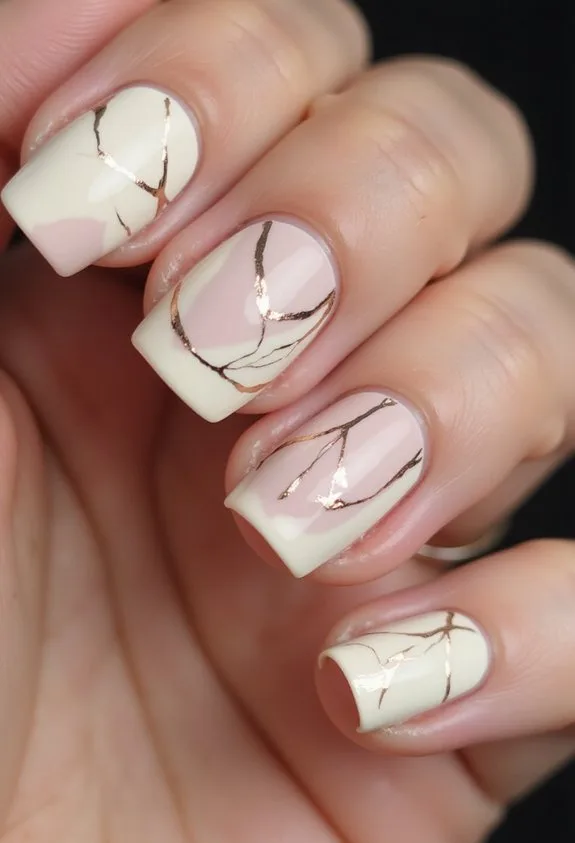
Nude With Thin Gold Lines

Since nude polish provides the perfect canvas, you’ll create an understated yet striking manicure by adding delicate gold striping.
Start with two coats of a creamy nude base like OPI’s “Bubble Bath” for smooth, even coverage. Once dry, use a thin striping brush or nail art liner with metallic gold polish to draw parallel lines across each nail.
You can space these lines closely together for a bold statement or scatter them randomly for organic sophistication. The contrast between muted nude and gleaming gold creates visual interest without overwhelming your nails.
Apply a glossy top coat to seal everything and enhance that luxe finish. This design works perfectly for professional settings while maintaining modern elegance. The technique requires minimal skill, making it ideal for beginners seeking polished results.
Stamping Designs Even Beginners Can Master

If you’re ready to level up beyond basic brushwork, nail stamping offers an exciting gateway to intricate designs without requiring advanced artistic skills. You’ll use a specialized stamper and plate to transfer detailed patterns onto your nails effortlessly.
Here’s what you need to know:
- Quality stamper plates feature precise etching that captures fine lines, dots, and intricate motifs for consistent results every time you stamp
- Stamping polish contains thicker pigments than regular polish, ensuring vibrant color transfer and crisp design definition on your nail surface
- Proper technique—gentle pressure, quick rolling motion, and correct angle—determines whether your designs appear professional or smudged
Start with simple geometric patterns using brands like Moyou London or Bundle Monster. As nail technician Sarah Chen notes, “Stamping democratizes nail art; anyone can achieve salon-quality results with practice.”
Your confidence grows quickly. Soon you’re layering stamped designs with regular polish for dimensional, gallery-worthy nails.
Lace Details With a Thin Brush

Once you’ve mastered stamping’s bold patterns, delicate lace designs offer the next artistic challenge—one that rewards patience with genuinely elegant results. You’ll need a thin brush, preferably a 00 or 000 liner, paired with gel or traditional polish. Start with a neutral base coat. Lightly sketch delicate lines across your nail, building intricate webbing patterns that mimic actual lace. Work slowly. Rushing ruins the effect. According to nail artist Michelle Chen, “Thin brush work demands a steady hand and confidence—shakiness shows immediately.” Consider layering sheer whites over soft pinks for dimensional depth. You can’t rush this technique. Practice on practice wheels first. Once perfected, these designs transform simple manicures into sophisticated statements. The investment in quality brushes absolutely pays off.
Inverted French Tips
While lace designs celebrate intricate detail work, inverted French tips flip the traditional manicure formula on its head—literally. You’ll paint your nail base in a bold color, then apply a contrasting shade to the cuticle area instead of the tip. This modern twist creates instant sophistication with minimal effort.
Here’s why you can’t get enough of this technique:
- It elongates fingers by drawing the eye upward toward the nail bed
- It works beautifully with both vibrant and neutral color combinations
- It requires fewer steady hands than traditional French manicures
Start with a creamy base coat using OPI Bubble Bath or similar sheer pinks. Apply your accent color precisely along the cuticle line using a thin angled brush. The reversed placement makes this design contemporary and fresh.
Two-Color Manicure With Clean Lines
Geometric precision meets effortless elegance in the two-color manicure with clean lines. You’ll divide your nail into two distinct sections using painter’s tape as your guide. Apply your base color—perhaps a soft nude or classic white—to the lower half. Then paint your accent color on the upper section for striking contrast.
The key is steady hands and quality tools. Use a thin, angled brush for crisp edges. Sally Hansen’s gel polishes deliver that professional finish you’re after. Remove the tape immediately while polish remains slightly tacky.
You can experiment with placement too. Try diagonal splits or vertical halves for modern sophistication. As nail artist Lisa Chen notes, “Clean lines elevate any design from casual to refined.” This approach works beautifully for work environments or special occasions.
Textured Manicure With a Single Hue
You can transform a single polish color into something unexpectedly dimensional by layering texture over your entire nail. This approach creates visual depth without requiring multiple shades, making it perfect for those seeking sophistication through simplicity.
Here’s how to achieve this look:
- Apply a base coat, then two coats of your chosen polish color for even coverage
- While the final coat’s still tacky, sprinkle fine textured powder or use a matte top coat for contrast
- Seal everything with a glossy finish to enhance the dimensional effect
The beauty of textured manicures lies in their versatility. You’re not limited to sparkles—try sand-textured finishes, subtle shimmer, or matte effects. A professional nail technician notes that “texture adds personality without complexity.” This technique works beautifully on shorter nails too, requiring minimal maintenance while delivering maximum impact.
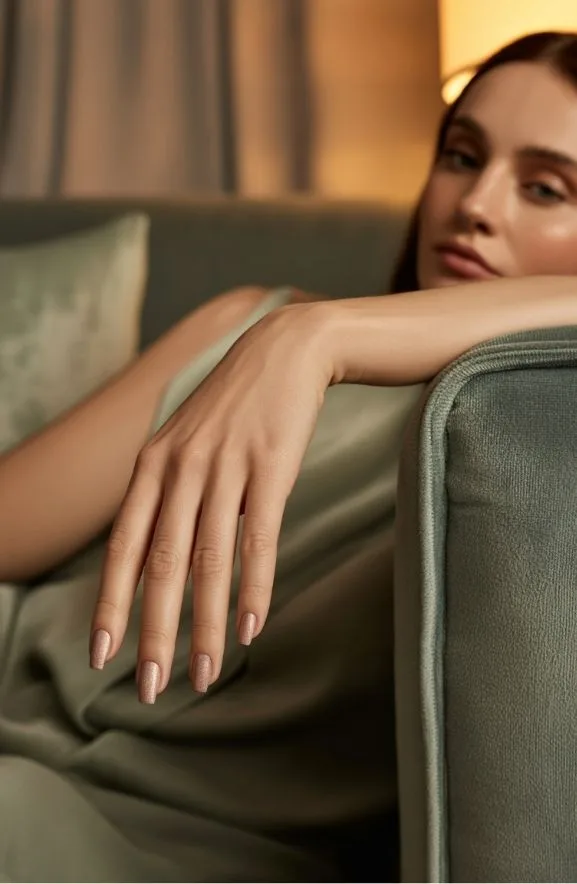
Cat-Eye Nails for Short Lengths

Because cat-eye nails create an illusion of length and elegance, they’re surprisingly perfect for shorter nail beds. You’ll apply a metallic base coat—try Chrome Crush by Essie—creating that signature magnetic finish. Use a thin brush or magnetic wand to draw the distinctive diagonal line across your nail. The effect? Instantly elongated fingers that appear more refined.
Keep your design minimal for maximum impact. A single metallic stripe works beautifully on natural, buffed nails without overwhelming shorter lengths. “The key is proportion,” explains nail artist Christina Martinez. “Shorter nails need cleaner, bolder lines to create visual drama.”
You can layer translucent nude polish beneath the chrome effect for added dimension. This technique balances sophistication with simplicity, delivering salon-quality results at home in minutes.
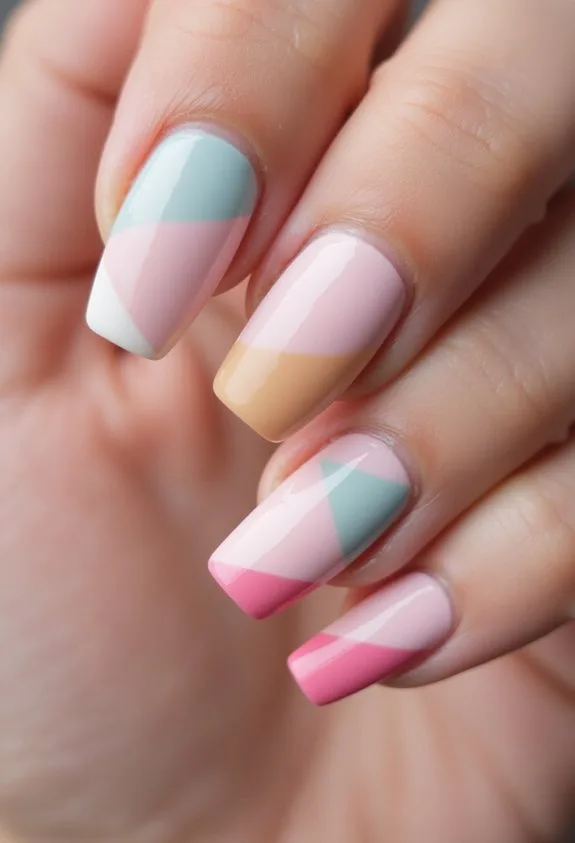
Simple Pastel Nail Designs

Soft, dreamy hues bring an effortless elegance to any nail look. You’ll find that pastel shades work beautifully on shorter nails because they create sophisticated, understated designs without overwhelming your nail bed.
- Versatility across seasons – Pastels shift seamlessly from spring florals to soft winter neutrals, giving you year-round design options
- Psychological calming effect – Muted tones reduce visual fatigue while projecting polish and refinement in professional settings
- Layering potential – Pastel bases pair excellently with delicate line work, micro-florals, or subtle ombre effects for dimensional depth
Apply a sheer pastel base like OPI’s “Baby, Take a Vow” for coverage without opacity. Add fine-tipped brushwork or stamping plates for intricate details. The result? You’ve created a salon-quality manicure that feels both modern and timeless.
Frequently Asked Questions
How Long Do Simple Nail Designs Typically Last Before Chipping or Fading?
You’ll typically enjoy simple nail designs for 1-2 weeks before chipping or fading appears. If you’re using quality polish and applying a protective top coat, you can extend that timeframe. Proper nail care and avoiding harsh chemicals helps preserve your design longer.
What Are the Best Base Coats and Top Coats for Elegant Manicure Longevity?
You’ll want to use a quality base coat like OPI or Essie to protect your nails, then seal everything with a glossy top coat. You should apply thin layers and reapply top coat every three days for maximum longevity and shine.
Can I Create These Designs Without Any Special Tools or Equipment at Home?
Yes, you can absolutely create elegant nail designs at home without special tools. You’ll need just basic supplies: nail polish, a thin brush or toothpick for details, and steady hands. Start with simple patterns you’re comfortable attempting.
How Do I Remove Nail Polish Safely Without Damaging My Natural Nails?
You’ll safely remove nail polish by soaking your nails in acetone remover for five minutes, then gently pushing polish off with a wooden stick. Moisturize afterward to prevent damage. You shouldn’t scrape forcefully, as this weakens your natural nails.
What Nail Shapes Work Best for Displaying Simple Elegant Nail Designs?
You’ll find that almond, oval, and square shapes work best for showcasing simple elegant designs. They’ve got plenty of surface area, so you can display your nail art clearly without it appearing cramped or overwhelming.
Conclusion
You’ve got everything you need to master elegant nail designs. These forty-three techniques—from classic French tips to modern geometric patterns—work whether you’re prepping for an event or rejuvenating your everyday look. Quality polish and steady hands matter most. Start with simpler designs like solid colors and two-tone manicures, then progress toward cat-eye and textured finishes. You’ll achieve salon-quality results at home in minutes.